CLUTCH
6.19
DRIVE BELT REMOVAL/INSPECTION
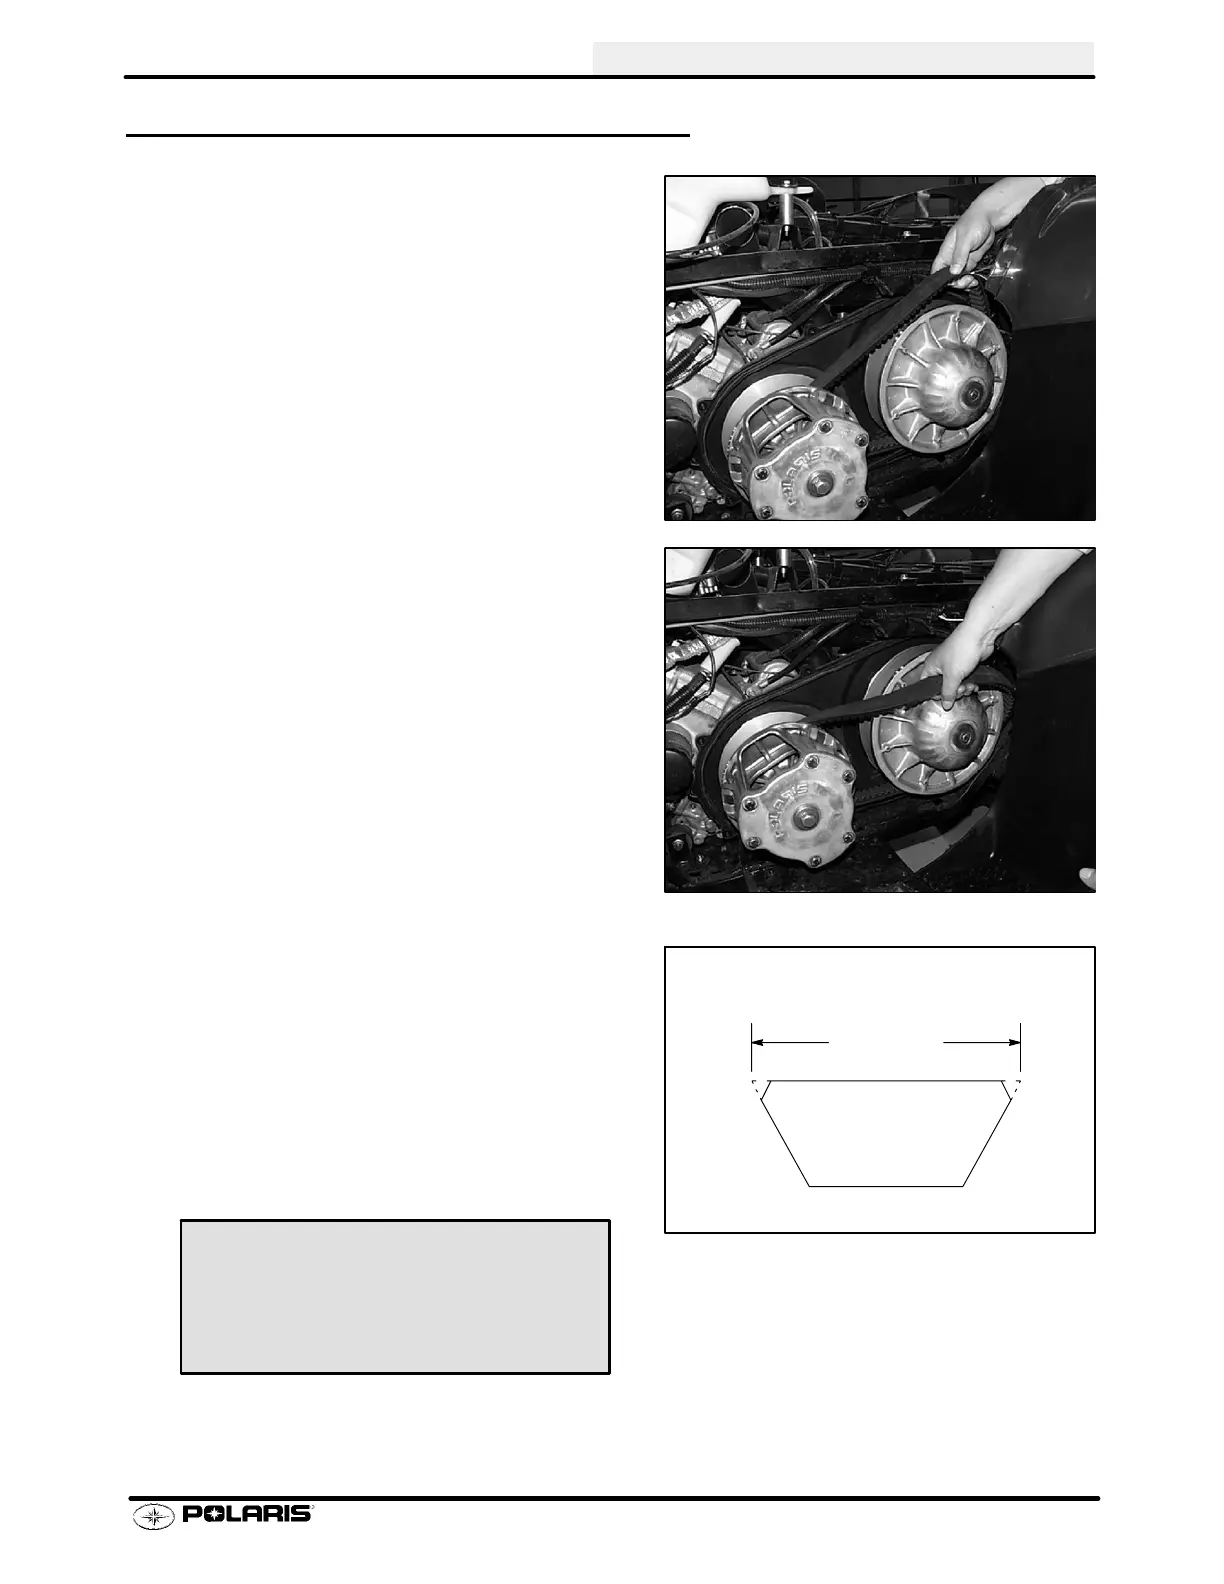
1. Remove outer PVT cover as described in PVT
Disassembly.
2. Mark drive belt direction of rotation so that it canbe
installed in the same direction. NOTE: Normally
positioned so part numbers are easily read.
3. To remove drive belt, apply brake, pull upward and
rearward on belt to open driven clutch sheaves, pull
out and down on belt to slip over the driven clutch
outer sheave.
4. Measure belt width and replace if worn severely.
Generally, beltshouldbereplacedifclutchescanno
longer be adjusted to provide proper belt deflection.
S The top edges have been trimmed on some
drive belts. It will be necessary to project the
sideprofilesandmeasure fromcornertocorner.
S Place a straight edge on each side of the drive
belt.
S Place another straight edge on top of belt.
S Measure the distance where the side straight
edges intersect the top, as shownintheillustra-
tion at right.
5. Inspect belt for loose cords, missing cogs, cracks,
abrasions,thinspots,orexcessive wear. Replaceif
necessary.
6. Inspect beltforhourglassing(extremecircularwear
in at least one spot and on both sides of the belt).
Hour glassing occurs when the drive train does not
move and the drive clutch engages the belt.
Projected Belt
Width
Belt Width:
New 1.174 - 1.188″
(2.98-3.02 cm)
Wear Limit 1.125″ (2.86 cm)
 Loading...