ELECTRICAL
10.3
HEADLIGHT HOUSING REPLACEMENT
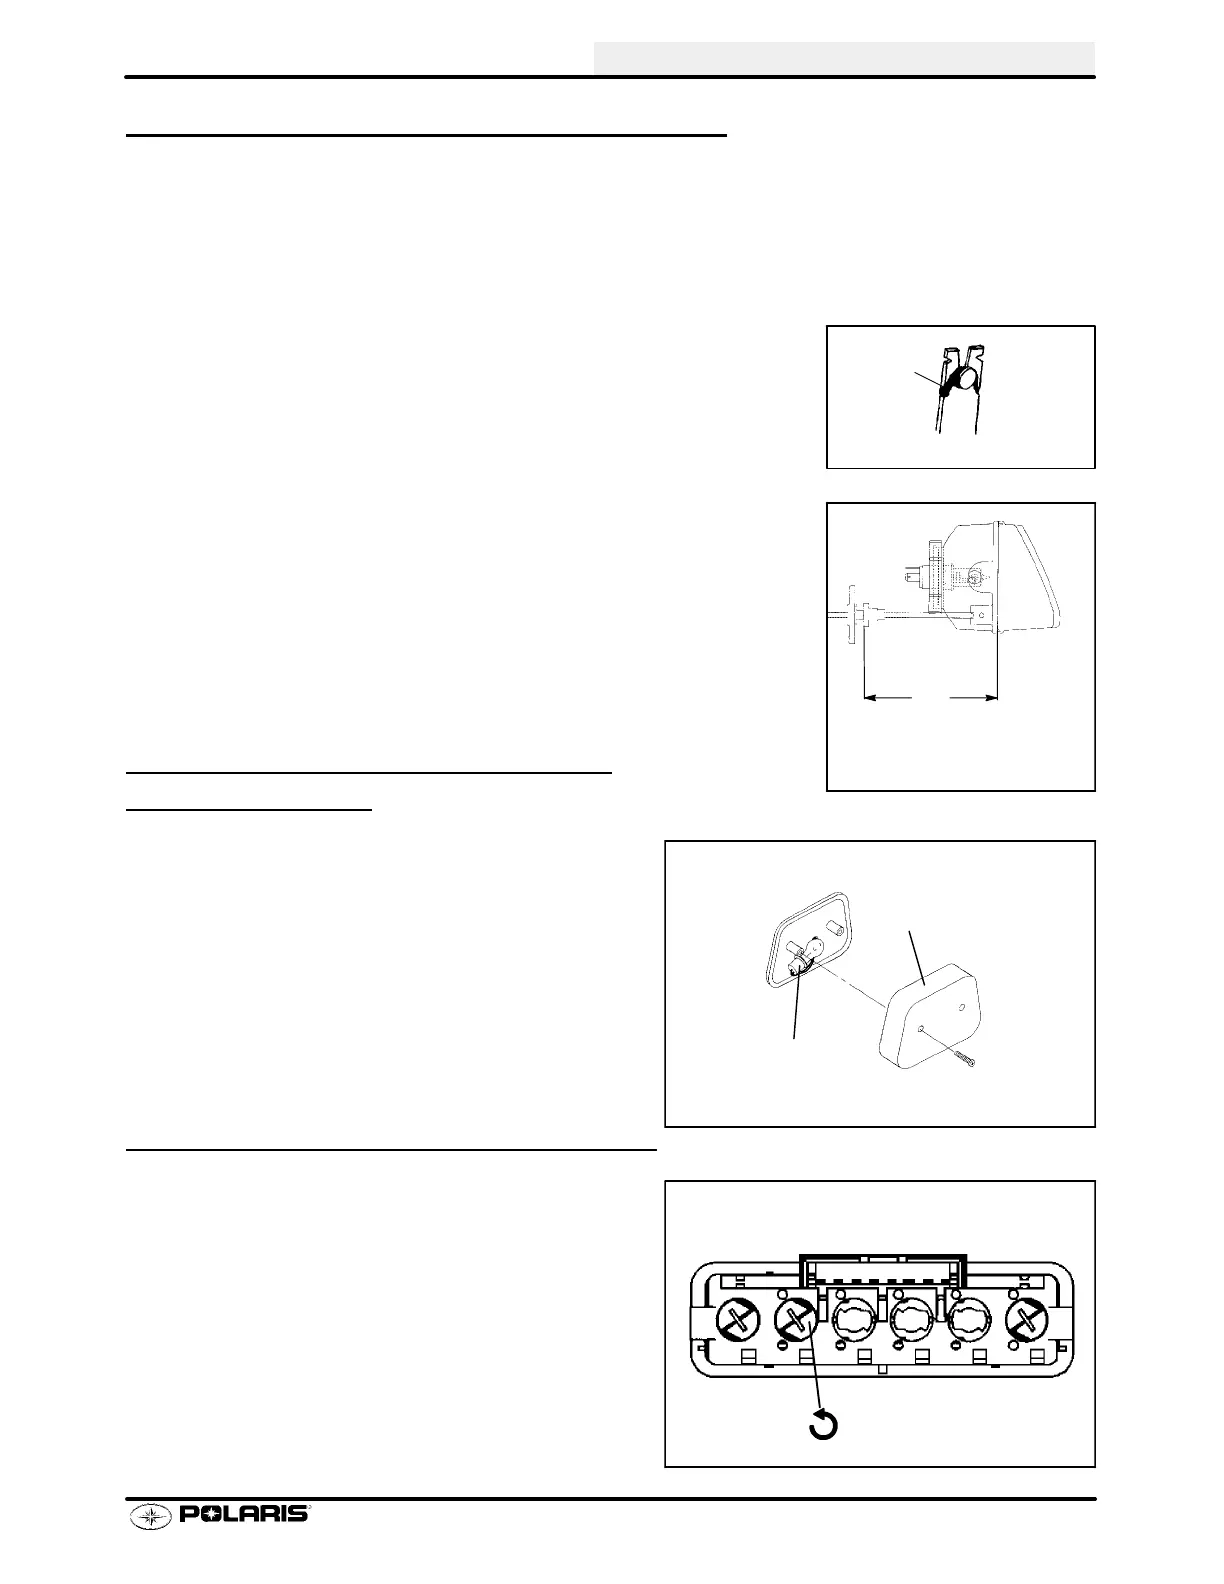
1. Remove three Phillips screws at back of headlight pod.
2. Remove Phillips screws from bottom of headlight pod at each front
corner. NOTE: To aid in accessing these screws, it may be helpful
to turn handlebars to left or right and use a short, stubby screwdriver .
Removal of the front rack and cover will also allow easier access.
3. Lift podcoverup. Unplugspeedometer fromharness. Unplugindica-
tor lights from harness and remove pod cover.
4. Unplug headlamp from wiring harness.
5. Remove O-Ring from headlight pivot pins.
6. Pull headlight housing up to release from locking tabs.
7. Lift adjusting knob up to remove from locking tabs.
8. Carefully pull assembly up and out of pod.
9. Reverse steps to install new housing and reassemble pod.
10.Adjust headlight aim by turning adjusting knob.
TAILLIGHT/BRAKELIGHT LAMP
REPLACEMENT
If the taillight/brakelight doesnot work thelampmayneed
to be replaced.
1. From the rear of the taillight remove two screws hold-
ing lens cover in place and remove lens cover.
2. Removelampandreplaceit withrecommendedlamp.
Apply Nyogelt grease PN 2871329.
3. Reinstall the lens cover removed in step 1.
4. Test the taillight/brakelight to see that it’s working.
INDICATOR LAMP REPLACEMENT
1. Follow steps 1 - 2 of Headlight Housing Replacement.
2. Disconnect indicator light panel from harness.
3. Toremovedefectivelight: Useasmallscrewdriverand
turn light holder a quarter turn, pull lightholder outwith
a needle nose pliers or equivalent. Replace with new
holder and bulb assembly and reassemble pod.
O-Ring
51/8″
(13 cm)
Distance from headlamp parting
line to end of adjustment knob stop
is 5 1/8″ (13 cm).
Lens Cover
Bulb
Rear view of indicator lamp panel
1/4 Turn
 Loading...