Quasar CP-3211/CP-4221 User and Installation Guide
28
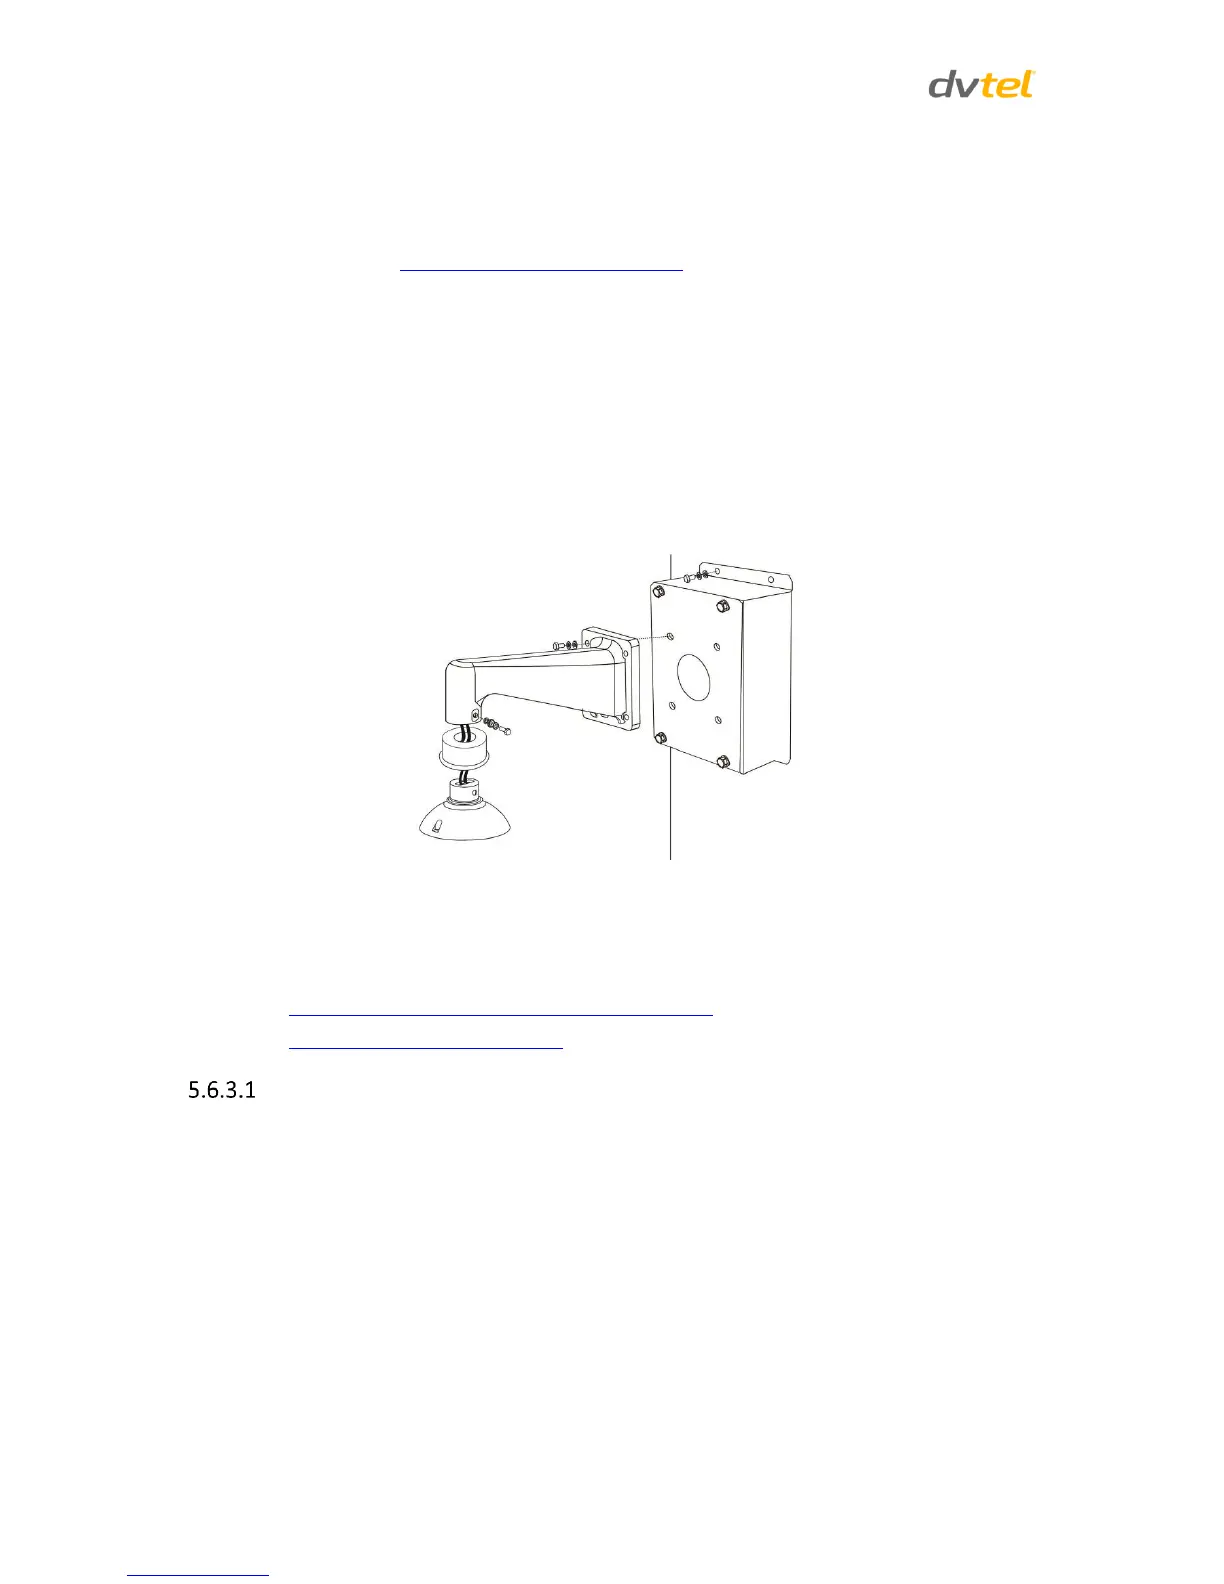
5. Thread the cables through the standard/compact wall mount with the cables coming out of
the pendant mount’s outlet. For outdoor cameras, attach the waterproof gasket to the
pendant mount.
6. After threading the cables, block the entry hole with the supplied sponge to prevent insects
from entering. See Standard or Compact Wall Mount, Step 3.
7. Thread the cables through the indoor or outdoor mount kit and attach the mount kit to the
standard/compact wall mount using the supplied screws and washers.
8. For outdoor cameras, adjust the waterproof gasket to the joint.
9. Connect the cables to the camera.
10. Secure the camera to the indoor or outdoor mount kit.
11. Ensure the camera is fixed completely, and that the thread holes on the camera’s fixing plate
and the mount kit are aligned.
12. Screw in the supplied screw and washer.
Figure 12: Wall Box Mounting: Wall Box Mount + Standard Wall Mount + Mount Kit
5.6.3 Corner Mount
There are two methods to corner-mount the camera:
Corner Standard Mounting Plate/Corner Plate Mini
Corner Thin/Wide Box Mounting
Corner Standard Mounting Plate/Corner Plate Mini
The corner/corner mini mounting plate must be used in conjunction with the standard or compact
wall mount.
Items needed:
Indoor pendant mount kit or outdoor mount kit (standard with outdoor cameras)
Standard/compact wall mount package (DVTEL camera mounting option available
separately)
Corner standard mounting plate/corner plate mini package (DVTEL camera mounting
option available separately)
Screws and screw anchors for fixing the corner mounting plate (not provided)
 Loading...