Quasar CP-3211/CP-4221 User and Installation Guide
36
6.2 Quick Start
1. Install and run the DNA application on a computer connected to the network. The
software is an .exe file supplied in a zip file together with an Online Help file (.chm).
2. Extract both files from the zip file, and place them together in a new directory. Both files
should have the same name, but different extensions (.exe and .chm).
3. Upon launching the tool, DNA automatically discovers all devices on the network. The
initial launch creates a default .ini file (dna.ini).
4. In the event that there are devices that are not authenticated, click Login and enter login
credentials for the devices.
5. If there are devices located on a separate VLAN, the devices must be added manually.
Click Add Device Manually from the Operational Toolbar and add the devices.
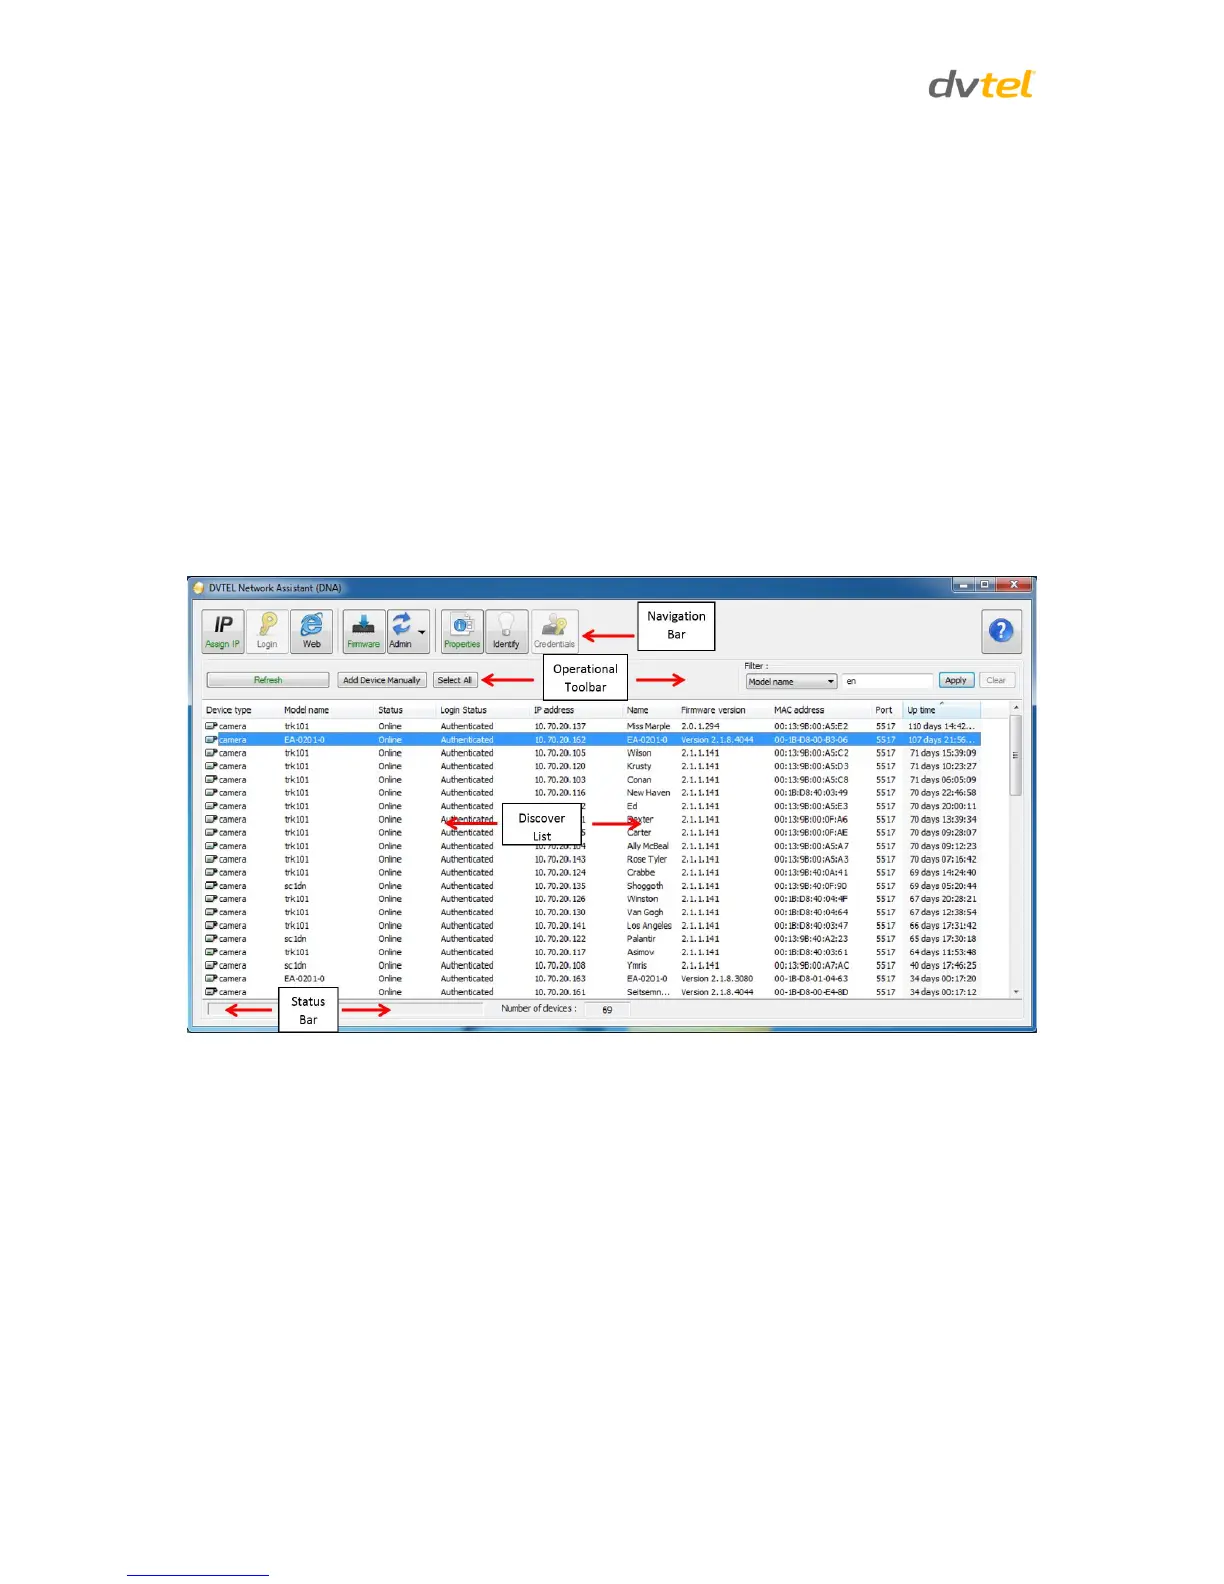
6.3 Main Screen
The DNA main screen contains four sections, as seen in the following figure:
Figure 17: DNA Main Screen
6.4 Navigation Bar
The callouts on the screen are explained below:
1. Navigation Bar: Located at the top of the screen. Includes tabs and dropdown menus to
perform actions.
2. Operational Toolbar: Located below the Navigation Bar. Used to refresh discovered
units, filter connected devices for easy operation, and to add a device manually.
3. Discover List: Occupies the center of the screen. Displays a list of discovered devices
with partial device information.
4. Status Bar: Located at the bottom of the screen. Displays current device status, including
scanning time, status, and the number of discovered units.
 Loading...