Quasar CP-3211/CP-4221 User and Installation Guide
38
6.6 Configuring Communication Settings on the Quasar Camera
To configure communication settings on the camera:
1. Connect the camera to the network on the same VLAN/LAN as the workstation.
2. If the network supports the default, open DNA utility by running dna.exe which can be
found in the DNA Utility folder in the supplied CD, or click the DNA icon .
3. In the DNA application, click the DNA button.
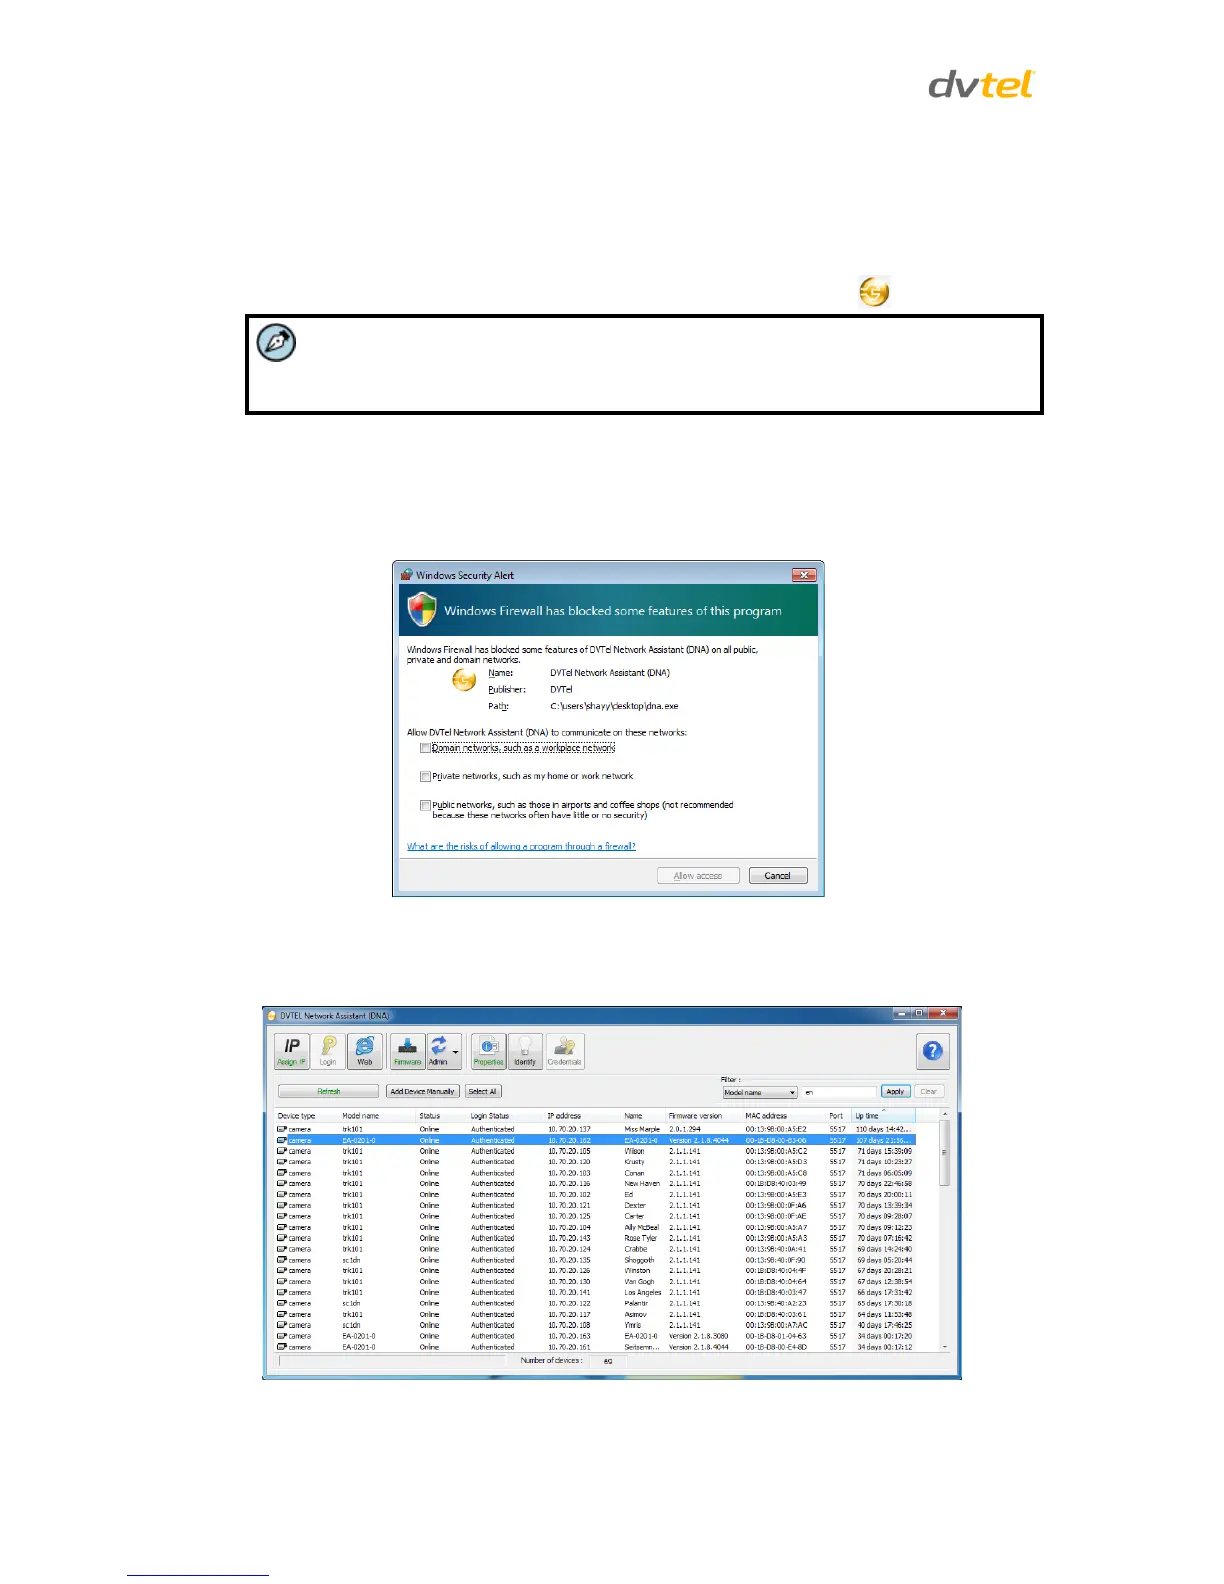
4. If the Windows Firewall is enabled, a security alert window pops up.
5. To continue, click Allow Access. Latitude users should consult the Latitude Installation
Instructions on disabling the Windows Firewall.
Figure 19: Windows Firewall Screen
6. Click Assign IP. All the discovered IP devices will be listed in the page, as shown in the figure
below. The camera’s default IP Address is automatically supplied by the DHCP server.
Figure 20: Discovered IP Devices
 Loading...