Projecting Images Using QuickProjection
• To project images by ad hoc wireless communication, log in to the computer with administrator
privileges.
• Depending on the settings of the computer, the password input screen is displayed when you start
QuickProjection. Enter an administrator's password.
Before projecting images using QuickProjection, connect the projector to a network. For details about
how to connect the projector to a network, see page 62 "Connecting the Projector to a Network".
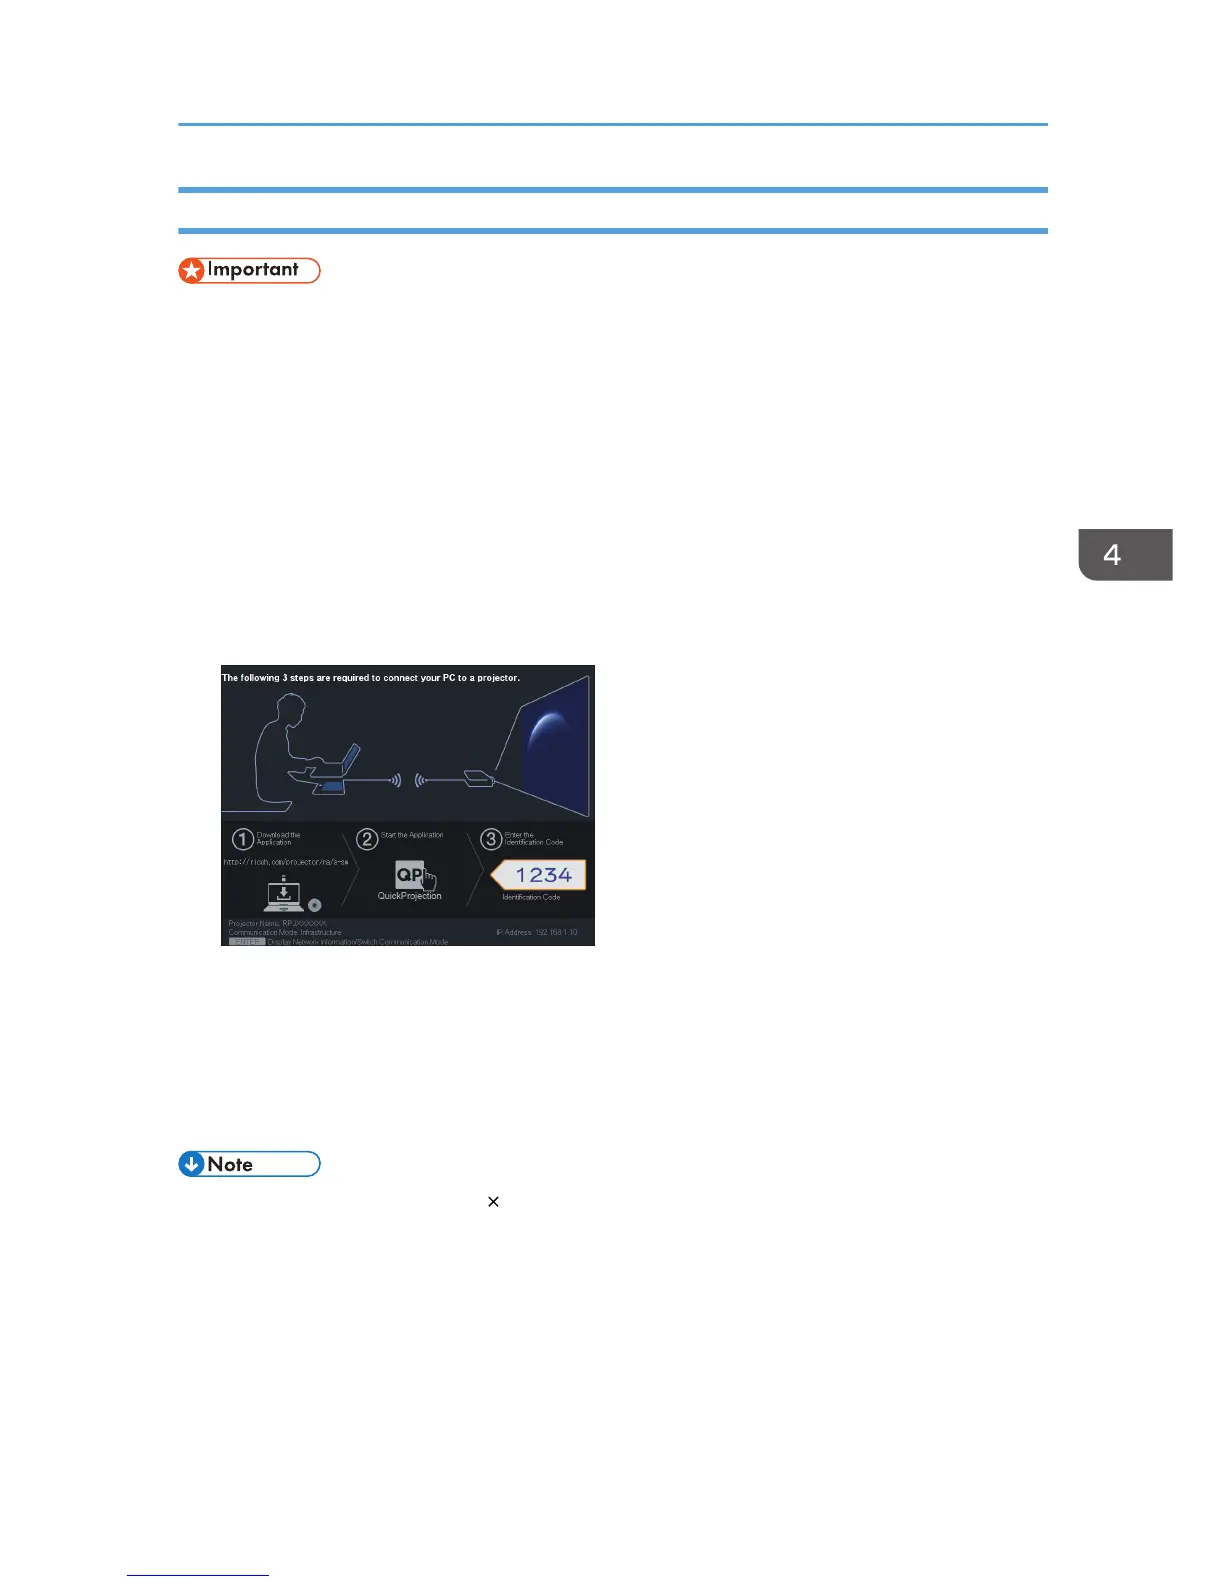
1. Turn the projector on.
2. Press the [Input] button to switch the input signal to [Network PC].
The standby screen for [Network PC] input appears.
3. Check the 4-digit number (identification code) on the projection screen.
4. Double-click the "QuickProjection" icon on the computer.
5. Enter the identification code on the QuickProjection dialog.
The projector's name or IP address can also be entered instead of the identification code.
6. Click [Projection].
The computer screen is projected.
• To close QuickProjection, click [ ].
• For detailed QuickProjection operating methods, refer to the QuickProjection Help.
• If the display resolution of the computer screen and the projector matches, the image quality is
better. We recommend setting the resolution of the computer screen to the following:
• RICOH PJ X3340N/X4240N: 1024 × 768
• RICOH PJ WX3340N/WX4240N: 1280 × 800
Projecting a Computer's Screen via a Network
69
 Loading...