Installation and Setup
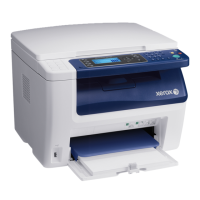
WorkCentre 6505 Color Laser Multifunction Printer
User Guide
40
3. At the top of the License Agreement, select your language, then click I Agree to accept the
agreement.
The Xerox
®
Printer Installation screen appears.
4. When the installer is done, click Finish.
Note: Before using the Scanner, you must select it in the Scan Setting Tool.
To configure the computer software for using the WorkCentre 6505 scanner feature:
1. On your computer, select Start > All Programs > Xerox > WorkCentre 6505 > Scan Setting Tools.
2. In the IP Address box of the IP Address Setting window, enter the IP address of the printer.
3. If a password has been set for using the scanner feature of the printer, enter it in the field on the
Password Settings window.
4. Click OK, then close the Scan Settings Tool window.
5. Click Start > Control Panel > Scanners and Cameras. Select Xerox WorkCentre/Pro TWAIN
(Recommended) #2. Click the Test Sca nner button to test the connection and setting of the
scanner.
6. Double-click Xerox WorkCentre 6505 (LAN) to open the Scanner and Camera Wizard.
The scanner feature is ready to use.
Installing Print and Scan Drivers for Windows USB
To install the print driver:
1. If a USB cable is not connected from the printer to your computer, connect it now.
2. Cancel the Windows Found New Hardware Wizard.
3. Wait for the wizard to appear again and cancel it again.
Note: Windows recognizes the printer as two devices, a printer and a scanner, and tries to help you
install the drivers.
4. Insert the Software and Documentation disc into the appropriate drive on your computer. The
installer starts automatically unless you have autorun disabled on your computer. If the installer
does not start, navigate to the drive and double-click the Setup.exe installer file.
Note: If the Software and Documentation disc is not available, download the latest driver from
www.xerox.com/office/WC6505drivers.
5. When the installation menu appears, click Install Print Driver and accept the License Agreement.
The Xerox Printer Installation window appears.
6. Select your printer from the list.
7. When the Installation Options window appears, click Install.
8. When the installation is complete, click Finish.
The print driver is installed.
To install the scan driver:
1. From the installation menu, click Install Scan Driver.
2. Click Next to start the installer.
3. Accept the License Agreement and click Next.

 Loading...