Configuring Basic Features
229
This scenario is applicable to SIP-T48G/T46G/T29G IP phones.
To customize a local contact file:
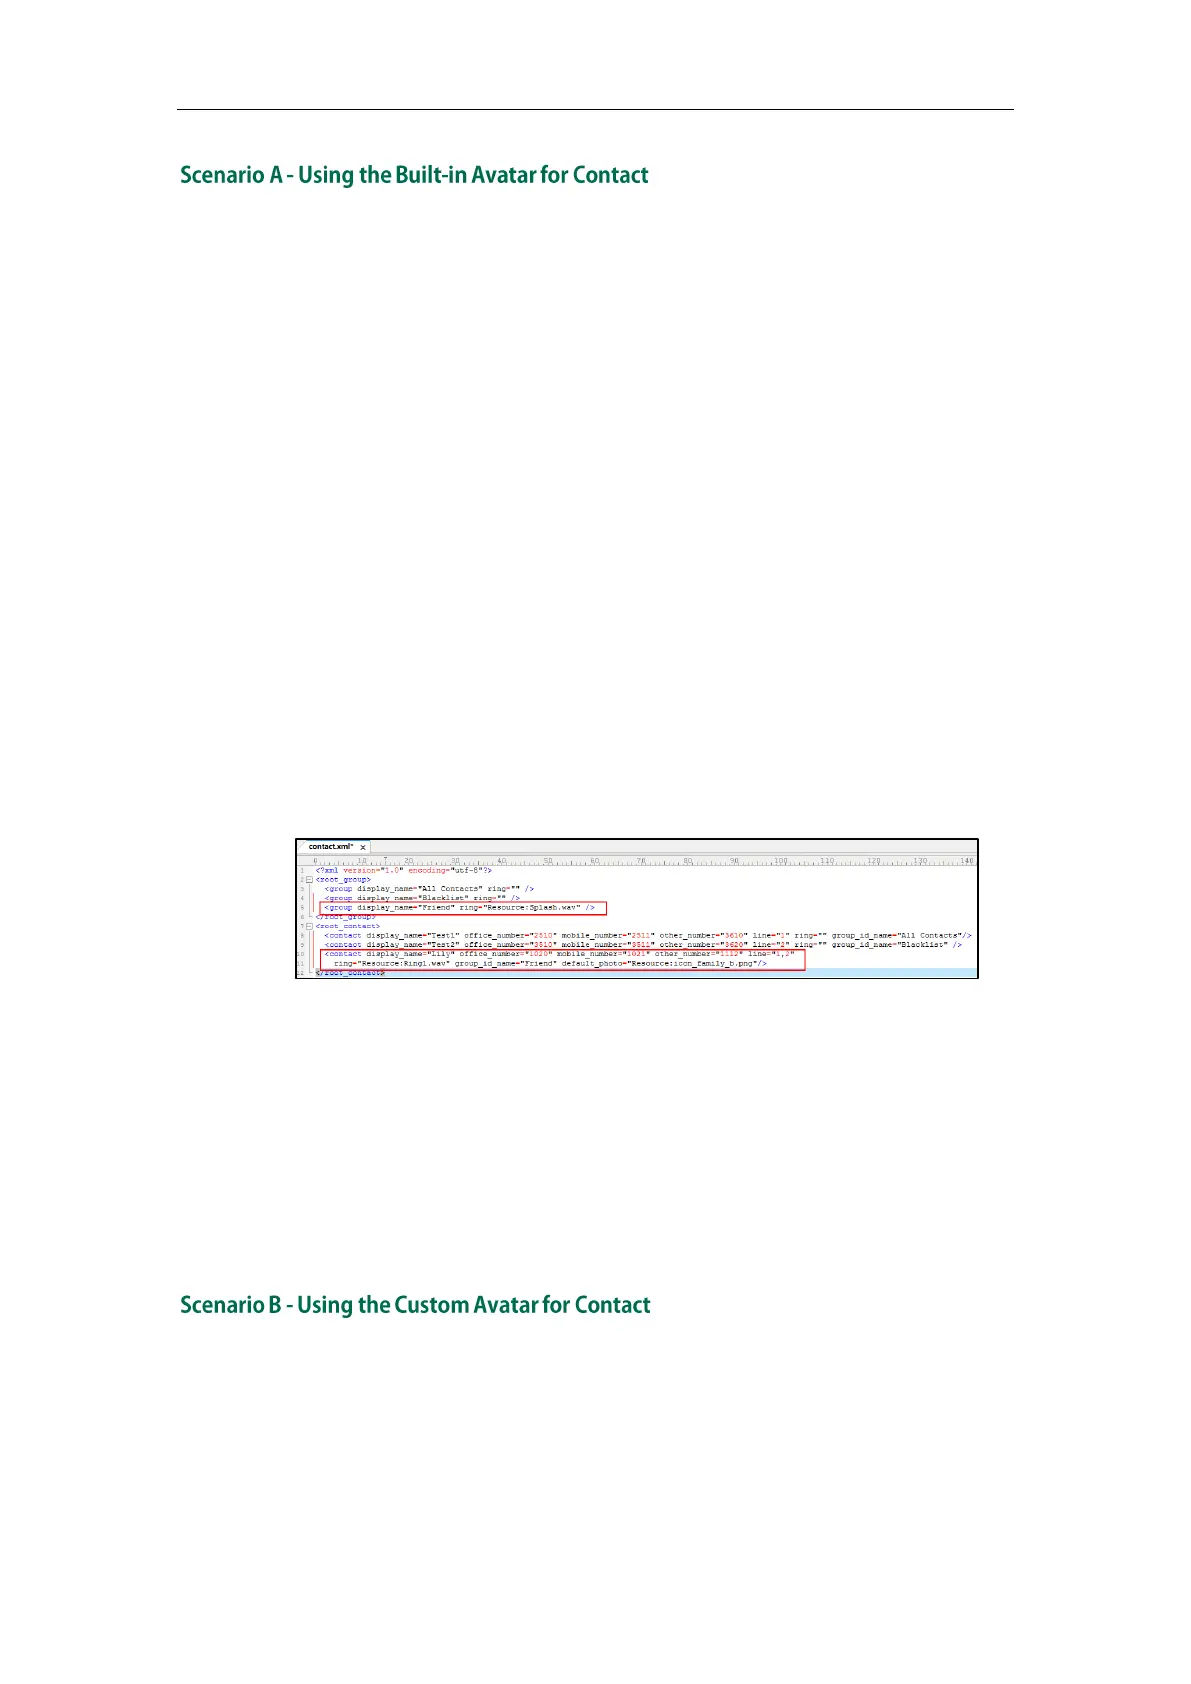
1. Open the template file using an ASCII editor.
2. For each group that you want to add, add the following string to the file. Each starts
on a separate line:
<group display_name="" ring=""/>
3. For each contact that you want to add, add the following string to the file. Each
starts on a separate line:
<contact display_name="" office_number="" mobile_number="" other_number=""
line="" ring="" group_id_name="" default_photo=""/>
4. Specify the values within double quotes.
For example:
<group display_name="Friend" ring="Resource:Splash.wav"/>
<contact display_name="Lily" office_number="1020" mobile_number="1021"
other_number="1112" line="1,2" ring="Resource:Ring1.wav"
group_id_name="Friend" default_photo="Resource:icon_family_b.png"/>
5. Save the change and place this file to the provisioning server.
6. Specify the access URL of the custom local contact template in the configuration
files.
For example:
local_contact.data.url = tftp://192.168.10.25/contact.xml
During the auto provisioning process, the IP phone connects to the provisioning
server “192.168.10.25”, and downloads the contact file “contact.xml”.
This scenario is applicable to SIP-T48G/T46G/T29G IP phones.
To specify a custom avatar for a contact, you need to upload the avatar to the
provisioning server in advance. The avatar must be compressed as a tar formatted file.
 Loading...