Administrator’s Guide for SIP-T2 Series/T19(P) E2/T4 Series/CP860 IP Phones
232
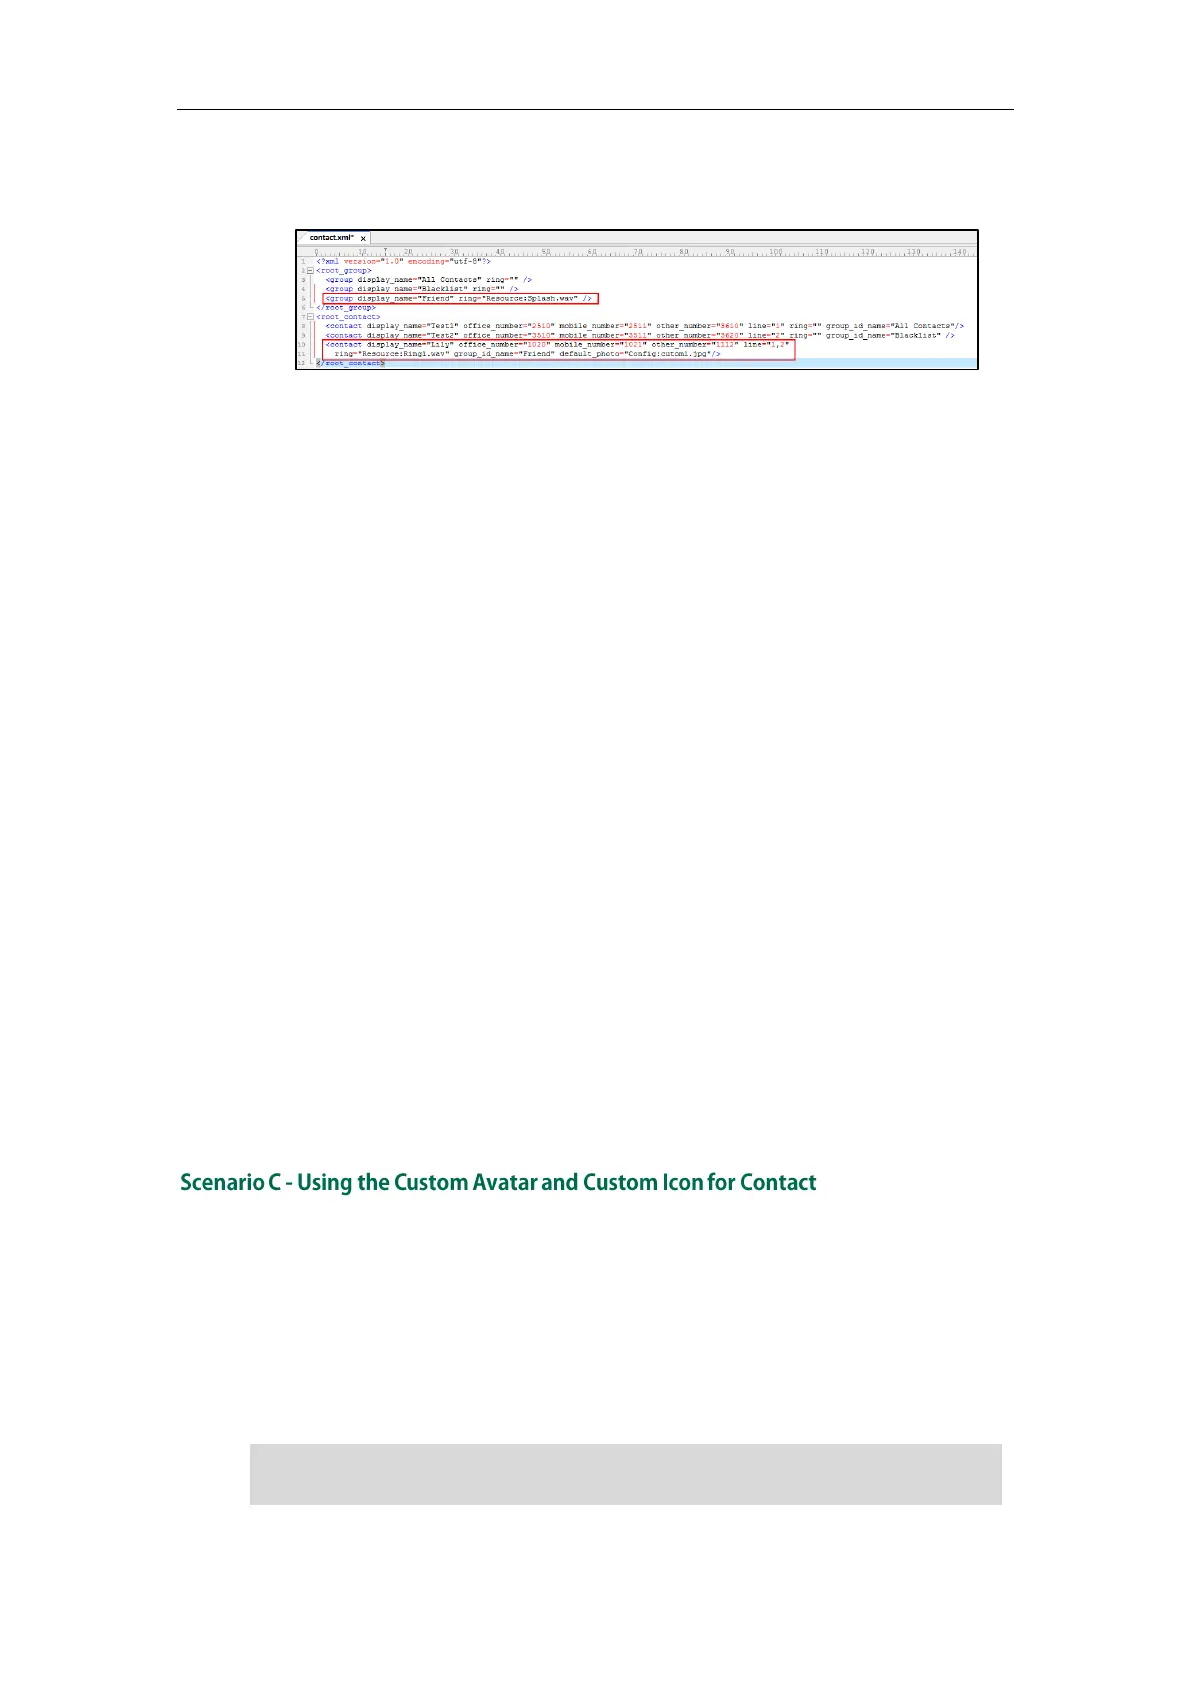
other_number="1112" line="1,2" ring="Resource:Ring1.wav"
group_id_name="Friend" default_photo="Config:cutom1.jpg"/>
5. Save the change and place this file to the provisioning server.
6. Specify the access URL of the custom local contact template in the configuration
files.
There are two methods to specify a custom avatar for a contact:
Method 1:
local_contact.data.url = tftp://192.168.10.25/contact.xml
local_contact.image.url = tftp://192.168.10.25/photo.tar
For more information on generating a contact avatar file “photo.tar”, refer to
Preparing the Tar Formatted File on page 230.
During the auto provisioning process, the IP phone connects to the provisioning
server “192.168.1.100”, and downloads the contact file “contact.xml” and avatar
file “photo.tar”.
Method 2:
If the local contact file (contact.xml) and custom avatars (photo.tar) are
compressed as a tar formatted file (e.g., Contact.tar), you can only configure the
following parameter to upload contacts and avatars:
local_contact.data_photo_tar.url = tftp://192.168.10.25/Contact.tar
For more information on generating “photo.tar” and “Contact.tar”, refer to
Preparing the Tar Formatted File on page 230.
During the auto provisioning process, the IP phone connects to the provisioning
server “192.168.10.25”, and downloads the file “Contact.tar”.
This scenario is only applicable to SIP-T48G IP phones.
To specify a custom avatar and icon for a contact, you need to upload the avatar and
icon to the provisioning server in advance. The avatar and icon must be compressed as
a tar formatted file respectively (e.g., photo1.tar and photo2.tar). For more information
on generating a tar formatted file, refer to Preparing the Tar Formatted File on page 230.
Note
The custom avatar and custom icon can be different, but make sure the icon name is the
same as avatar name.
 Loading...