Administrator’s Guide for SIP-T2 Series/T19(P) E2/T4 Series/CP860 IP Phones
68
Port->IPv4->DHCP IPv4 Client->Static DNS (Enabled) ->IPv4 Sec.DNS
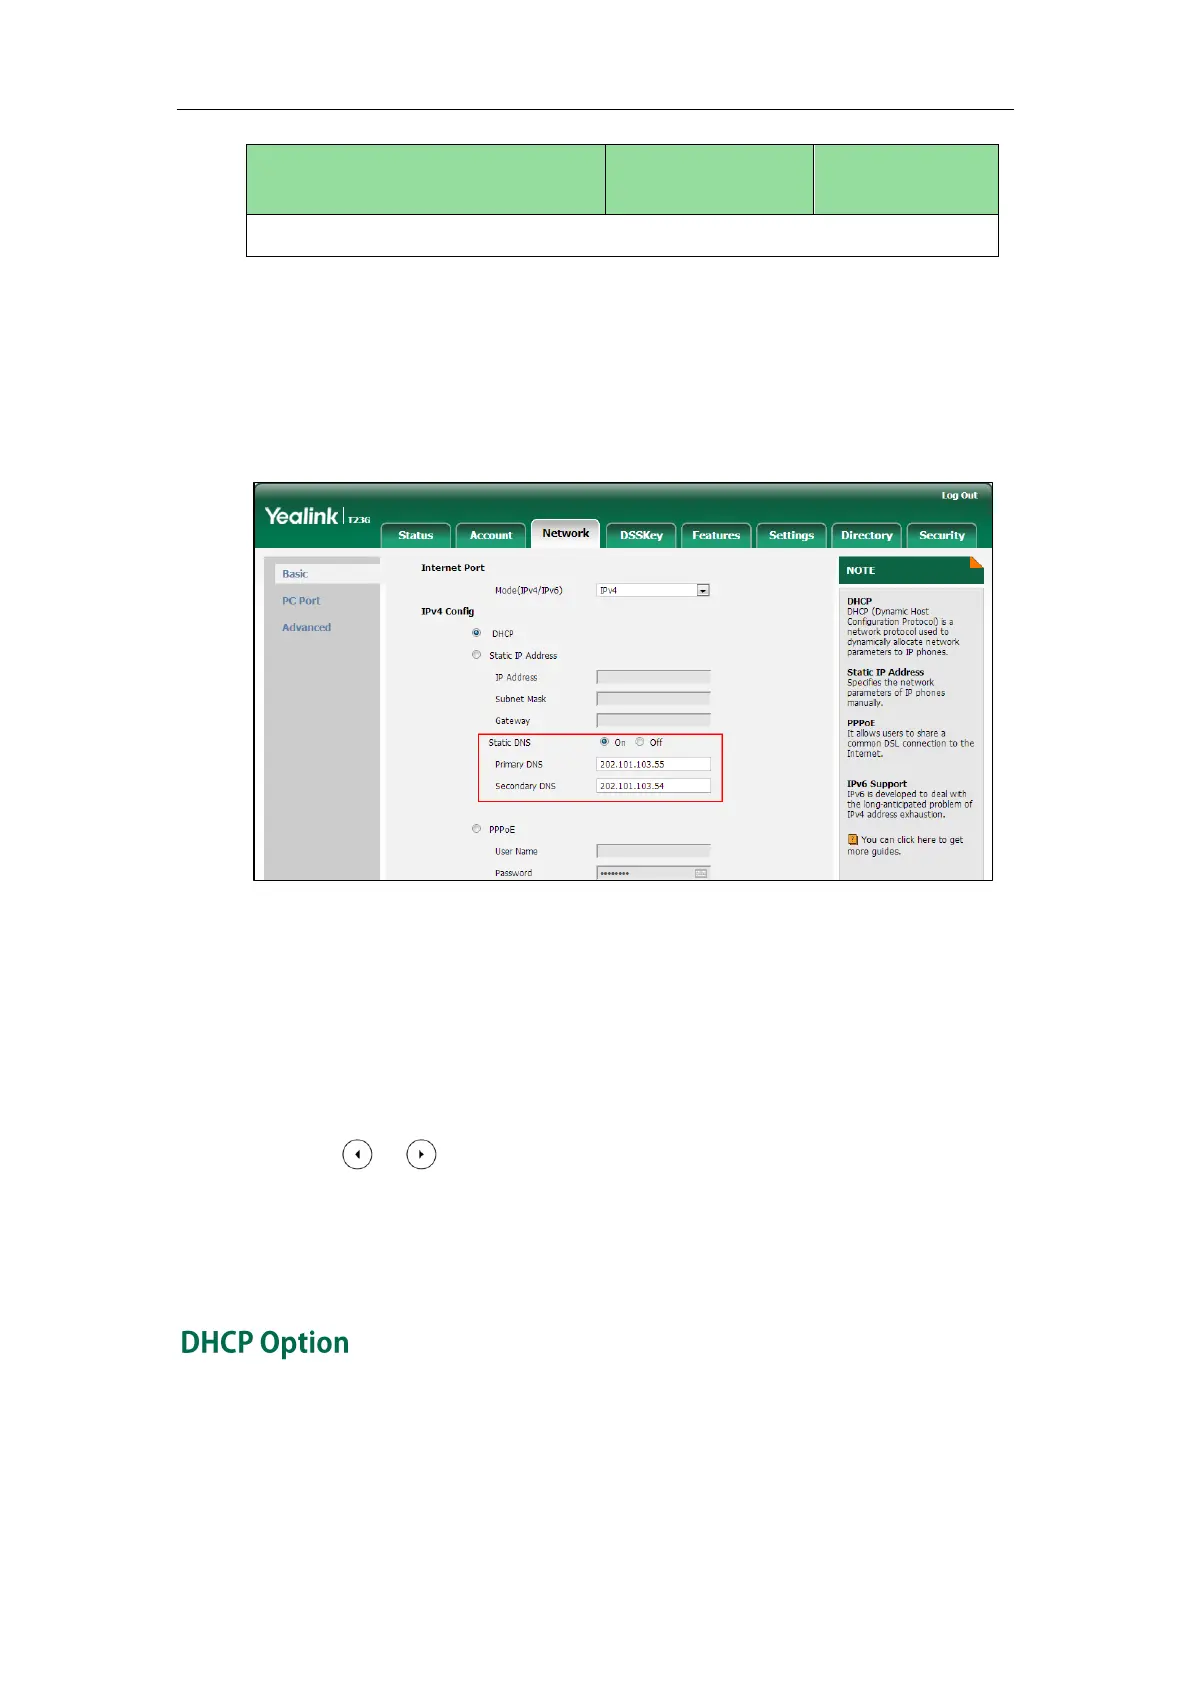
To configure static DNS address when DHCP is used via web user interface:
1. Click on Network->Basic.
2. In the IPv4 Config block, mark the DHCP radio box.
3. In the Static DNS block, mark the On radio box.
4. Enter the desired values in the Primary DNS and Secondary DNS fields.
5. Click Confirm to accept the change.
A dialog box pops up to prompt that settings will take effect after a reboot.
6. Click OK to reboot the phone.
To configure static DNS when DHCP is used via phone user interface:
1. Press Menu->Settings->Advanced Settings (default password: admin)
->Network->WAN Port->IPv4->DHCP IPv4 Client.
2. Press or , or the Switch soft key to select Enabled from the Static DNS field.
3. Enter the desired values in the IPv4 Pri.DNS and IPv4 Sec.DNS fields respectively.
4. Press the Save soft key to accept the change.
The IP phone reboots automatically to make settings effective after a period of time.
DHCP provides a framework for passing information to TCP/IP network devices. Network
and other control information are carried in tagged data items that are stored in the
options field of the DHCP message. The data items themselves are also called options.
DHCP can be initiated by simply connecting the IP phone with the network. IP phones
 Loading...