Version 5.8 45 July 2009
Installation Manual 3. Installation
3 Installation
The device's installation steps can be summarized into the following main steps:
1. Unpacking the device (refer to ''Unpacking and Package Contents'' on page 45).
2. Mounting the device (refer to ''Mounting the Device'' on page 45).
3. Cabling the device (refer to ''Cabling'' on page 47).
After powering-up the device, the blade's PWR and FAIL LEDs are lit, and then after a few
seconds, the FAIL LED switches off. During this time, the blade loads the relevant software
files (e.g., configuration and auxiliary files) and undergoes self-testing (PSTN LEDs switch
on and then off) for about a minute. After this stage, the GBE and PSTN LEDs are lit green,
indicating a successful connection to the LAN and PSTN (STM-1/OC-3 or T3) interfaces.
Any malfunction changes the FAIL LEDs to red (refer to ''LEDs'' on page 23 for details o
n
the device's hardware and its LEDs).
3.1 Unpacking and Checking Package Contents
Follow the procedure below for unpacking the received carton in which the device is
shipped.
¾ To unpack the device:
1. Open the carton and remove the packing materials.
2. Remove the device from the carton.
3. Ensure that the package contains the following items:
• One or two DC power cables.
• RS-232 adapter cable (two meters in length).
• Regulatory Information list.
4. Check that there is no equipment damage.
5. Check, retain and process any documents.
6. Notify AudioCodes of any damage or discrepancies.
Note: The blades and modules are supplied pre-installed in the device's chassis.
For replacing these items, refer to ''Maintenance and Repair'' on page 67.
3.2 Mounting the Device
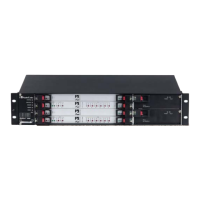
The device is a 19-inch, 2U-high rack mount chassis that can be mounted in a standard 19-
inch rack. The mounting is performed by attaching the device directly to the rack’s frame
using the chassis' integral mounting brackets (flanges). These flanges are located on the
left and right sides of the chassis. Each flange provides two holes (44.5 mm between
screw-hole centers) for attachment to the rack.
 Loading...