8. Communicator Touch Panel
8.2 Installing the Touch Panel interface
Necessary tools
• 17mm open wrench.
• 10mm open wrench.
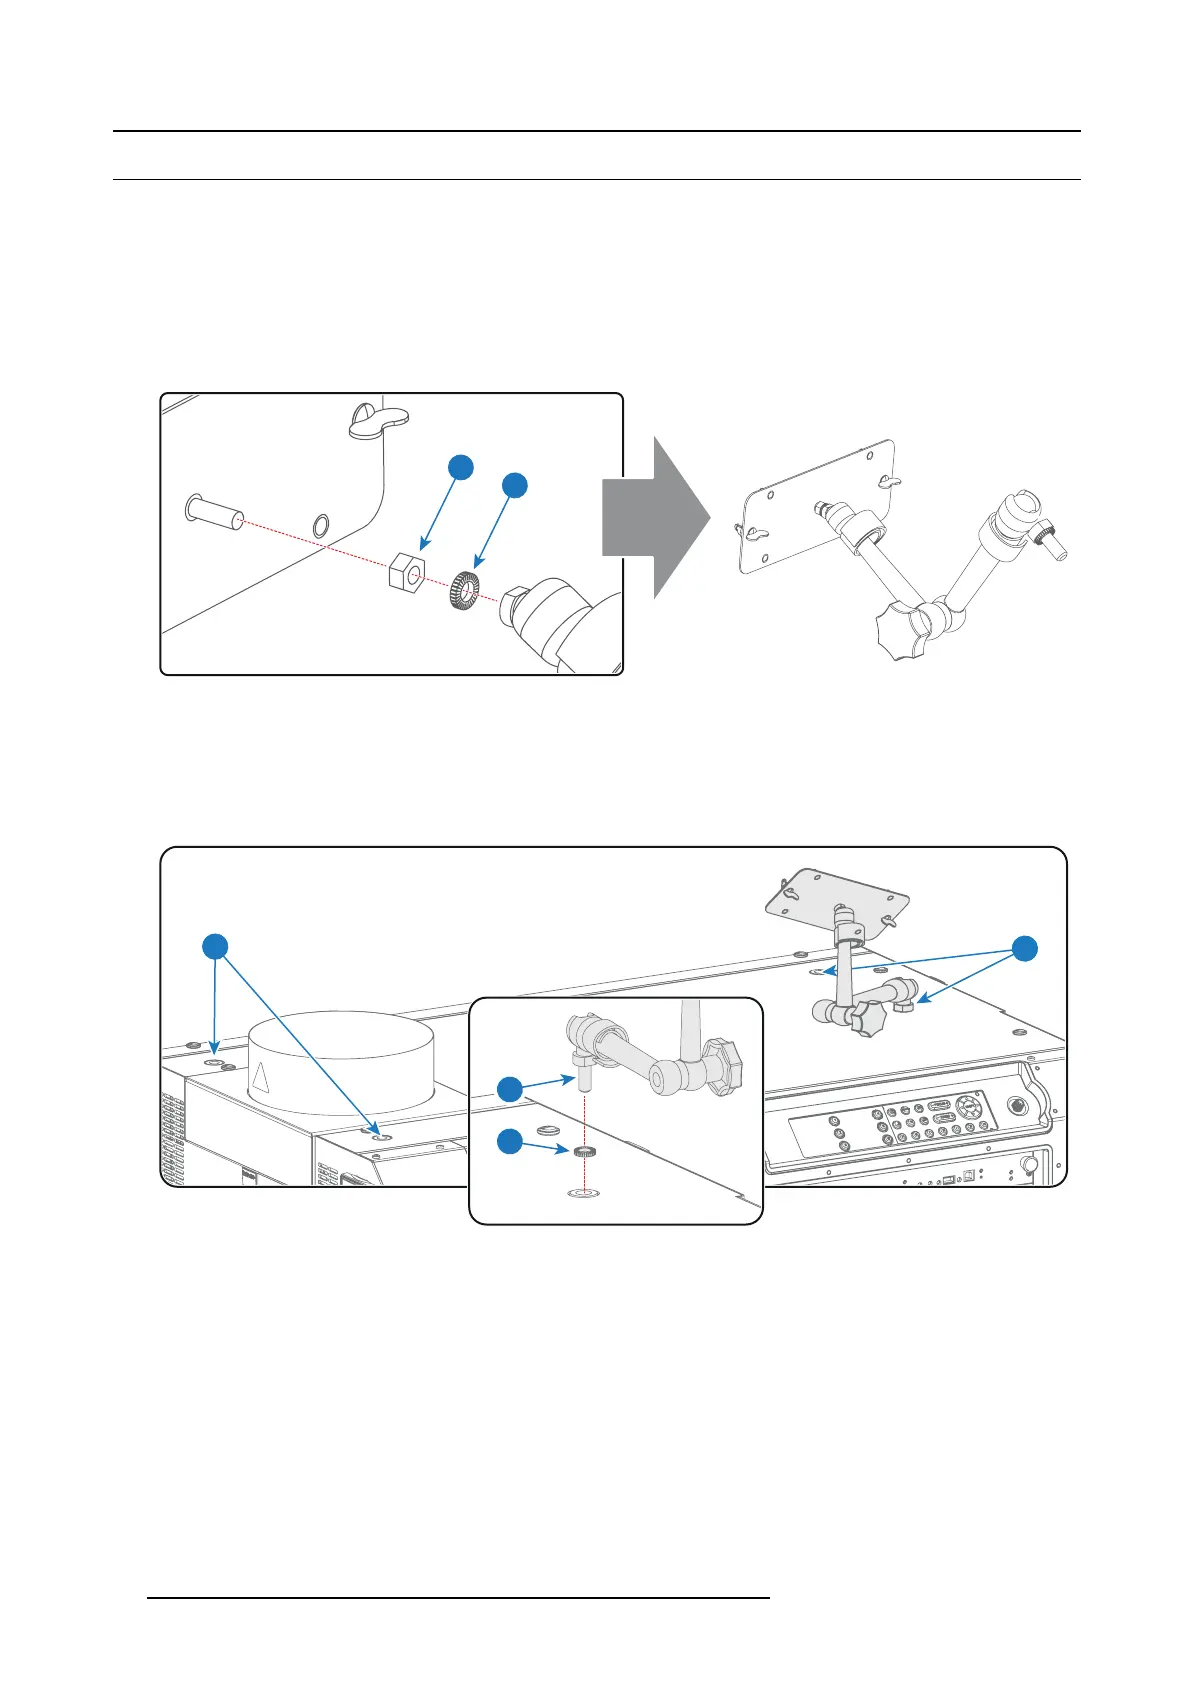
How to install the Touch Panel interface onto the top of the projector?
1. Ass emble the m ounting plate and the swivel arm together as illustrated. First place the nut (reference 1 image 8-4) upon the
rod of the mounting plate, then add the lock washer (reference 2 image 8-4), then fasten the mounting plate a
nd the swivel arm
together. W hen the arm is mounted, turn the nut (reference 1 image 8-4) against the arm to secure the position.
1
2
Image 8-4
2. Slide a washer (reference 4 im age 8-5) over the base of the swivel arm (reference 3 im age 8-5) and insert the base of the sw ivel
arm into one of the four p ossible mounting holes (reference 1 & 2 image 8-5) at the top of the projector.
Note: Which mounting hole to use depends on the operator preferences. In the illustration below the swiv el arm is installed
into the mounting h ole nearest by the Local Key pad of the projector.
Caution: If you choose to use the back mounting holes (reference 1 image 8-5) to mount y our Touch Panel, ensure it is suffi-
ciently removed from the hot top exhaust system, to avoid damage.
3
4
1
2
Image 8-5
3. Place the Touc h Panel interface upon the mounting plate of the swivel arm and fasten the two wing nuts (reference 5 im age 8-6)
as illustrated.
50
R5977692 DP2K-S SERIES 10/12/2012
 Loading...


