12. Lamp House & Lamp replacement
12.7 Installation of the Lamp House
WARNING: This procedure may only be performed by qualified technical service p ersonnel.
CAUTION: Due to its high internal pressure, the lamp may exp lode in e ither hot or cold states if improperly
handled.
Necessary tools
8mm nut driver or flat screw driver.
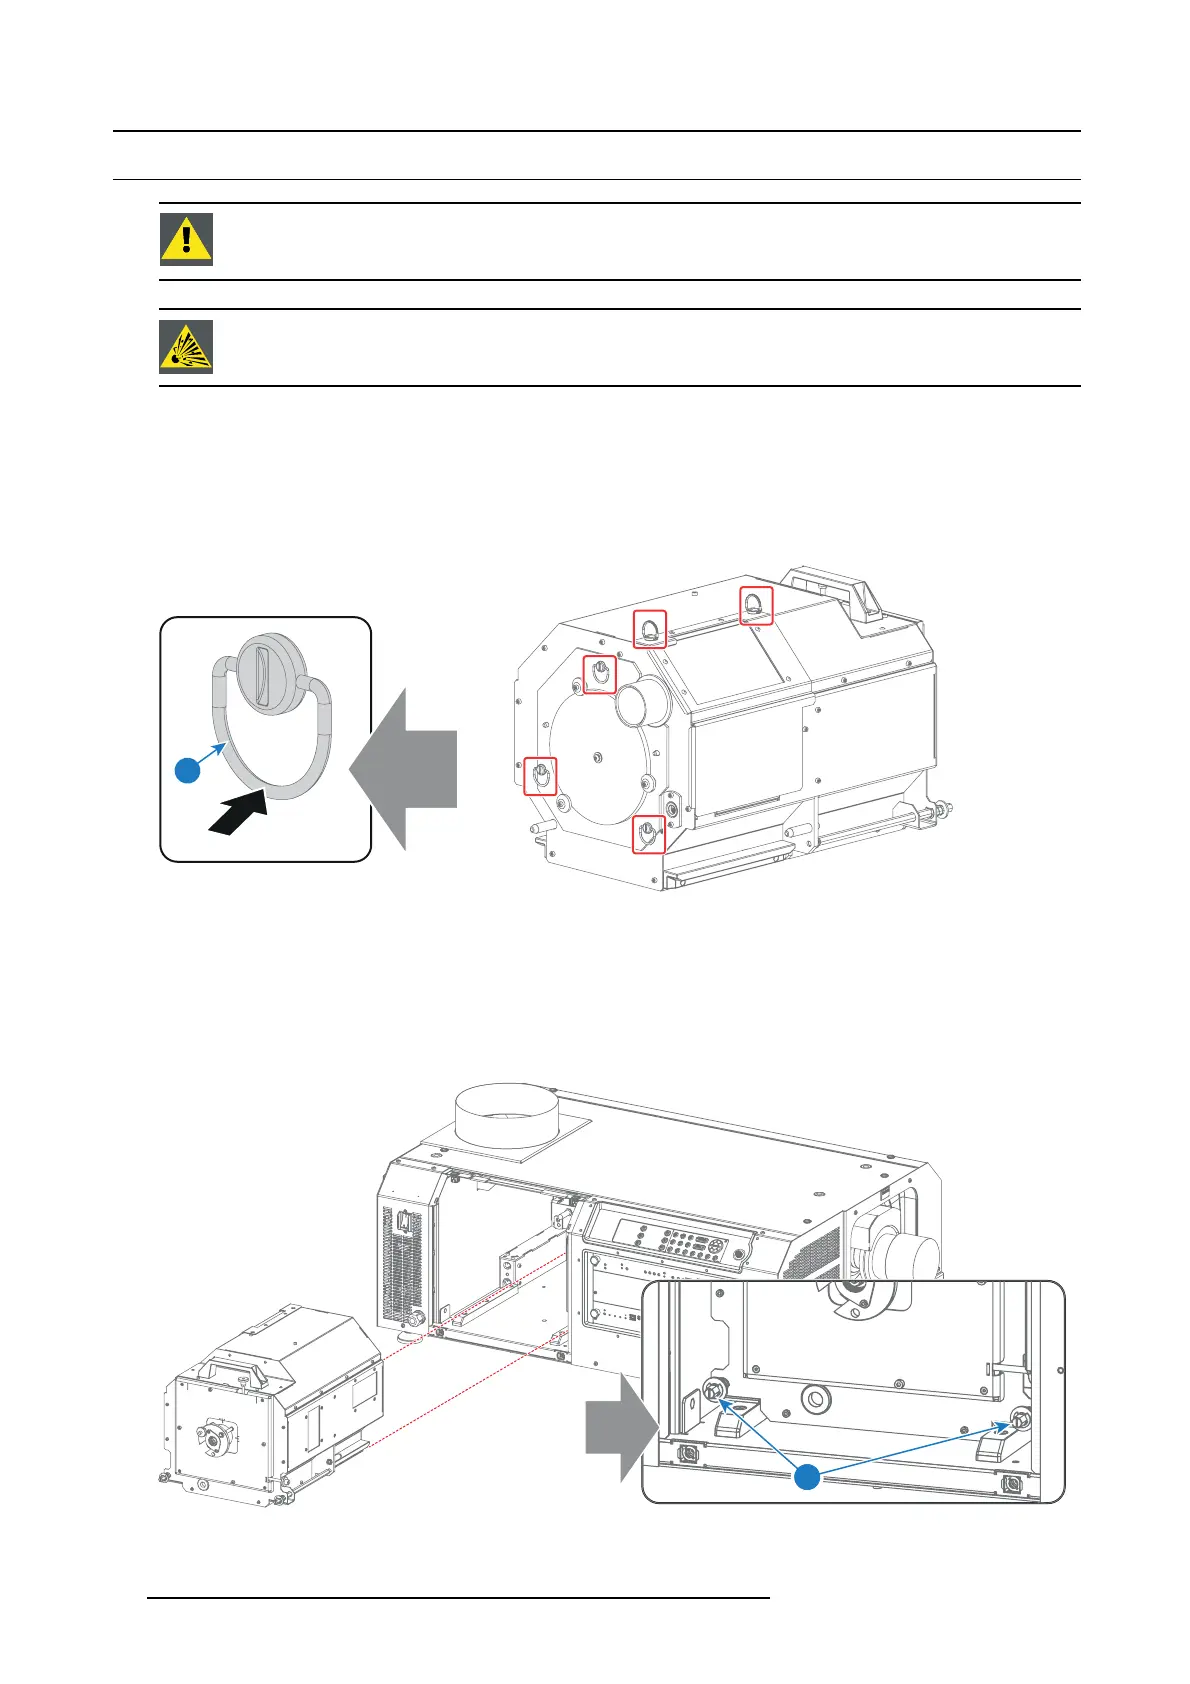
How to install the Lamp House in the projector?
1. C heck if the five quarter turn screws turning wires (reference 1image 12- 34) are flush with the cover or interference will occur
while inserting the Lam p House into the projector.
1
Image 12-34
2. Gr ip the Lamp House by the handle and place the fro
nt of the Lamp H ouse onto the base plate guides inside the lamp compart-
ment of the projector, lining up the pins o f the Lamp House with the s lots on the base.
3. Push the Lamp House fully into the slots.
4. Secure the Lamp House by fastening the two r etaining screws (reference 1 image 12-35) at the base of the Lam p House. Use
a 8m m nut driver or flat sc rew driver.
5. R einstall the cover of the Lam p House com partment.
1
Image 12-35
94 R5977692 DP2K-S SERIES 10/12/2012
 Loading...


