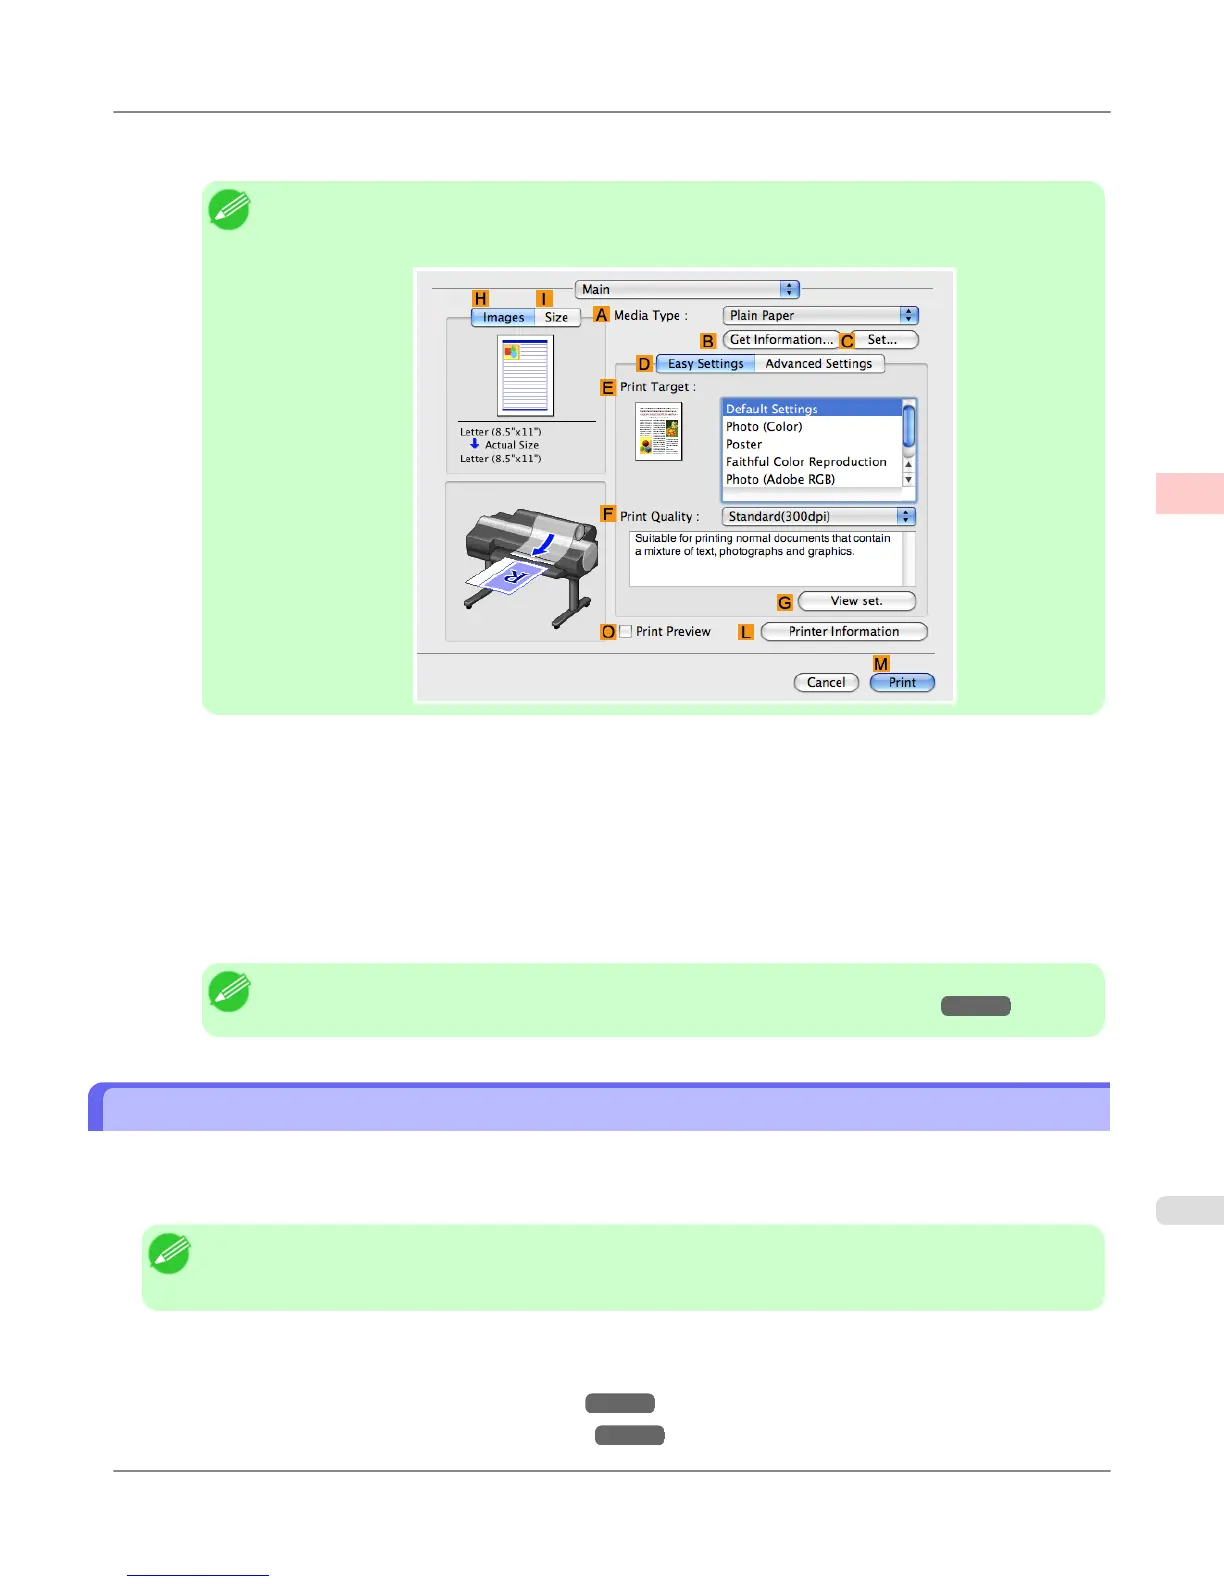
8. Make sure the width of the loaded roll is displayed in the B Roll Width list—in this case, 16 in. (406.4mm).
Note
• If the width of the loaded roll is not displayed in B Roll Width, click L Printer Information on the
Main pane and update the printer information.
9. In C Page Size, make sure 100*500 is displayed, as registered in Page Setup.
10. Select the D Enlarged/Reduced Printing check box.
11. Click F Fit Roll Paper Width.
12. Confirm the print settings, and click M Print to start printing.
Note
• For tips on confirming print settings, see "Confirming Print Settings (Mac OS X) →P.491 "
Printing on Non-Standard Paper Sizes
For printing on non-standard size paper, first register the paper size in the printer driver.
Once you register a paper size, you then can select it repeatedly from the paper size list. The paper size can be set up to 18.0
m.
Note
• In Windows, although you can even set Custom Size for the paper size, the maximum settable size is 3.2 m.
The setting of Custom Size is disabled when you exit the application software.
For instructions on specifying non-standard paper sizes for printing, refer to the following topics, as appropriate for your
computer and operating system.
• Printing on Non-Standard Paper Sizes (Windows) →P.132
• Printing on Non-Standard Paper Sizes (Mac OS X) →P.135
Enhanced Printing Options
>
Printing banners or at other non-standard sizes
>
iPF6300S Printing on Non-Standard Paper Sizes
2
131
 Loading...