Cleaning the print head
Use this if faint or missing segments are detected in
the printed documents. This function cleans the
surface of the print head. There are two types of
function; one is to automatically detect clogged
nozzles and perform cleaning and another is to
perform head cleaning immediately after selecting the
level.
When selecting the cleaning level, you should
normally select Standard. If nozzles are clogged even
after performing Normal head cleaning several times,
perform Heavy cleaning. If the situation is not
improved even after performing Heavy, perform
Powerful Cleaning from the Administrator Menu.
U “Cleaning the print head” on page 143
Check And Clean Nozzle
Perform this to check the status of the nozzles and
automatically clean only the nozzle arrays that are
clogged.
U “Maintenance menu” on page 128
Adjusting print misalignments
(Head Alignment)
This function adjusts the print misalignment. Use this
if lines are misaligned or print results are grainy.
U “Adjusting print misalignments (Head
Alignment)” on page 145
Adjusting paper feeding (Paper Feed
Adjust)
Use this setting if you are unable to resolve banding
issues (horizontal striped lines or uneven colors) in
the standard print area (for cut sheets, the area
excluding the 1 to 2 cm strip at the bottom of the
paper) even after print head cleaning or Head
Alignment.
U “Paper Feed Adjust” on page 148
Checking for clogged nozzles
Nozzle checks can be performing from a computer or
using printer's control panel.
From the computer
Explanations in this section use the Windows printer
driver as an example.
Use Epson Printer Utility 4 for Mac OS X.
U “Epson Printer Utility 4 Functions” on page 77
A
Make sure that the roll paper or a cut sheet of
A4 size or larger is loaded in the printer.
Make sure you set the paper source and media
type correctly according to the paper you use.
U “Loading and Removing the Roll Paper” on
page 31
U “Loading and Removing Cut Sheets” on
page 38
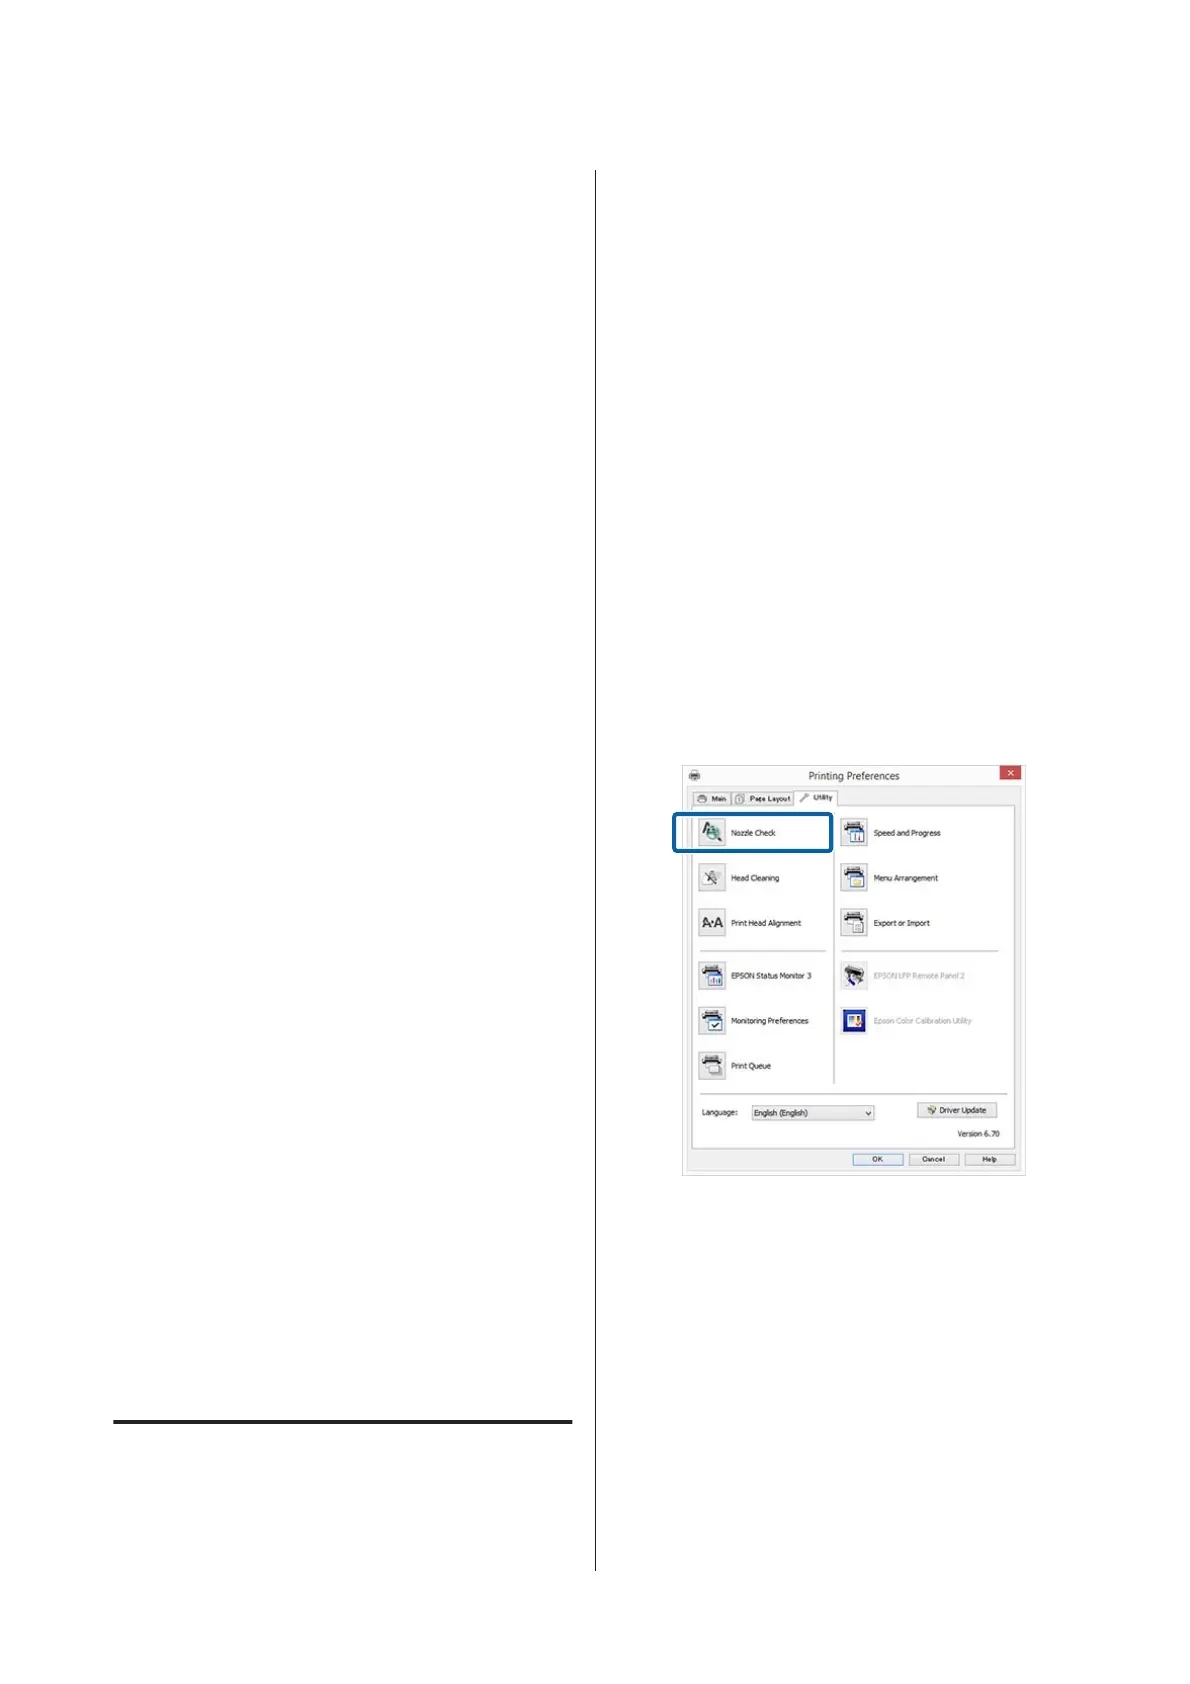
B
Click Nozzle Check from the Utility tab in the
printer driver's Properties (or Printing
preferences) screen.
C
Click Print.
The nozzle check pattern is printed.
D
Check the nozzle check pattern.
If there is no problem: click Finish.
If there is a problem: click Clean.
After printing a nozzle check pattern, make
sure that the nozzle check pattern printing is
complete before printing your data or cleaning
the print head.
SC-P20000 Series/SC-P10000 Series User's Guide
Maintenance
142
 Loading...