When the edging cycle is finished, the retouch screen is displayed.
Press to release the lens.
If necessary, retouch the lens.
Otherwise, start edging the second lens. Select the lens directly on the screen, on the left or right of the
work area.
The edging screen for the second lens is displayed. All finishes chosen and the modifications made
are kept.
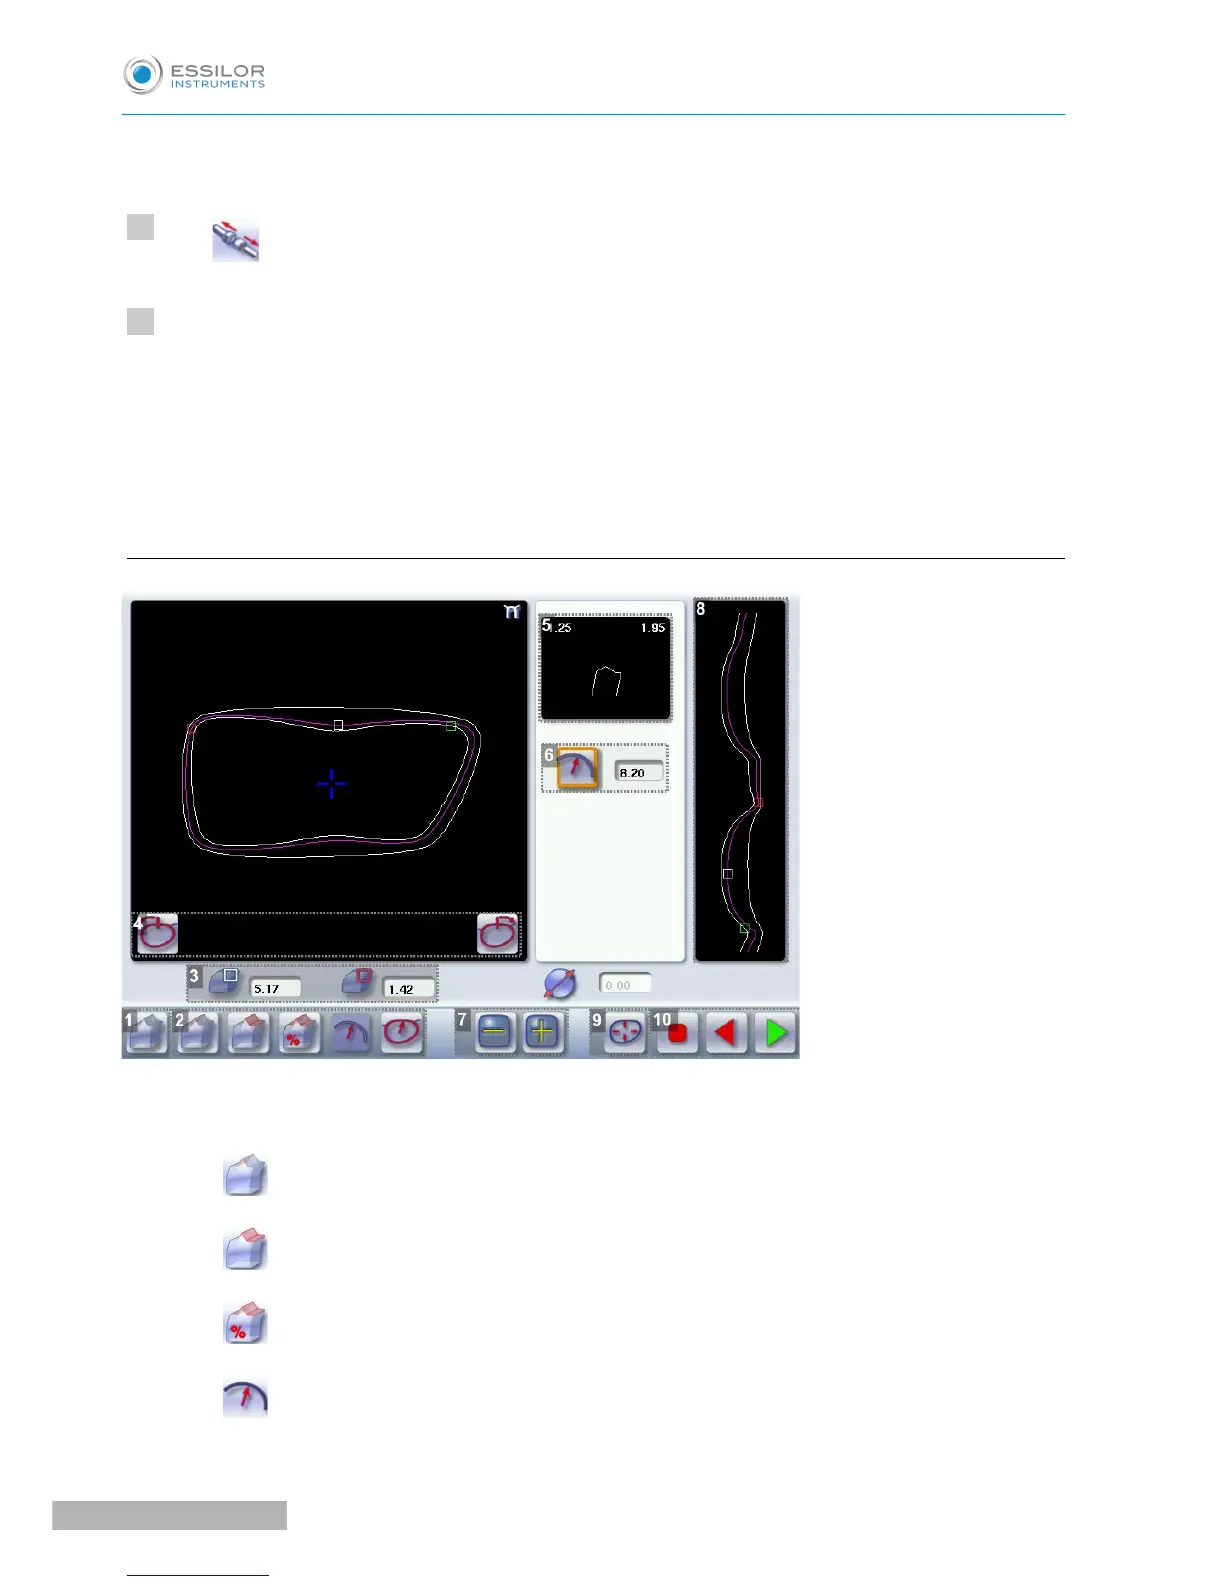
b. Legend screen for customized bevels
1. Automatic bevel
2. Customized bevel
◦ Front surface tracking: the crest of the bevel is positioned at a constant distance from the
front surface.
◦ Rear surface tracking: the crest of the bevel is positioned at a constant distance from the
rear surface.
◦ Distributed bevel: the position of the crest of the bevel is proportional to the thickness of
the lens, with respect to the front surface.
◦ Lens curve tracking: the camber of the bevel is adjustable.

 Loading...