For more information, consult the section Edging a lens > Perform a polishing (F p.67) and Edging a
lens > Perform a chamfering (F p.67).
Press the “cycle start” button (front face) or .
The door closes, the lens is clamped and then felt.
The edging cycle starts.
When the edging cycle is finished, the retouch screen is displayed.
Press to release the lens.
If necessary, retouch the lens.
Otherwise, start edging the second lens. Select the lens directly on the screen, on the left or right of the
work area.
The edging screen for the second lens is displayed. All finishes chosen and the modifications made
are kept.
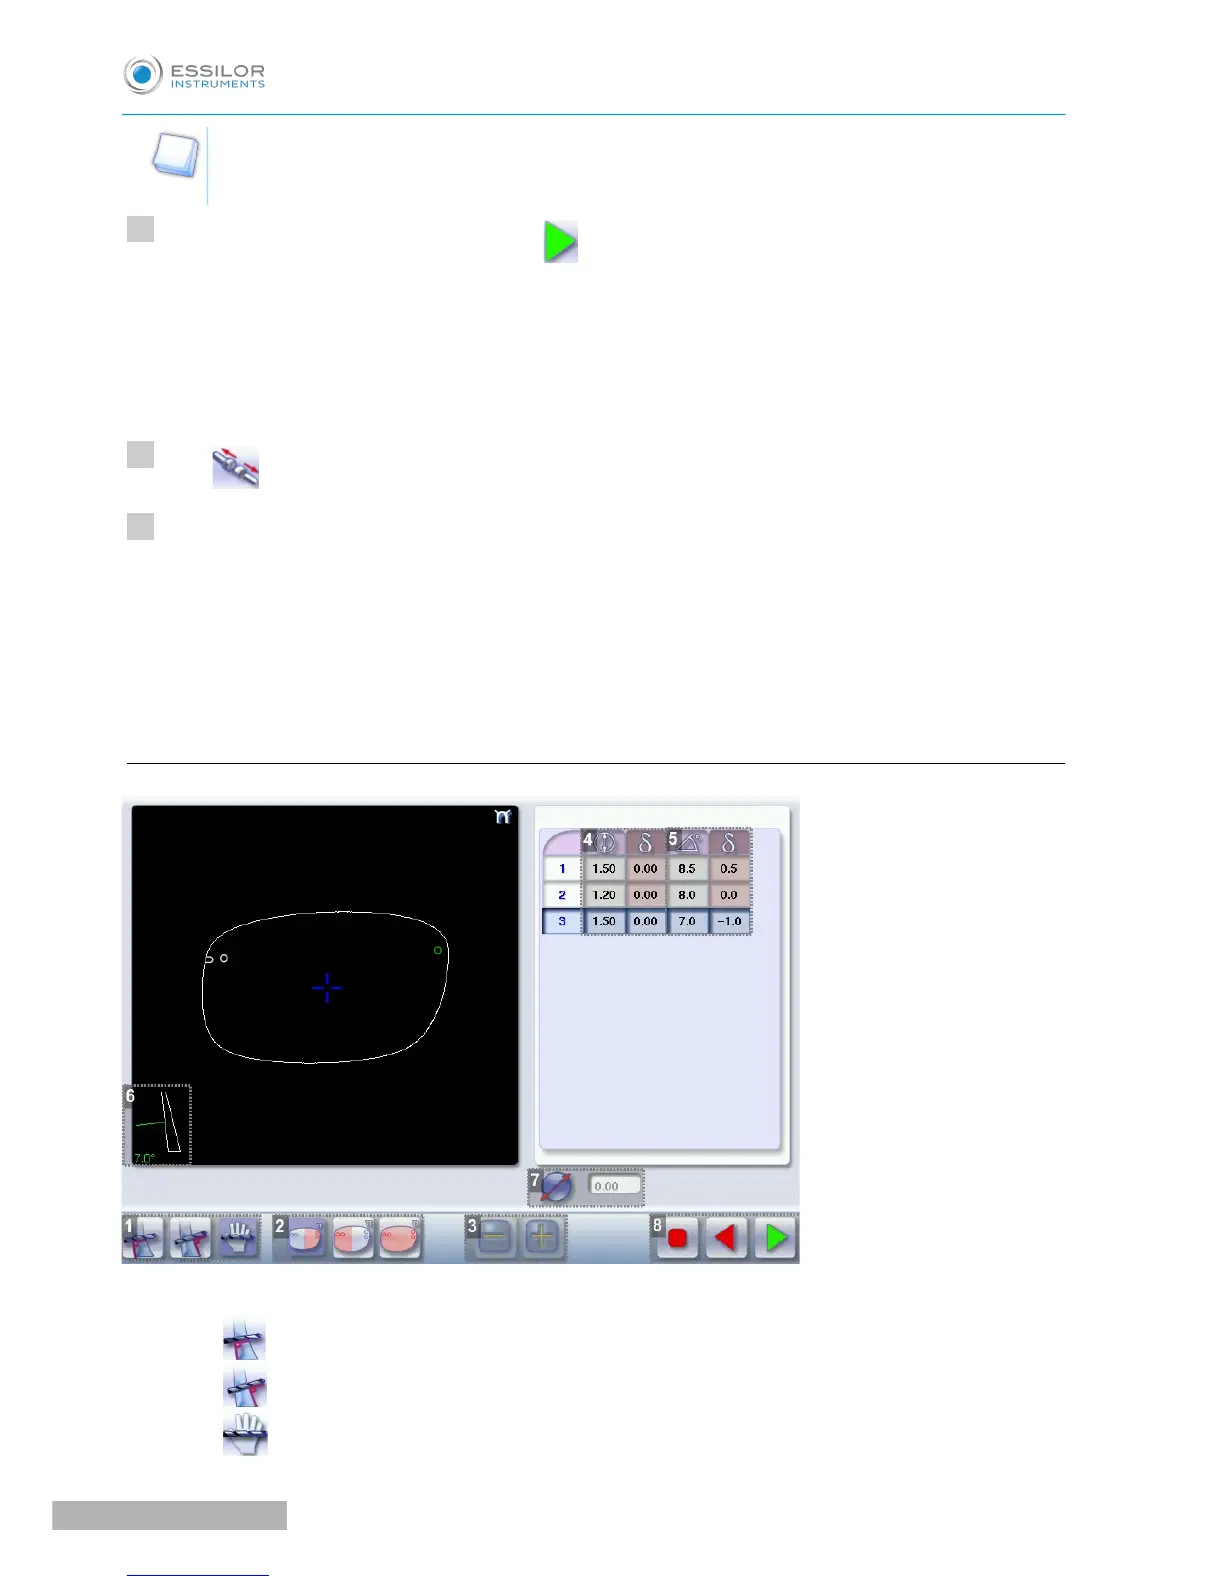
b. Legend screen for customized drilling
1. Type of drilling
◦ Perpendicular to the front surface
◦ Perpendicular to the rear surface
◦ Customized

 Loading...