11 Job Status
376
Job Status
11
When [Print] is Selected
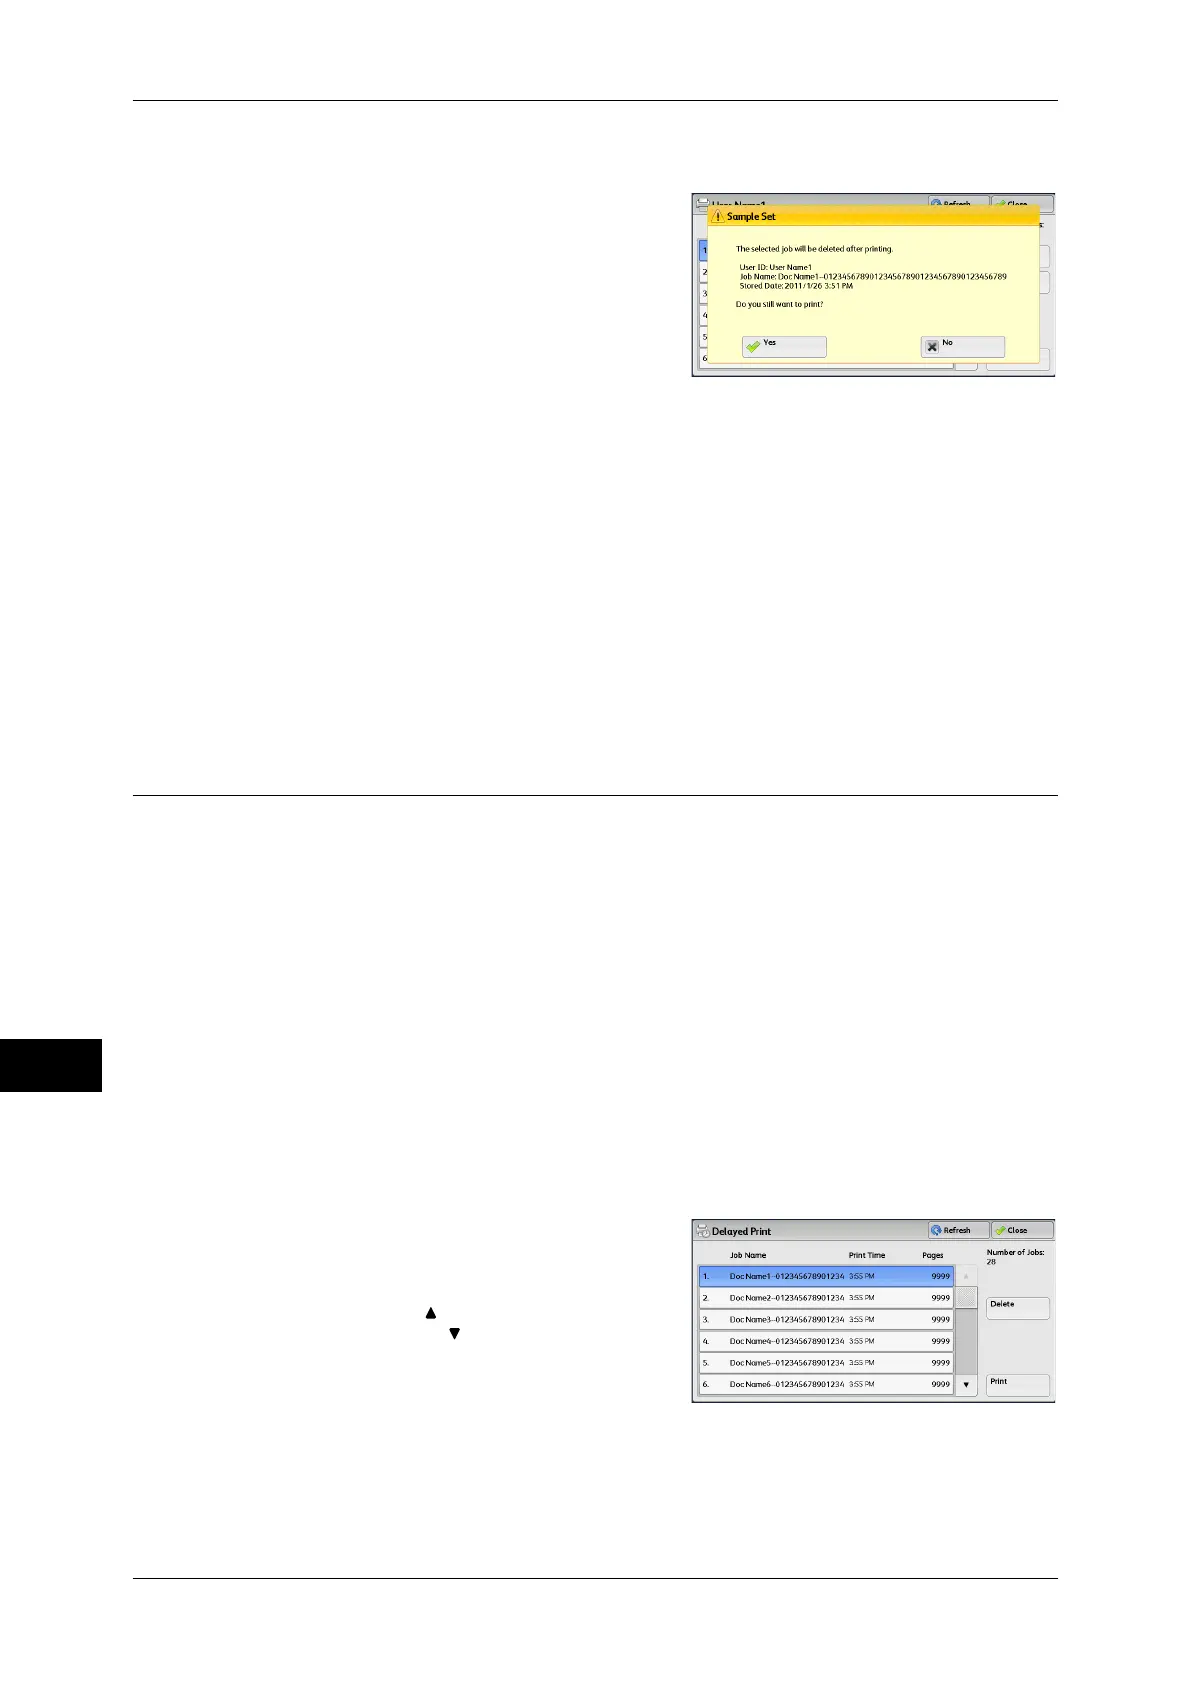
1 Select [Yes].
Note •
The screen shown on the right does not
appear if [Print Job Confirmation Screen] is
set to [Disabled] in System Administration
mode. If [Disabled] is selected, the machine
automatically deletes the job after printing
without displaying the confirmation screen.
For more information, refer to "5 Tools" >
"Stored File Settings" > "Print Job
Confirmation Screen" in the Administrator
Guide.
Yes
Starts printing the job. The job is deleted after it is printed.
Note • After a sample set is output, the remaining sets will automatically be output if the machine is
not instructed for the period specified in [Auto Job Release]. To prevent the remaining sets
from being output automatically, set [Auto Job Release] to [Off]. For information on how to
set [Auto Job Release], refer to "5 Tools" > "Common Service Settings" > "Machine Clock/
Timers" > "Auto Job Release" in the Administrator Guide.
No
Cancels printing the job.
Delayed Print
This feature allows you to temporarily store print data on the machine to print it at a
specified time.
Up to 100 jobs can be stored (queued) simultaneously for the Delayed Print feature. If
the power is switched off when jobs are in queue (before the specified print time), the
jobs for which the print time has elapsed will automatically be printed immediately after
the power is switched on again.
The following describes how to print or delete jobs stored with the Delayed Print
feature.
For information on how to operate a Delayed Print job, refer to the print driver's help.
Note • When [Save as Private Charge Print Job] or [Save as Charge Print Job] is selected in
[Receive Control] under [Charge/Private Print Settings], jobs will not be saved in [Delayed
Print] under [Secure Print Jobs & More] even if you select [Delayed Print] on the print driver.
For more information, refer to "5 Tools" > "Authentication/Security Settings" >
"Authentication" > "Charge/Private Print Settings" in the Administrator Guide.
1 Select [Delayed Print].
2 Select the job to be printed or deleted.
Note • Select [Refresh] to display the updated
information.
• Select [ ] to return to the previous
screen or [ ] to move to the next screen.
• [Print Time] shows the time to start
printing.
 Loading...