Maintenance
50940411/G0219 136 Printed in U.S.A.
3. Open the engine cover according to “Engine
Access” on page 126.
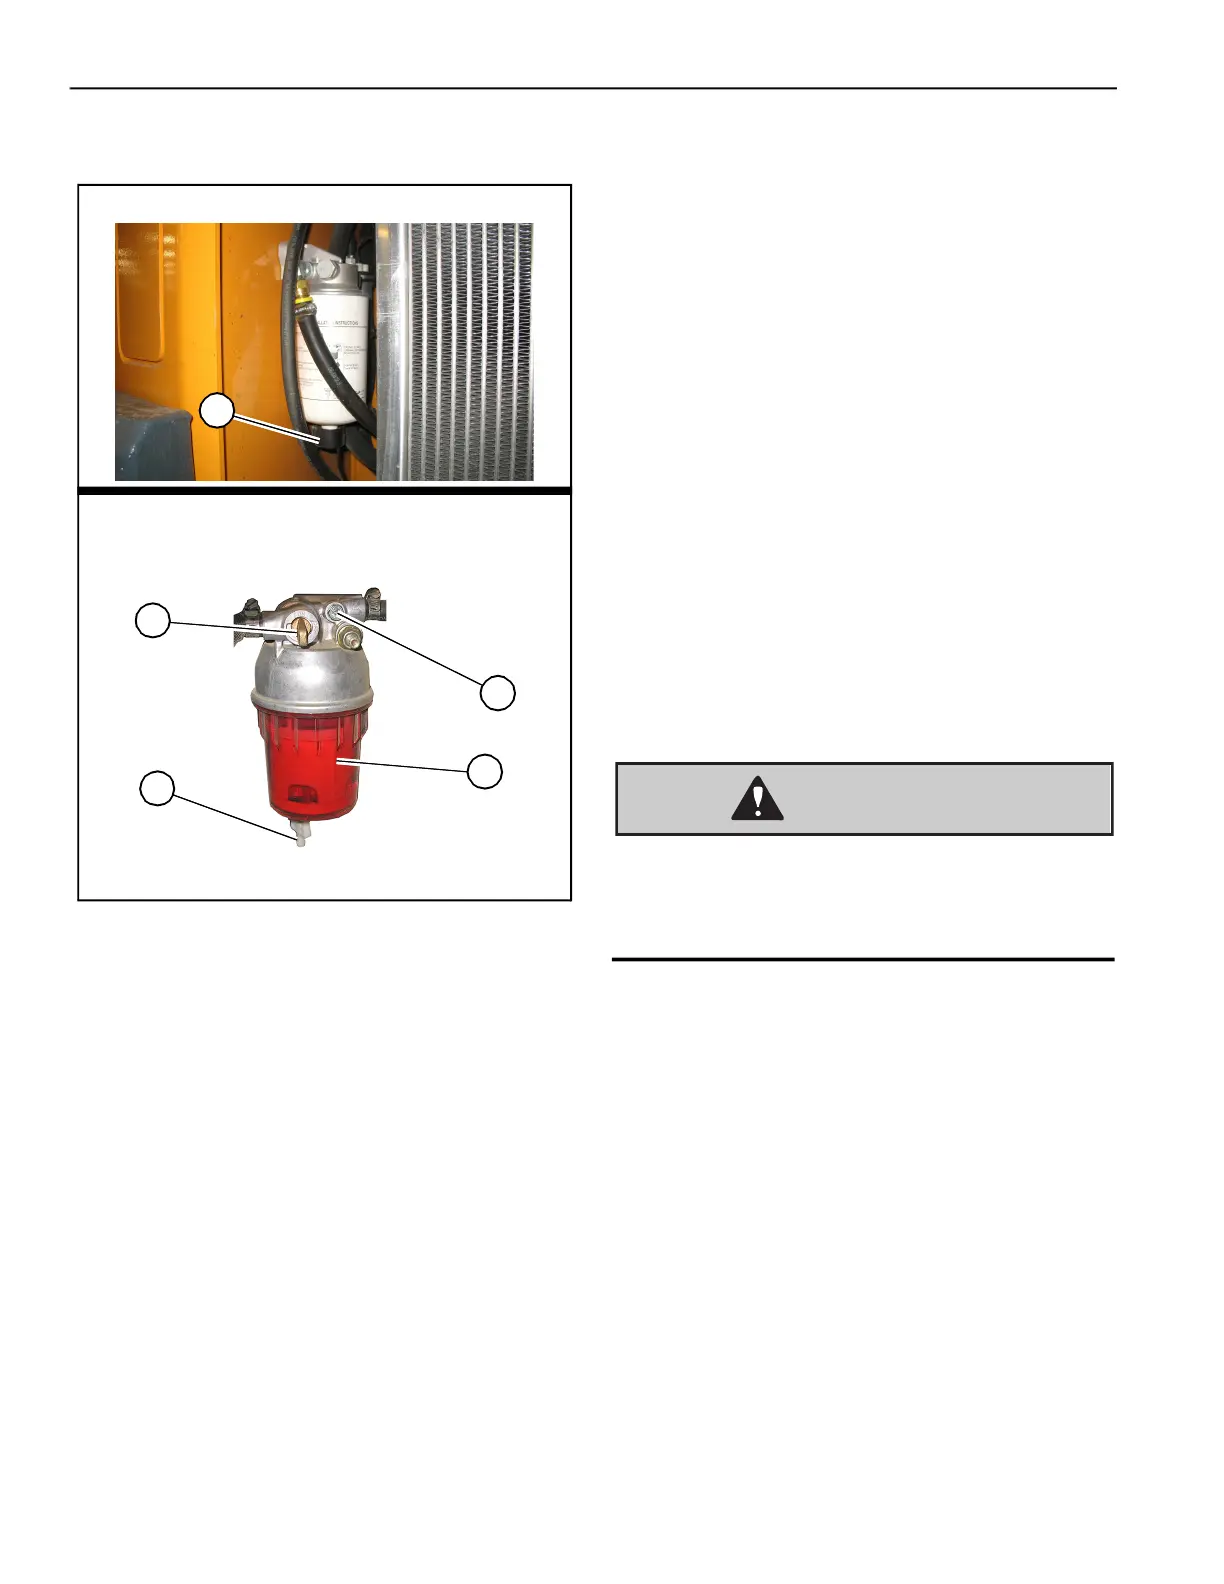
4. Model RT250: Inspect the water separator (Fig.
141) for the presence of water:
a. Position a suitable collection container
underneath the water separator drain.
b. Twist drain fitting (R) at the bottom of the
water separator. Allow water to drain until
flow stops. Twist drain fitting (R) back to it’s
original position to close.
5. Models RT175/RT210: Inspect the water
separator (Fig. 141) for the presence of water:
• If the indicator ring (M) is at the bottom of
the cup, no action is required.
• If the indicator ring (M) is floating off the
bottom of the cup, water is present and needs
to be drained.
6. Drain water from the water separator:
a. If water needs to be drained, position a suit-
able collection container underneath the
water separator drain.
b. Turn the fuel shut-off valve lever (P) on the
water separator to the OFF position.
c. Loosen drain plug (N) at the bottom of the
water separator. Allow water to drain until
indicator ring falls to the bottom of the cup.
NOTE:
If the water does not drain well, loosen
vent plug (O).
d. Tighten drain plug (N) and discard fuel/
water according to environmental laws.
e. Turn the fuel shut-off valve lever (P) on the
water separator to the ON position. Tighten
vent plug (O), if it was loosened.
7. Prime the fuel system by turning the ignition key
to the ON position without starting the engine
for 30 seconds.
Do not use the starter motor to crank the engine
to prime the fuel system. Damage to the engine
starter motor, coils, pinion/ring gear could
result.
IMPORTANT: Dispose waste fuel according to
environmental laws. DO NOT pour fuel onto the
ground or down a drain.
Model RT250
Models RT175/RT210
Fig. 141 – Water Separator
M
N
P
OFF
ON
O
R
 Loading...