Maintenance
50940411/G0219 148 Printed in U.S.A.
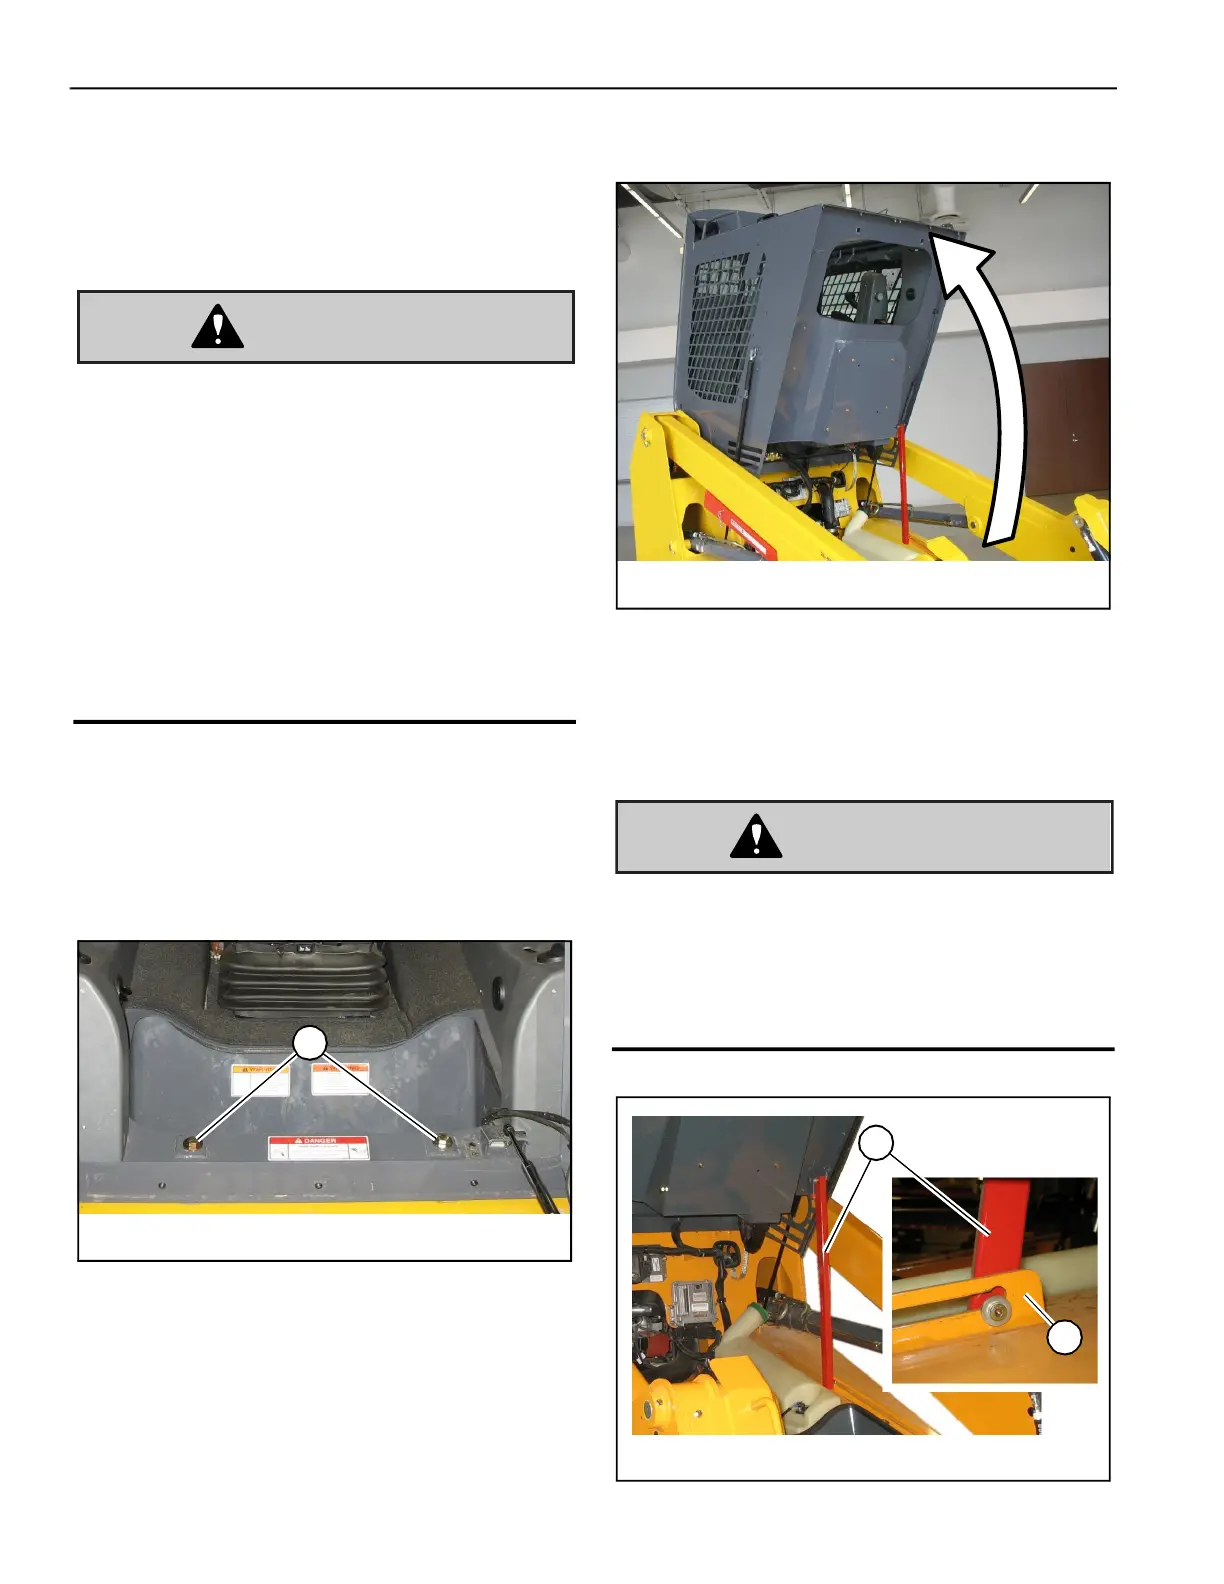
Tilting ROPS/FOPS
Tilting up the ROPS/FOPS provides access to
hydraulic and electrical components.
Raising ROPS/FOPS
Always secure the ROPS/FOPS to the chassis
with anchor bolts and washers (M, Fig. 158)
before driving or using the machine.
Always close the cab door before tilting the
ROPS/FOPS.
Stay clear from underneath the ROPS/FOPS as
it is tilted.
Check ROPS/FOPS tilt component condition at
regular intervals. Replace damaged or worn
parts immediately.
1. Perform the “Mandatory Safety Shutdown Pro-
cedure” on page 20.
2. Remove anchor bolts and washers (M, Fig. 158)
securing the front of the ROPS/FOPS to the
chassis.
3. On machines equipped with a cab, securely close
and latch the cab door.
4. Close the engine cover.
5. Raise the ROPS/FOPS up as far as it will go
(Fig. 159).
NOTE:
Gas springs balance the ROPS/FOPS to
aid raising and lowering.
6. With the ROPS/FOPS fully raised, tilt prop bar
(P, Fig. 160) locks into the slot at the back of
bracket (F), securing the ROPS/FOPS in the
tilted position. Release the ROPS/FOPS to make
sure it is locked in the raised position.
Make sure to raise the ROPS/FOPS as far as it
will go so the tilt prop bar securely locks the
ROPS/FOPS in the raised position. Never allow
anyone under the ROPS/FOPS if it is not
securely locked in the raised position with the
tilt prop bar.
Fig. 158 – ROPS/FOPS Anchor Fasteners
M
Fig. 159 – ROPS/FOPS Tilting
Fig. 160 – ROPS/FOPS Tilt Prop Bar
P
F
 Loading...