CHAPTER 13
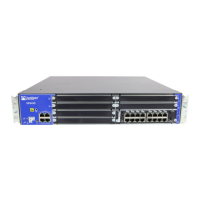
Installing the Services Gateway
•
SRX110 Services Gateway Safety Requirements, Warnings, and Guidelines on page 89
•
Installing the SRX110 Services Gateway in a Rack on page 89
•
Adjusting the Power Supply Adapter Tray for the SRX110 Services Gateway for
Rack-Mount Installation on page 92
•
Installing the SRX110 Services Gateway on a Desk on page 93
•
Installing the SRX110 Services Gateway on a Wall on page 95
•
Installing a 3G USB Modem in the SRX110 Services Gateway USB Port on page 97
SRX110 Services Gateway Safety Requirements, Warnings, and Guidelines
To avoid harm to yourself or the device as you install and maintain it, follow the guidelines
for working with and near electrical equipment, as well as the safety procedures for
working with devices. For a discussion of how to make the installation site a safe
environment and a list of safety warnings, see “SRX110 Services Gateway Definition of
Safety Warning Levels” on page 43.
NOTE: Providing an exhaustive set of guidelines for working with electrical
equipment is beyond the scope of this guide.
Related
Documentation
General Site Guidelines for Installing the SRX110 Services Gateway on page 38•
• Required Tools and Parts for Installing and Maintaining the SRX110 Services Gateway
on page 78
• Preparing the SRX110 Services Gateway for Rack-Mount, Desk-Mount, and Wall-Mount
Installation
Installing the SRX110 Services Gateway in a Rack
You can front-mount the SRX110 Services Gateway in a rack. Many types of racks are
acceptable, including 4-post (telco) racks, enclosed cabinets, and open-frame racks.
For more information about the type of rack or cabinet that the SRX110 Services Gateway
can be installed into, see “SRX110 Services Gateway Rack Requirements” on page 39.
89Copyright © 2012, Juniper Networks, Inc.
 Loading...