NOTE: The desk-mounting kit is not shipped with the device and must be
ordered separately.
To install the device in a horizontal position:
The horizontal position is the standard installation position and does not require the
vertical installation kit.
1. Make sure that the rubber feet are attached to the chassis.
2. Place the device on a desk with the Juniper Networks logo facing up. The logo is
embossed on the top cover.
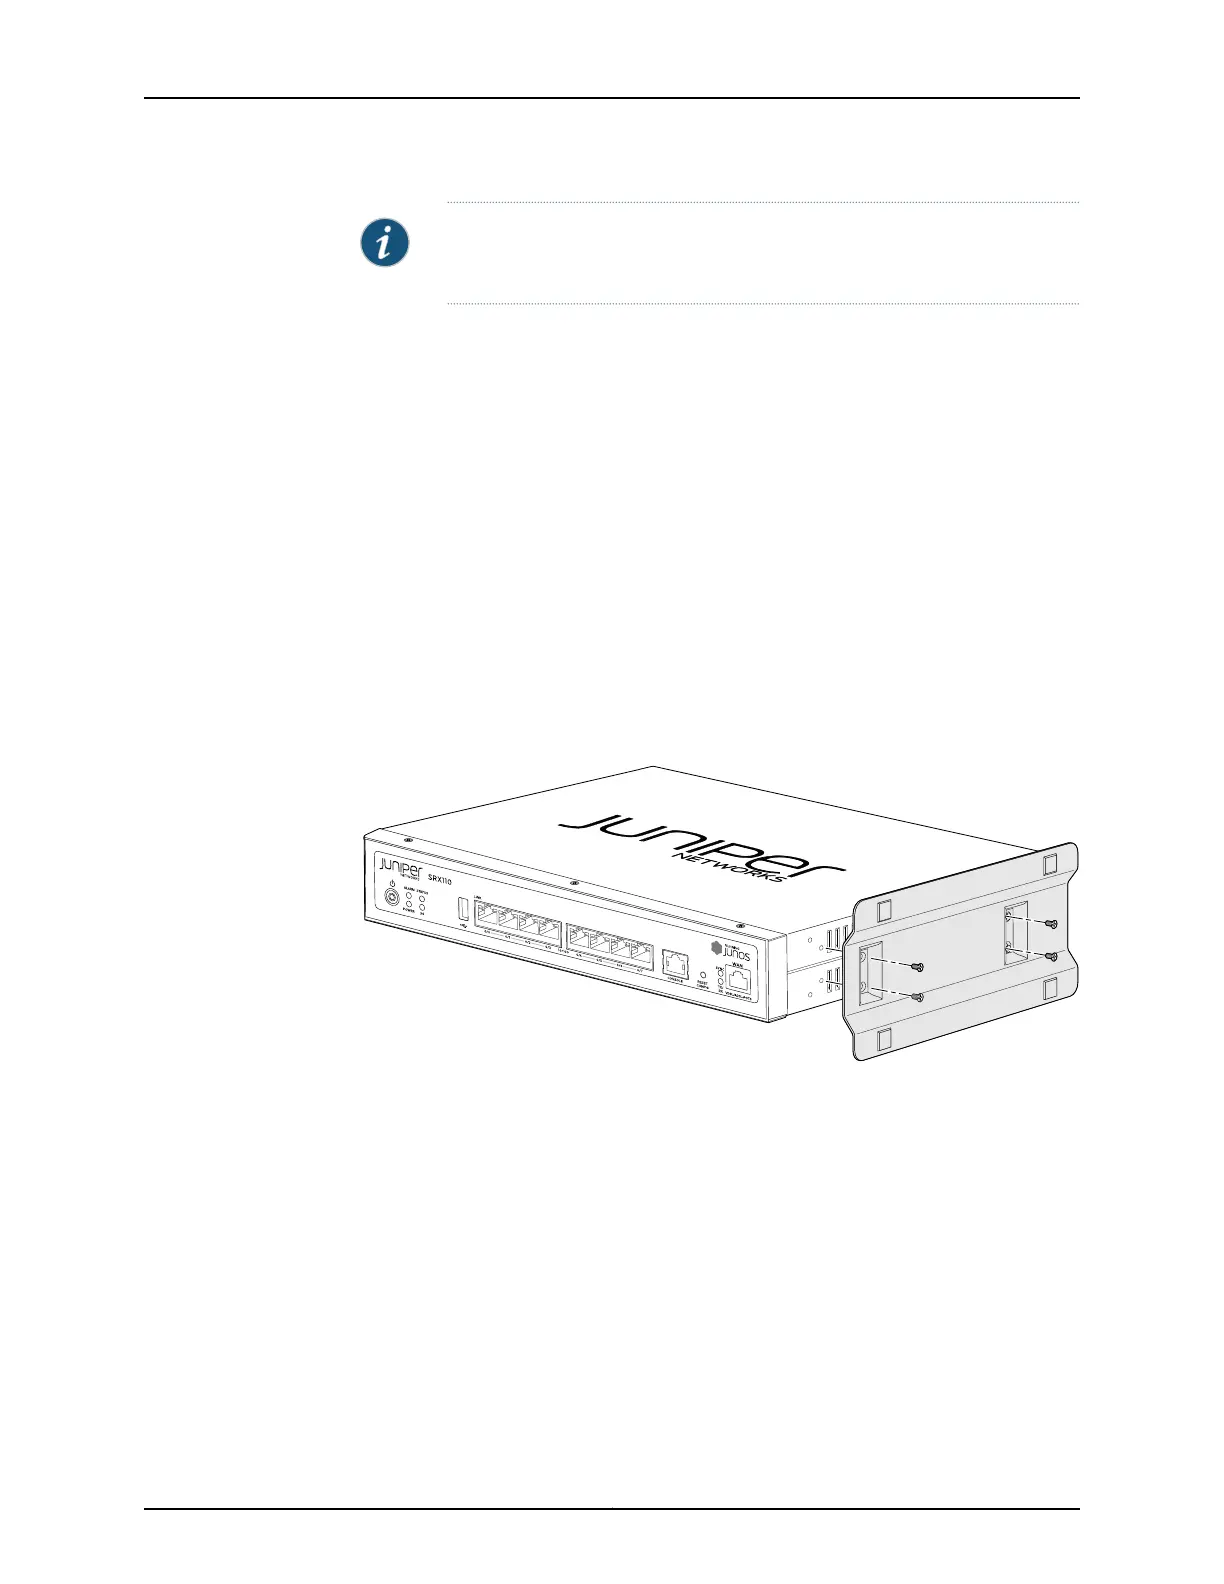
To install the device in a vertical position:
1. Place the device on a flat and level surface, with the Juniper Networks logo facing up.
The logo is embossed on the top cover.
2. Attach the vertical stand to the right side of the chassis, using the specified screws
as shown in Figure 18 on page 94.
Figure 18: SRX110 Services Gateway Desk Installation — Attaching the
Vertical Stand
3. Place the chassis vertically on the desk with the stand resting on the desk as shown
in Figure 19 on page 95.
Copyright © 2012, Juniper Networks, Inc.94
SRX110 Services Gateway Hardware
 Loading...