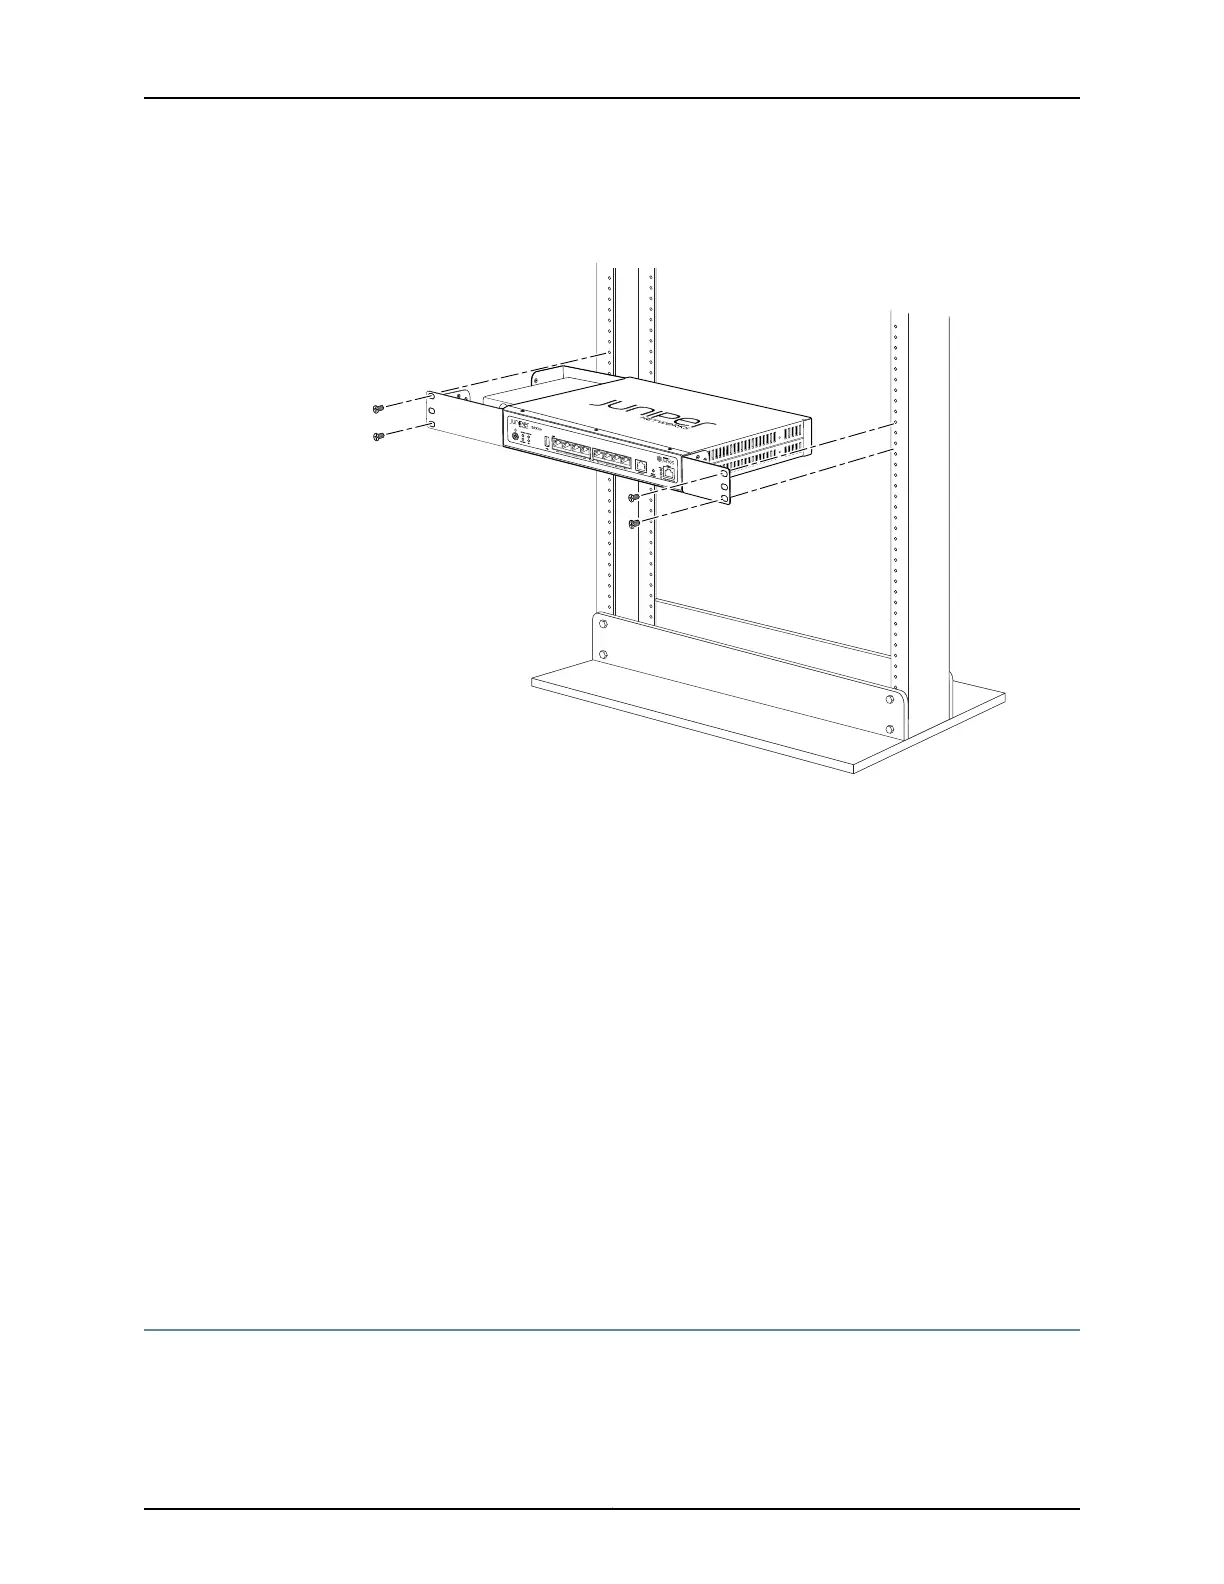
Figure 16: SRX110 Services Gateway Rack Installation — Hanging the
Services Gateway in a Rack
6. Have a second person install a mounting screw into each of the two aligned holes.
Use a Phillips (+) screwdriver, number 3, to tighten the screws.
7. Install the second screw in each mounting bracket.
8. Verify that the mounting screws on one side of the rack are aligned with the mounting
screws on the opposite side and that the device is level.
Related
Documentation
SRX110 Services Gateway Installation Safety Guidelines and Warnings on page 50•
• Required Tools and Parts for Installing and Maintaining the SRX110 Services Gateway
on page 78
• SRX110 Services Gateway General Safety Guidelines and Warnings on page 45
• Preparing the SRX110 Services Gateway for Rack-Mount Installation on page 85
• Adjusting the Power Supply Adapter Tray for the SRX110 Services Gateway for
Rack-Mount Installation on page 92
• Installing the SRX110 Services Gateway on a Desk on page 93
Adjusting the Power Supply Adapter Tray for the SRX110 Services Gateway for
Rack-Mount Installation
This topic provides details on the power supply adapter for the SRX110 Services Gateway
and the procedure for adjusting the power supply adapter tray to hold the power supply
adapter.
Copyright © 2012, Juniper Networks, Inc.92
SRX110 Services Gateway Hardware
 Loading...