210 Chapter 23: Crossfades (Automation)
PRO1 Live Audio System
Operator Manual
>> To create a crossfade event
1 Open the Edit Event window.
2 If you want to disable this event, select the Disable Event option.
3 In the When... section, select the parameters that will trigger the event.
4 If you want to incorporate a time offset delay between the event being triggered
and the start of the event, set a time in the Time Offset section.
5 In the Then do this... drop-down list, select the X-Fade Event option.
6 Do one of the following:
• Select a crossfade group from the Crossfade Group drop-down list.
• Create a new crossfade group. Click the Crossfade Group Edit button to
open the Crossfade Groups screen and then follow the instructions in
“Crossfade groups” on page 211.
7 In the Parameters section, select the level control on which you want the
crossfade event to occur (see “Programming events” on page 203). For example,
a fader.
8 In the crossfade set up section (see “Crossfade set up section in the Edit Event
window” on page 209), set up the crossfade parameters, such as time, % of
travel etc.
9 Click CLOSE.
To set up a crossfade to have a constant rate across its full travel, set both the
%ofTime and % of Travel fields to 50%.
How a crossfade operates
When the crossfade event is triggered, the time offset (if configured) will start.
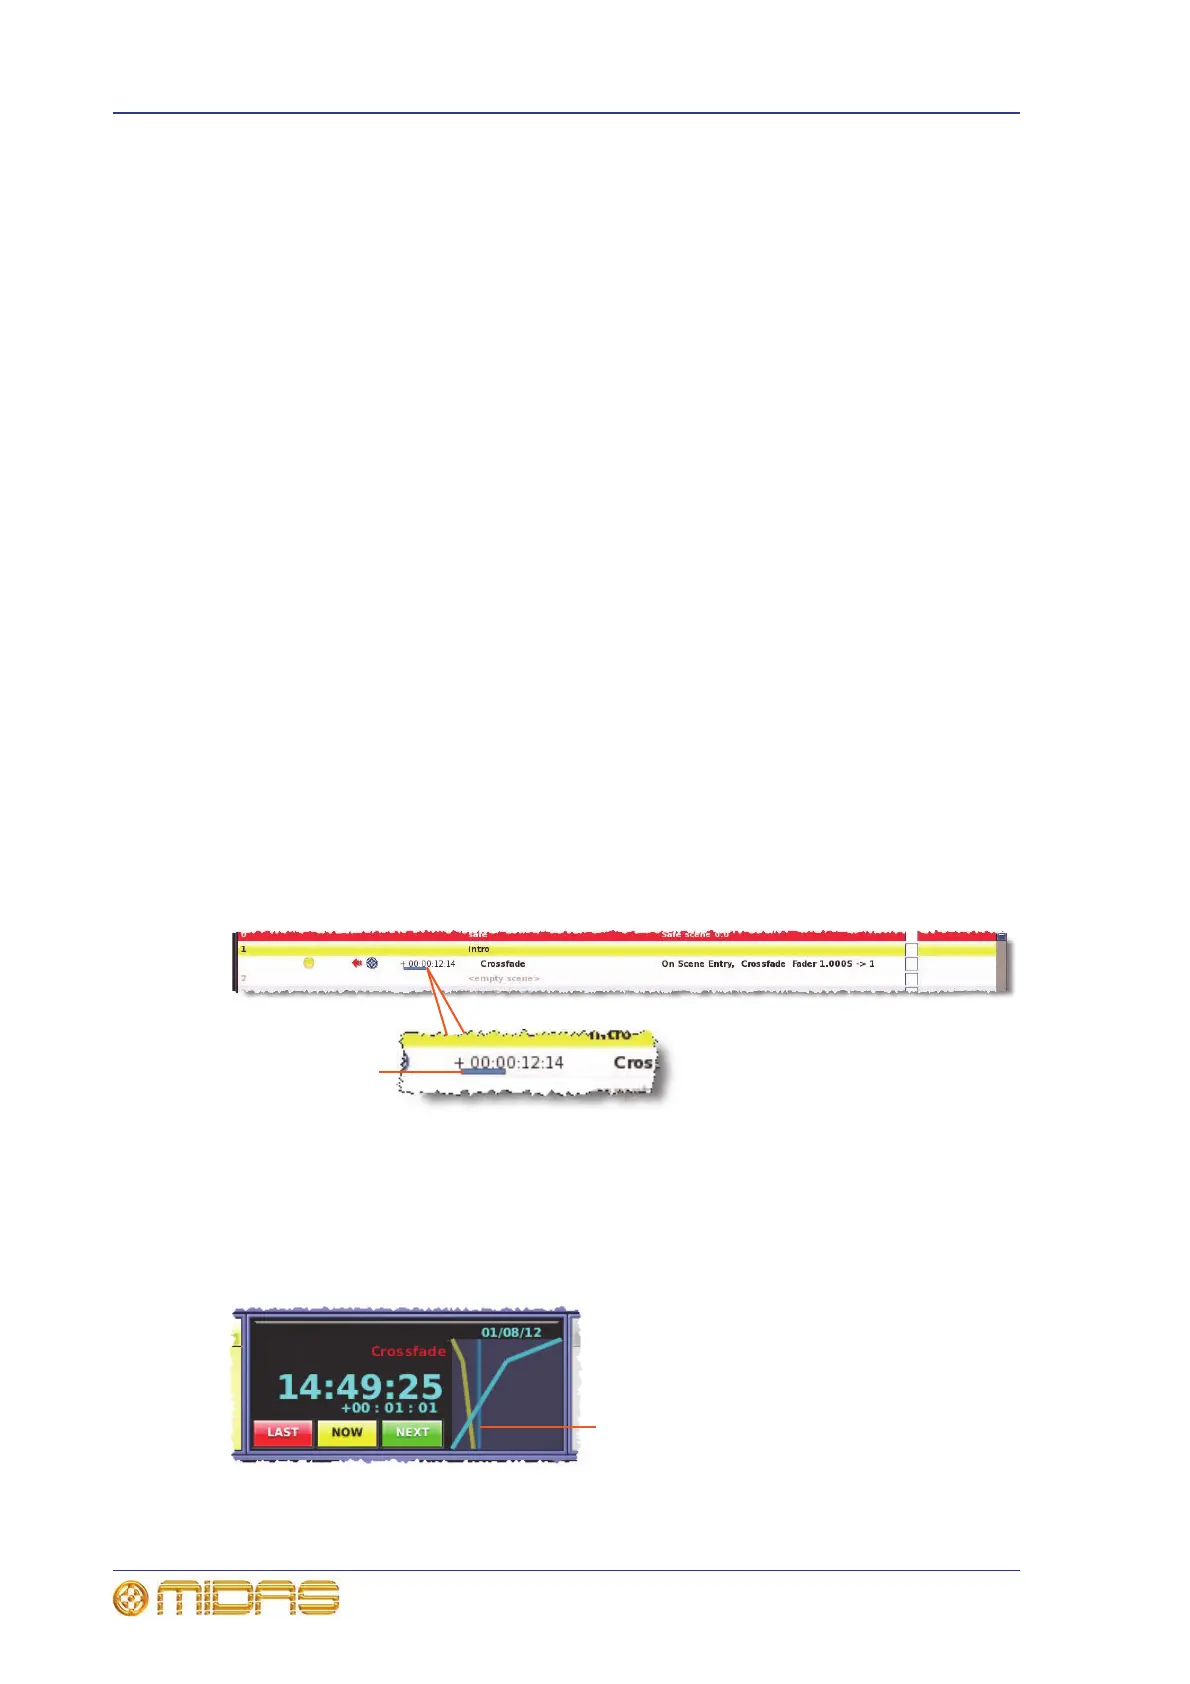
In the cue list, a blue status bar in a crossfade event will show the progress of a time
offset
After the time offset has finished, the crossfade will start; this will be either a down or
up crossfade, depending on the current control level. During the crossfade, the control
level will alter at the configured rate, shown on both the control surface and GUI.
Progress is shown in real time on the Automation screen.
Typical crossfade graph in the Automation screen. The blue vertical bar will travel
from left to right according to the time elapsed and at the configured crossfade rate.
 Loading...