45
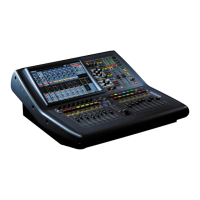
PRO1 Live Audio System
Operator Manual
Chapter 8: Patching
This chapter describes the patching function of the PRO1.
Introduction
The patching function is fundamental to PRO1 operation as, until the I/Os have been
correctly patched, you won’t get any audio. Patching is done entirely at the Patching
screen, which is a GUI menu option. This screen lets you carry out all the routing
requirements of the PRO1 by providing an easy-to-use interface, where you can select
your source and destination patching options, facilitated by a panel of function buttons.
Additionally, the Patching screen lets you set up any other devices connected within
the system. For example, you can adjust the analogue gain, select +48V phantom
voltage etc.
Terms used in PRO1 patching
• Checkpoint: A patching data store point, created by clicking CHECKPOINT.
• Destination: The patch connector to which a signal is routed.
• Device: A diagram on an I/O tab representing a physical rack unit, such as a
line I/O, mic splitter, DN9696, AES50 etc.
• Drag: A method of selecting a block of source patch connectors in the From section
of the Patching screen (see “To select a block of patch connectors in the From
section” on page 63).
• From section: The left portion of the Patching screen, which contains the source
patch connectors.
• Patch connector: A patching point on any of the tabs. For example, an XLR
connector, bus, sidechain compressor, etc.
• Patching: The process of routing a channel/signal from a source to a destination(s).
• Source: The patch connector from which a signal is routed.
• Tab: A ‘sheet’ in the From and To sections that contains a specific group of patch
connectors.
• To section: The right portion of the Patching screen, which contains the
destination patch connectors.
About the Patching screen
The Patching screen has two main areas: a function button panel towards the top of
the screen and a patching area below. The function buttons provide the required
patching functionality and allow I/O tab devices to be set up. The patching area
provides access to all the patch connectors.
The patching area is split equally into two independent sections, called From and To,
which contain the source and destination patch connectors, respectively. The patch
connectors are grouped on tabs according to type. Only one tab per section will be
visible at any time.
 Loading...