2
Installation and Connections
Setting Up Ethernet
FQ2 User’s Manual
53
2-5 Setting Up Ethernet
Connecting to Sensors from the Touch Finder
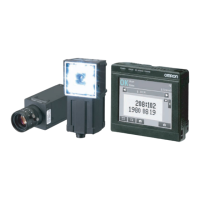
Configurations Consisting of Only Sensors and the Touch Finder
When only Sensors and a Touch Finder are used, IP addresses are automatically assigned. No settings are
required to use Ethernet.
Connections on Existing Networks
If a Sensor or Touch Finder is connected to a network where a PLC or computer is already connected, the
Ethernet settings must be made compatible with the existing network.
Set the IP addresses with one of the following methods.
● Setting Fixed IP Addresses
• Sensor
(Setup Mode) − [Sensor settings] − [Network] − [Ethernet] − [IP address setting]
1 Press [Fixed].
2 Set the IP address and subnet mask according to the network settings.
• Touch Finder
(Setup Mode) − [TF settings] − [Ethernet] − [IP address setting]
1 Press [Fixed].
2 Set the IP address and subnet mask according to the network settings.
● Using a DHCP Server
• Sensor
(Setup Mode) − [Sensor settings] − [Network] − [Ethernet] − [IP address setting]
1 Press [DHCP].
• Touch Finder
(Setup Mode) − [TF settings] − [Ethernet]] − [IP address setting]
1 Press [DHCP].
• If you connect the Touch Finder or PC Tool to a Sensor on a different network through a router, set fixed IP
addresses.
• If you use an EtherNet/IP connections, set fixed IP address for the Sensors.
Note
 Loading...
