3.27
ENGINE / COOLING
3
9924125 - 2013 RANGER RZR / RZR S / RZR 4 Service Manual
© Copyright 2012 Polaris Sales Inc.
Rocker Arms
1. Remove the valve cover.
2. Mark or tag rocker arms in order of disassembly to
ke
ep them in order for reassembly.
3. Inspect the wear pad at the valve end of the rocker
a
rm for indications of scuffing or abnormal wear. If the
pad is grooved, replace the rocker arm.
NOTE: Do not attempt to true this surface by
g
rinding.
4. Check the rocker arm pad and fulcrum seat for
ex
cessive wear, cracks, nicks or burrs.
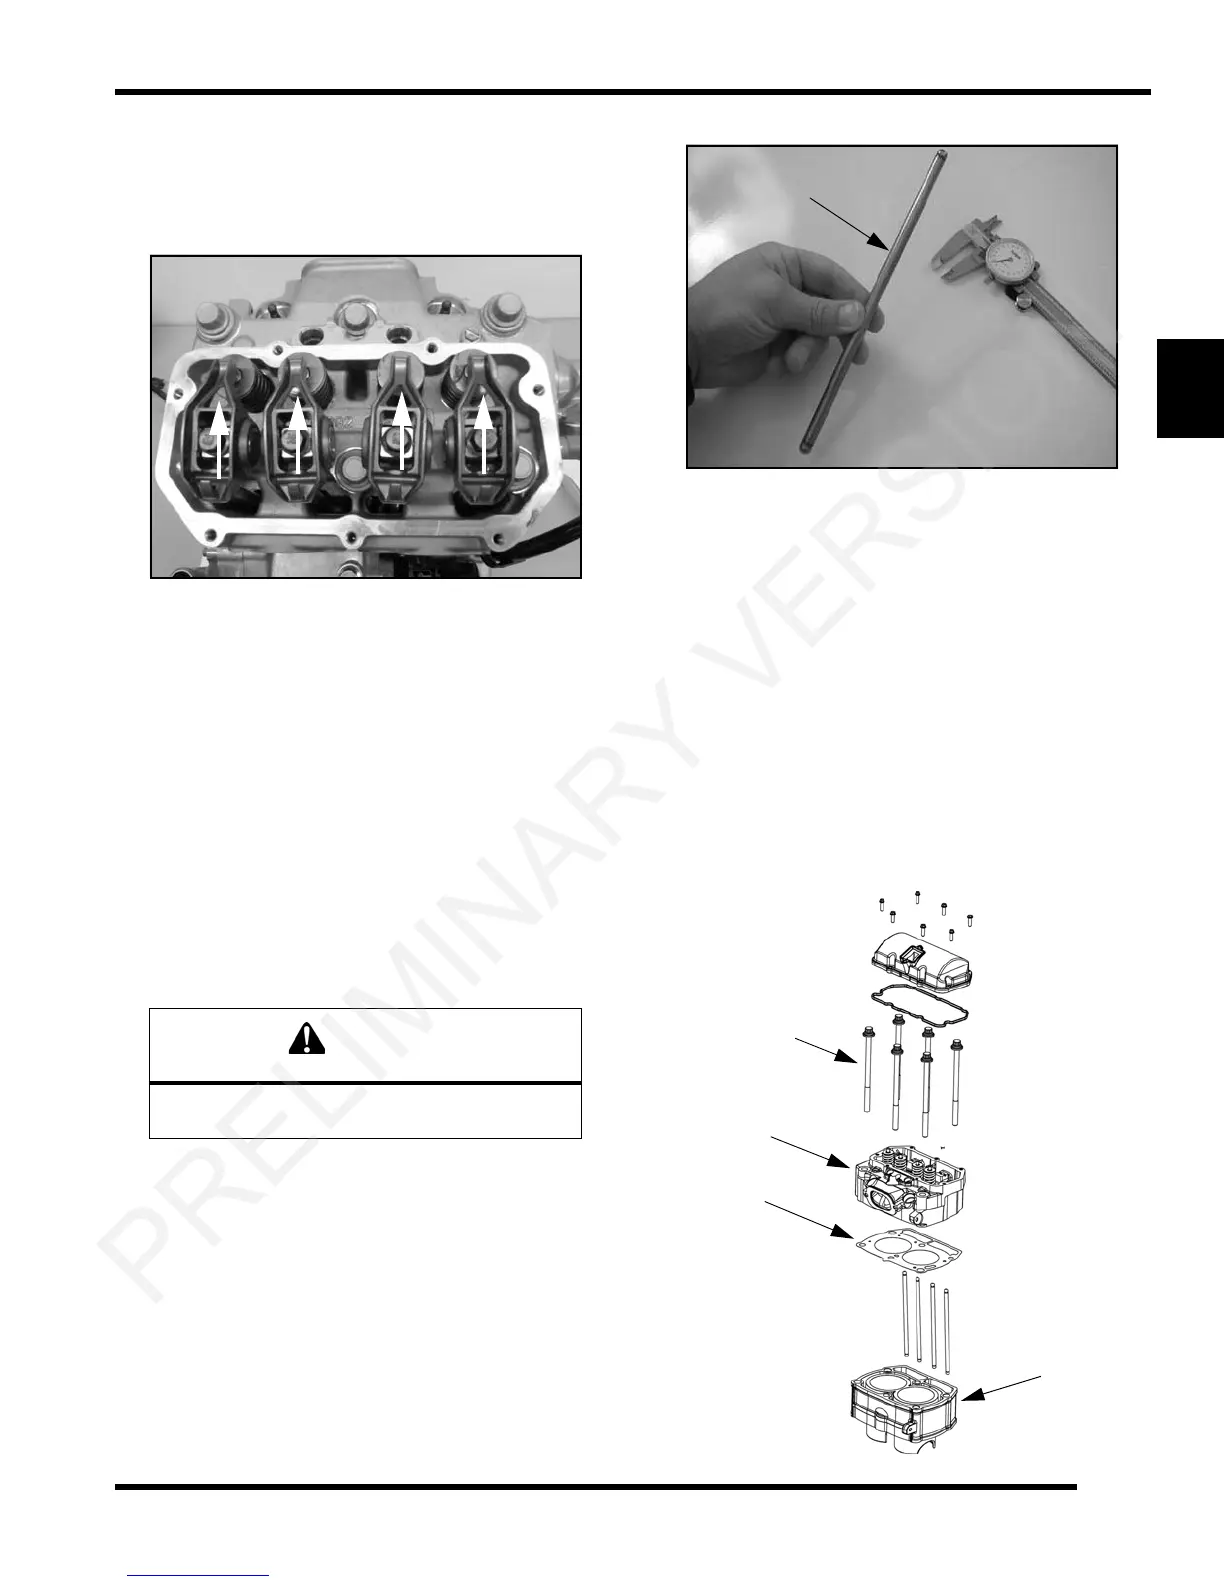
Push Rods
1. Clean push rods (A) in a suitable solvent. Blow dry
push rods with compressed air.
2. Use compressed air to confirm the oil passage is clear
in
the center of the push rod.
3. Check the ends of the push rods (A) for nicks,
g
rooves, roughness or excessive wear.
4. The push rods (A) can be visually checked for
straig
htness while they are installed in the engine by
rotating them with the valve closed. Push rods can
also be checked with a dial indicator or rolled across
a flat surface to check for straightness.
5. If the push rod (A) is visibly be
nt, it should be replaced.
Cylinder Head Removal
NOTE: The cargo box assembly and the upper frame
bolt-in brace must be removed to allow enough
clearance to remove all the cylinder head bolts.
Refer to Chapter 5 for removal procedures.
1. Loosen the six cylinder head bolts (A) evenly 1/8 turn
e
ach in a criss-cross pattern until loose.
2. Remove bolts (A) and tap cylinder head (B) lightly with
a
soft face hammer until loose. CAUTION: Tap only
in reinforced areas or on thick parts of cylinder head
casting to avoid damaging the head or cylinder.
3. Remove cylinder head (B) and head gasket (C) from
the
cylinder (D).
Always wear safety glasses when working with
compressed air to prevent personal injury.
 Loading...