EasyManuals Logo

Ricoh D127 User Manual

Ricoh D127
553 pages
To Next Page IconTo Next Page
To Previous Page IconTo Previous Page
Page #43 background imageLoading...
Page #43 background image
Copier
SM 2-11 D127/D128
Installation
Installation Procedure
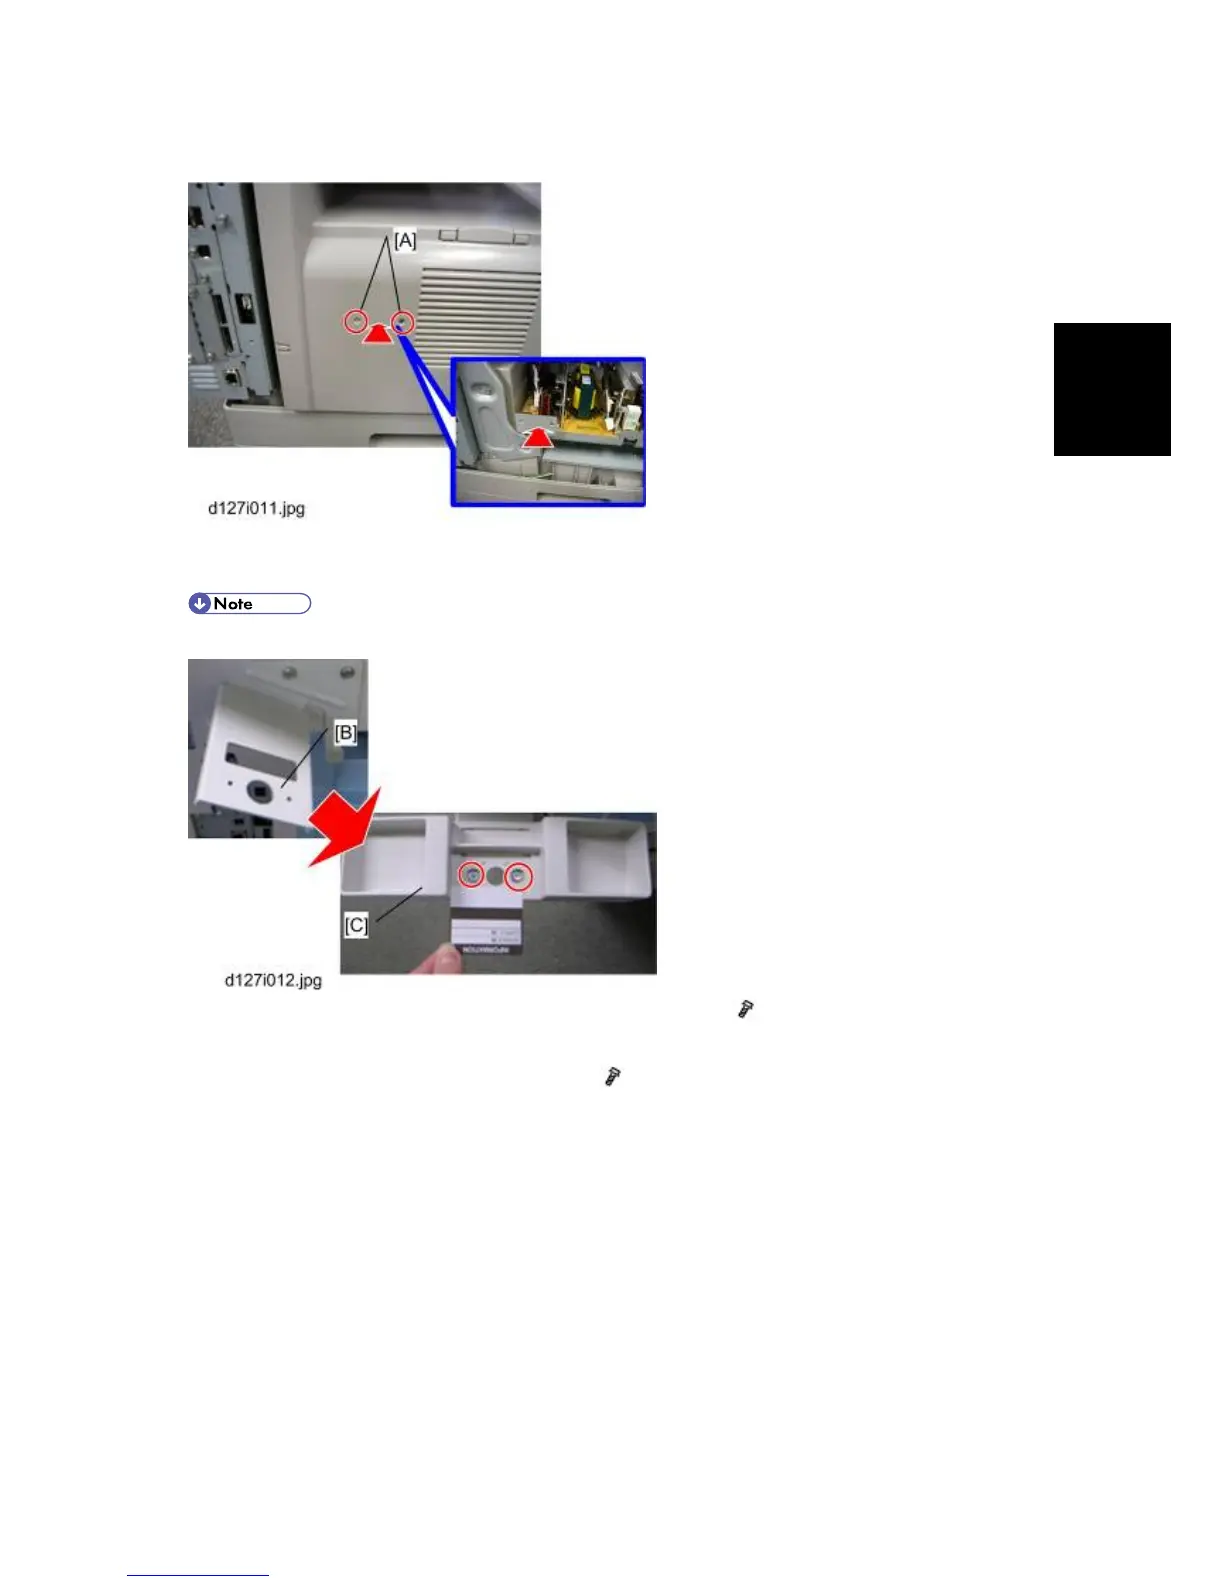
1. Make two holes [A] through which the screws fasten the handset bracket to the main machine.
(Just penetrate with a screw driver)
ï‚§ You should detach the tray cover and make holes on it. Or you might damage the PSU.
2. Attach the handset bracket [B] to the side of the tray cover. (
x 2)
3. Remove the label from the handset cradle [C].
4. Attach the cradle [C] to the handset bracket (
x 2).
5. Reattach the label.
6. Set the handset on the cradle.
7. Connect the core attached handset cable to the "TEL" jack.

Table of Contents

Other manuals for Ricoh D127

Questions and Answers:

Question and Answer IconNeed help?

Do you have a question about the Ricoh D127 and is the answer not in the manual?

Ricoh D127 Specifications

General IconGeneral
BrandRicoh
ModelD127
CategoryAll in One Printer
LanguageEnglish

Related product manuals