Scanner Unit
D127/D128 4-8 SM
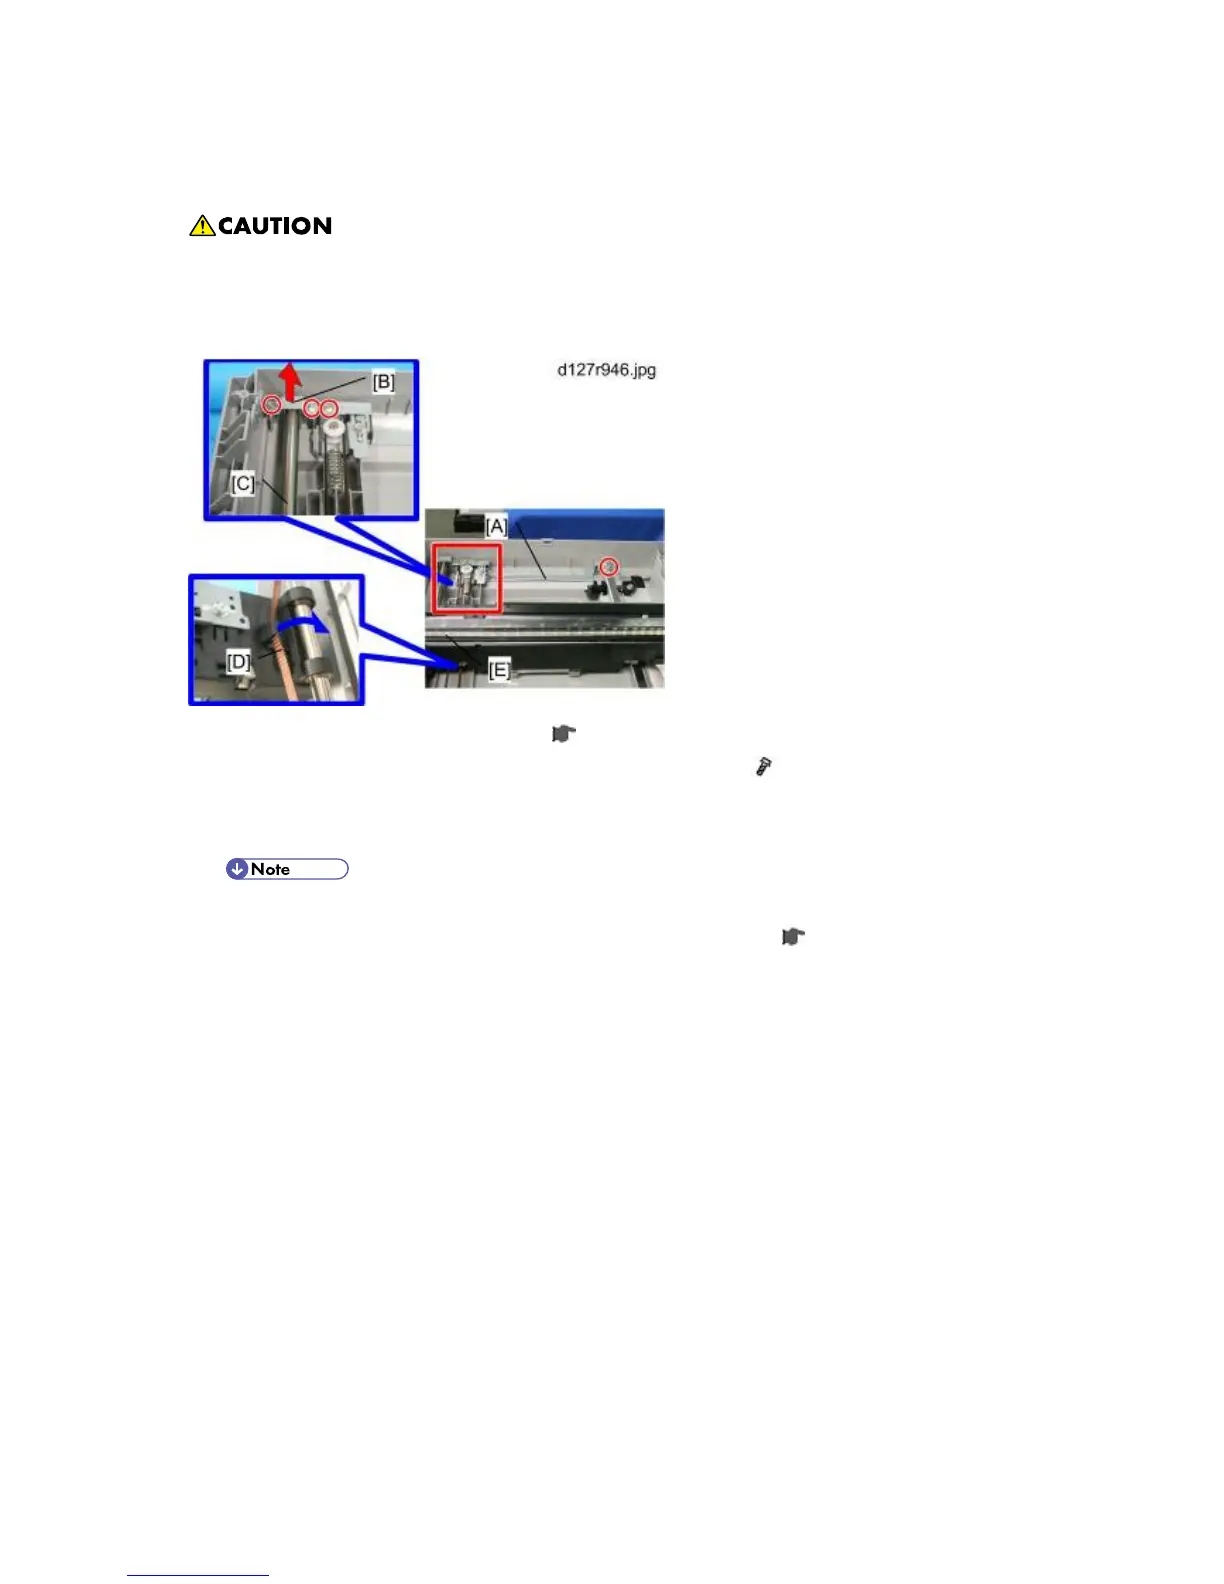
4.4.2 LED UNIT
Do not disassemble the LED Unit. The LED Unit is precision adjusted before shipment.
Do not touch the screws on the CCD. The CCD is precision adjusted before shipment.
Do not wipe the oil coated on the guide rod off. The oil doesn't exist in service parts.
1. Scanner Cover and Exposure Glass (
p.4-7 " Scanner Cover and Exposure Glass")
2. Remove the long bracket [A] and the guide rod bracket [B]. (
x 4)
3. Lift the guide rod [C] as the red arrow shows.
4. Put the belt [D] off as blue arrow shows to release the LED Unit [E] from the guide rod.
Do not loosen the paint-locked screws holding the lens in place.
After installing a new lens, carry out copy adjustments (
p.4-57 "Adjusting Copy
Image Area").
 Loading...