EasyManuals Logo

Ricoh D127 User Manual

Ricoh D127
553 pages
To Next Page IconTo Next Page
To Previous Page IconTo Previous Page
Page #99 background imageLoading...
Page #99 background image
PCU and Quenching Lamp
SM 4-17 D127/D128
Replacement
and
Adjustment
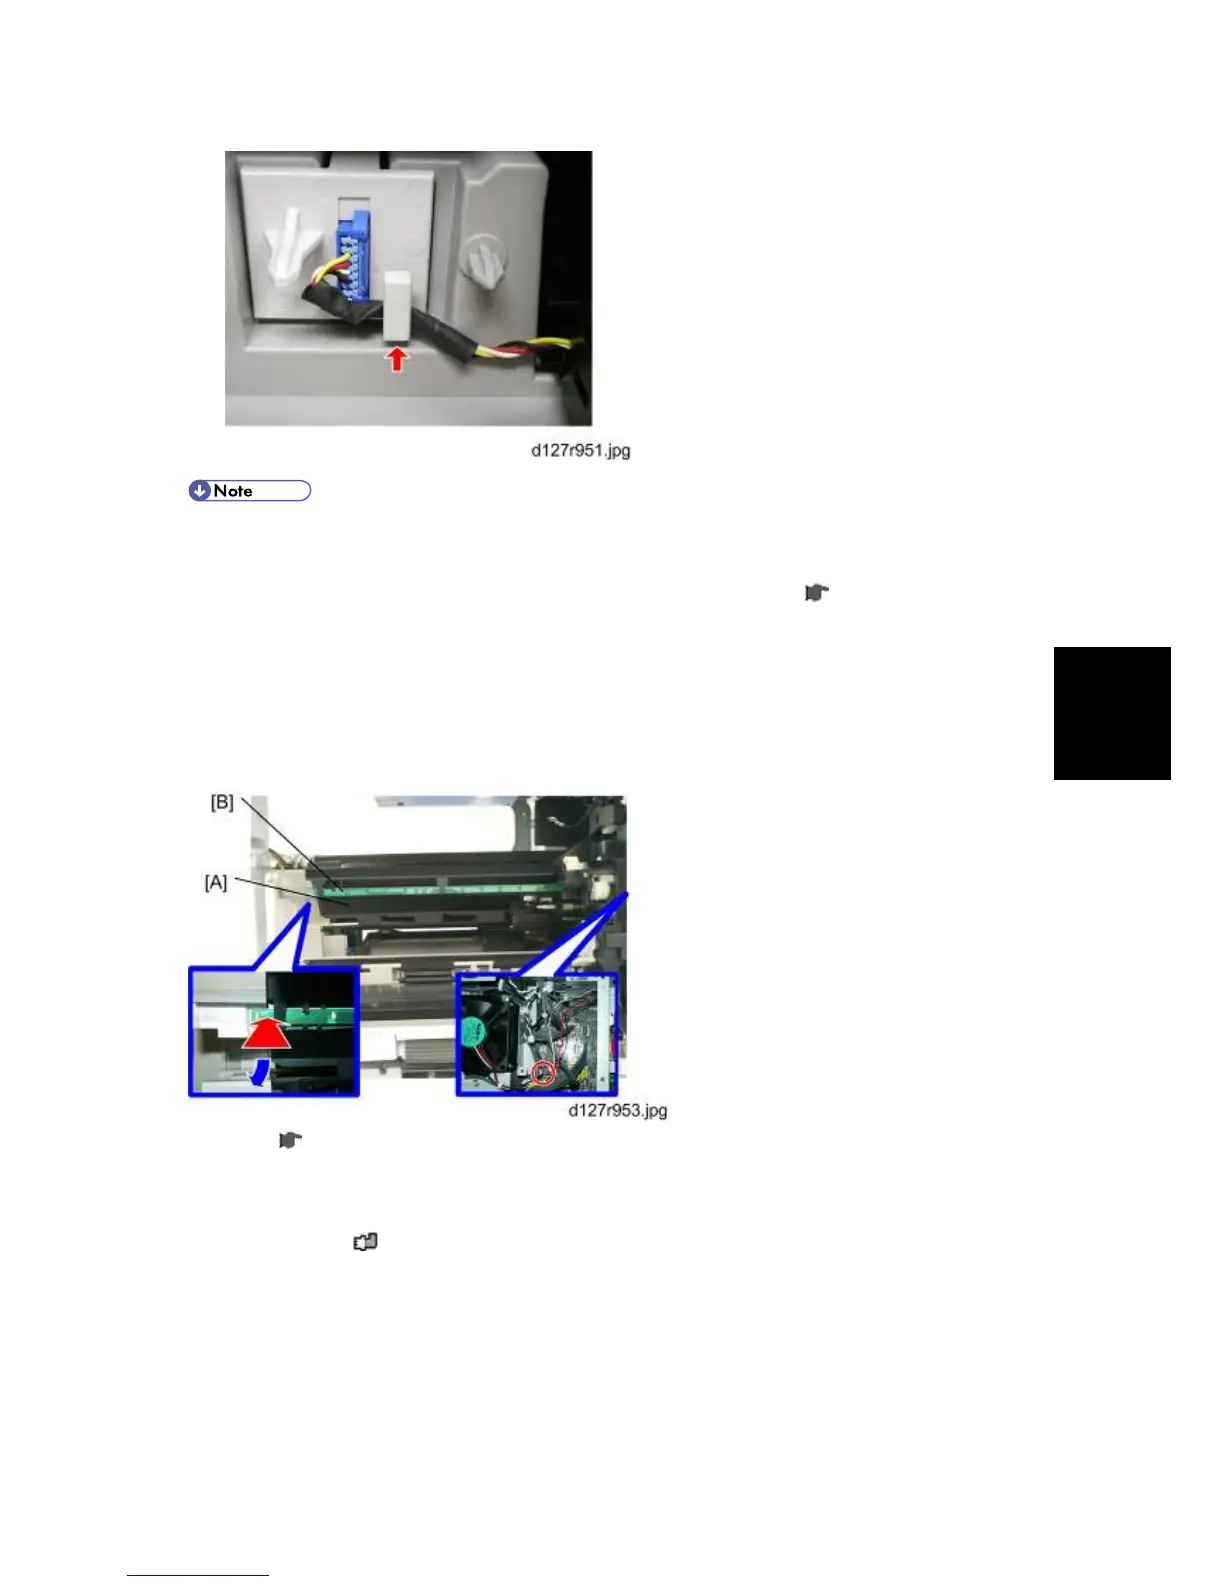
When reinstall the PCU, be sure to hook the PCU connector cable as shown above so as
not to damage the cable.
5. When having installed a new PCU, remove the Styrofoam and tags (
p.2-5 "Copier" in the
chapter "Installation").
Initialization
After replacement, Do “SP2801-001” to initialize the copier setting for PCU.
4.6.2 QUENCHING LAMP
1. PCU (
p.4-16 "PCU")
2. Remove the Lamp Shading [A] (Adhered)
3. Put the Quenching lamp [B] out as the blue arrow shows on pushing carefully as the red
arrow shows. (
x 1)

Table of Contents

Other manuals for Ricoh D127

Questions and Answers:

Question and Answer IconNeed help?

Do you have a question about the Ricoh D127 and is the answer not in the manual?

Ricoh D127 Specifications

General IconGeneral
BrandRicoh
ModelD127
CategoryAll in One Printer
LanguageEnglish

Related product manuals