OPTICS
A251/A252 5-2 SM
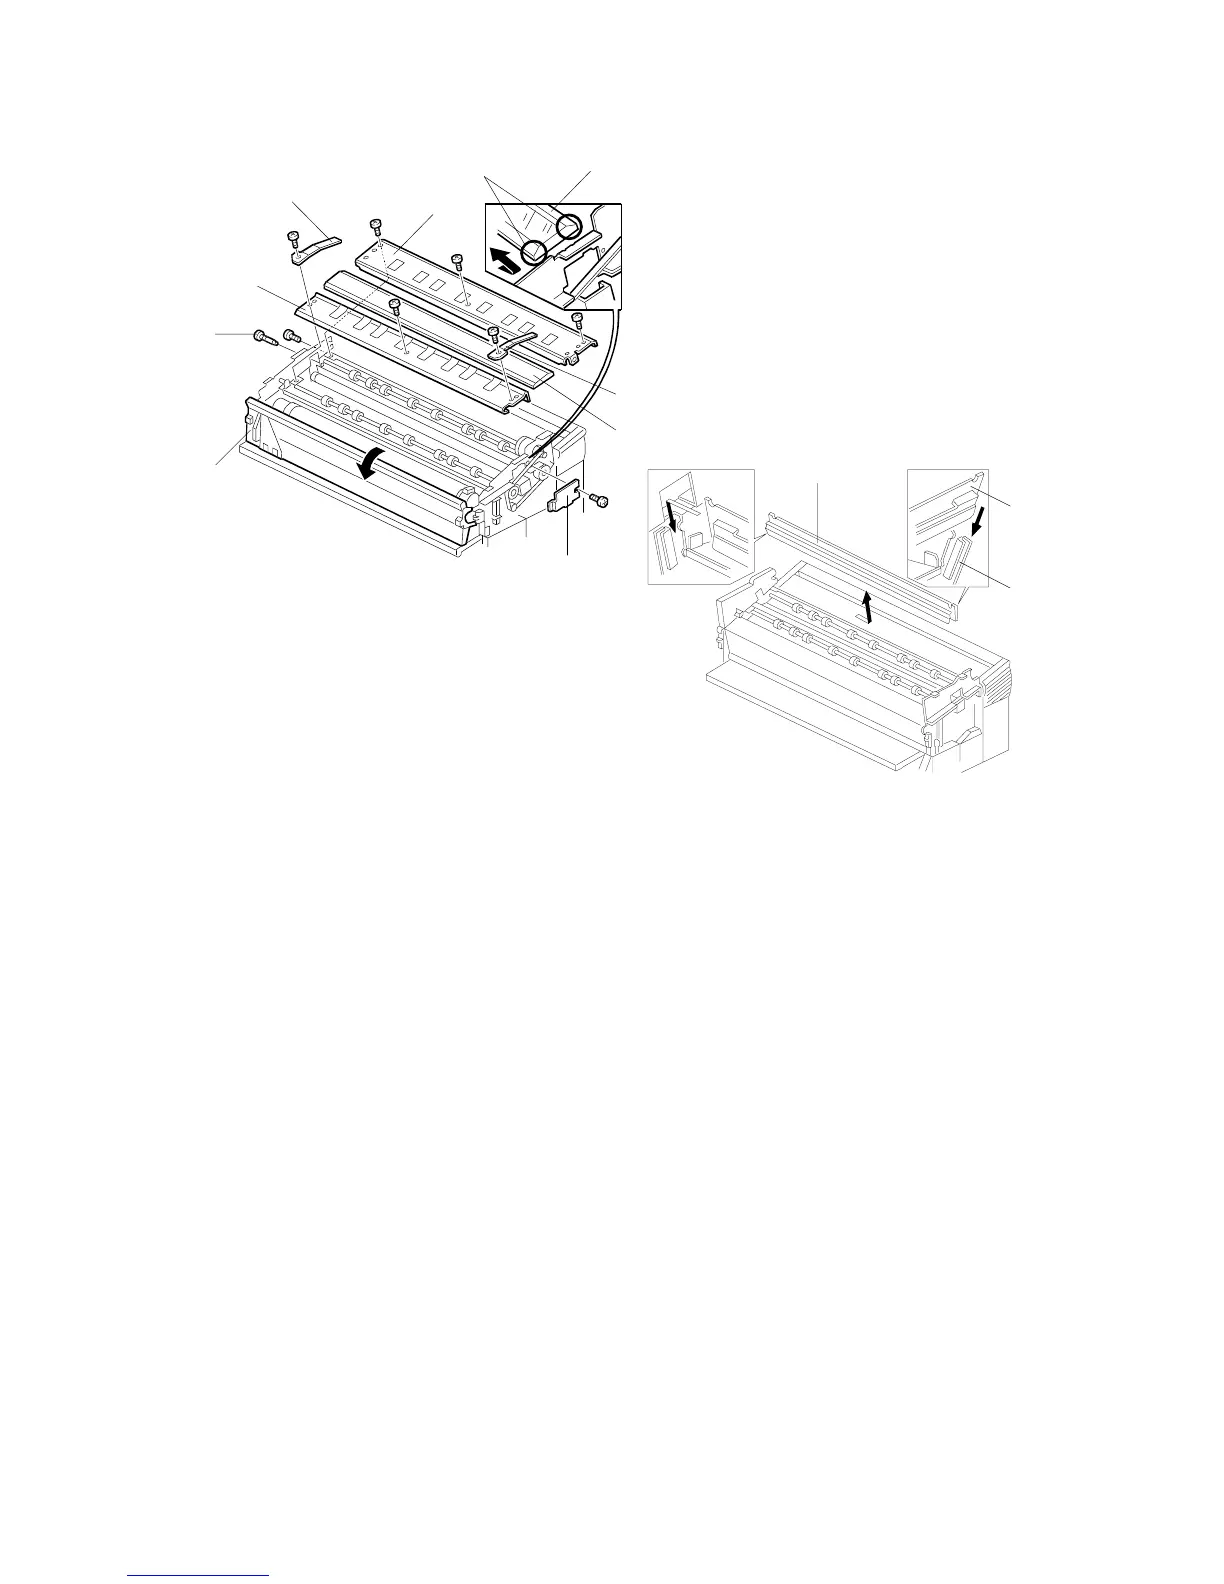
5.2.2 EXPOSURE GLASS REMOVAL (A252 ONLY)
1. Remove the original feed unit.
2. Remove the exposure glass bracket [A] (1 screw).
3. Remove the exposure glass stoppers [B] (2 screws).
4. Remove the exposure glass [C] by sliding it out to the right side and lifting up
the left side as shown.
NOTE:
Make sure that the edge cut side [D] of the exposure glass is towards the
upper side when reassembling.
5.2.3 FIBER OPTICS ARRAY REMOVAL (A252 ONLY)
1. Remove the exposure glass.
2. Open the toner supply cover [E] and remove the front original guide plate [F] (1
screw).
3. Remove the rear original guide plate [G] (4 screws and 1 pin [H]).
4. Lift up the fiber optics array [I] and remove it from the left side by sliding it out to
the right side as shown.
NOTE:
When reassembling, be careful not to damage the right side [J] of the
fiber optics array by touching the optics side plate [K].
A252R510.WMF
A252R502.WMF
[D]
[H]
[F]
[B]
[G]
[E]
[C]
[C]
[B]
[A]
[I]
[K]
[J]
 Loading...