FUSING
A251/A252 5-8 SM
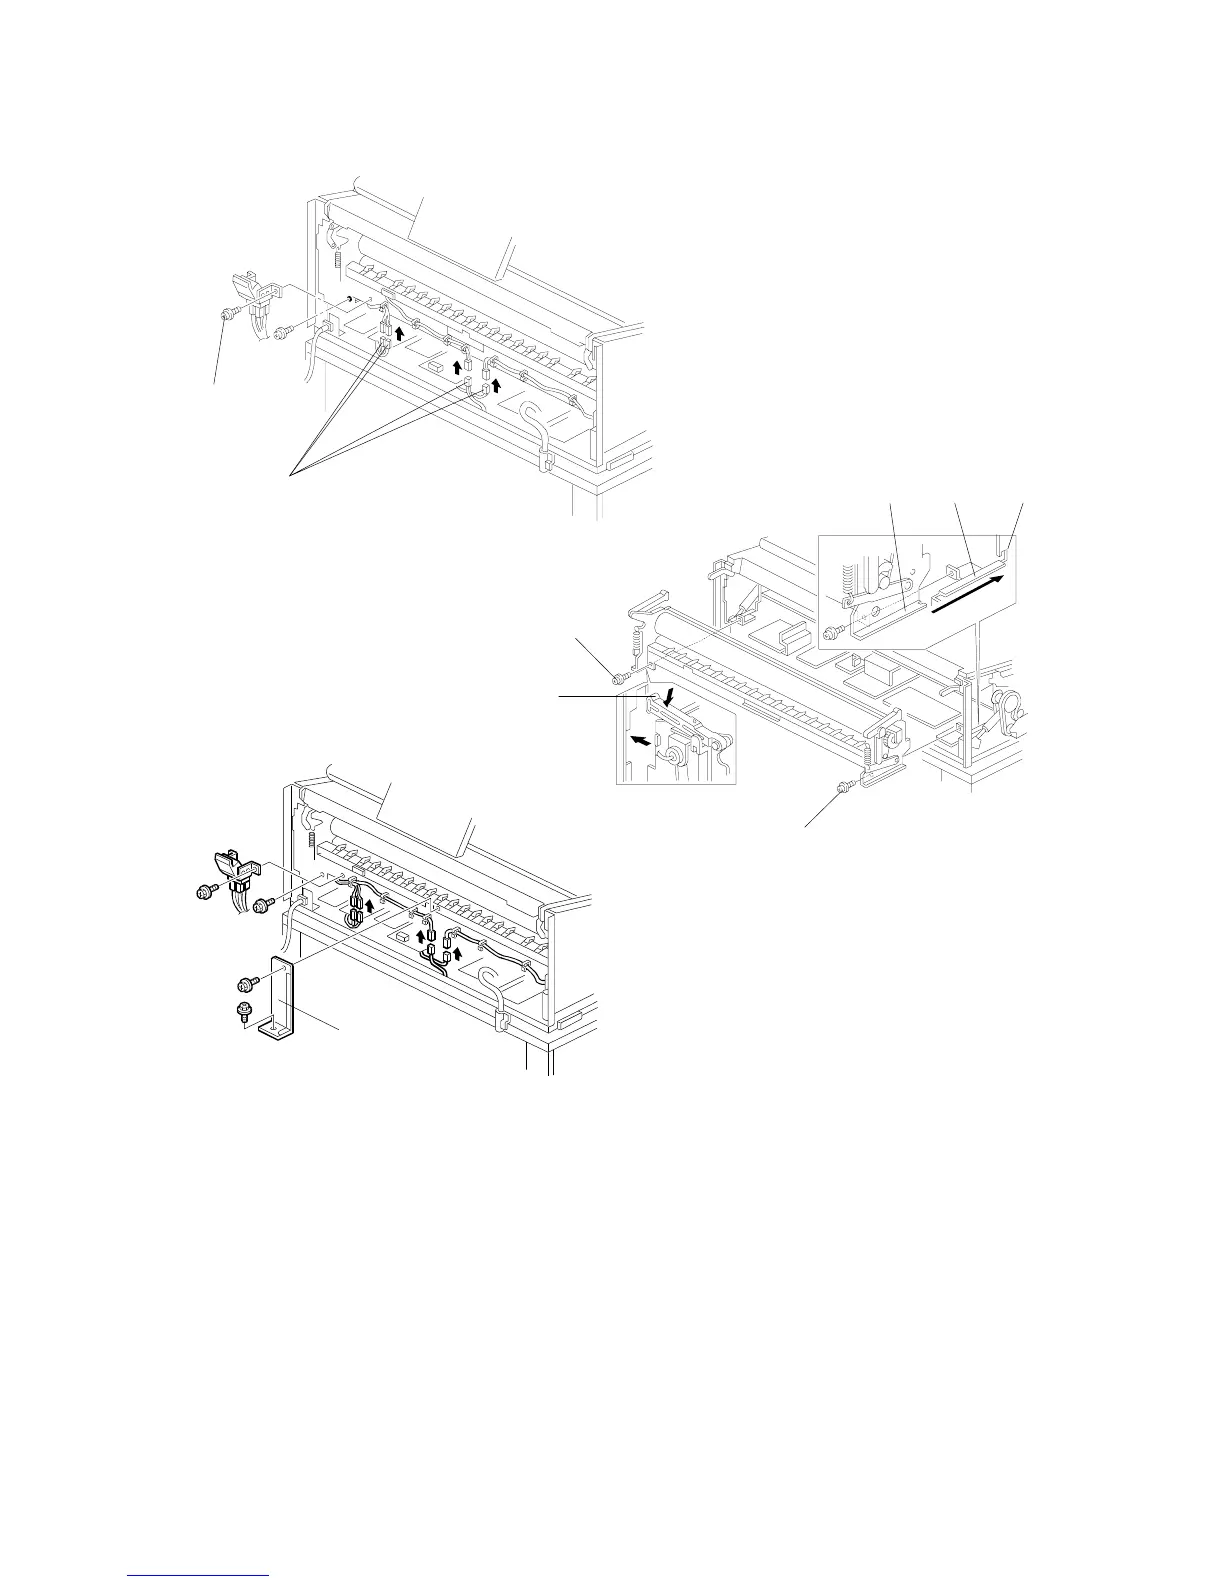
5. Disconnect the connectors [A].
6. Remove the screw [B] fixing the safety switch bracket.
7.
220 ~ 240 V version only:
Remove the 2 screws [C] and bronze plate [D] (2 screws).
8. While pressing down the fusing pressure release bar [E], pull out the fusing
unit.
NOTE:
When reinstalling the fusing unit, press down the fusing pressure release
bar [E], set the fusing unit on the guides [F] and align the cuts [G] to the
side plates [H] at both ends.
A252R507.WMF
A252R506.WMF
A252R508.WMF
[A]
[D]
[B]
[C]
[E]
[C]
[F][G] [H]
 Loading...