EasyManua.ls Logo

Roland EGX-350 User Manual

Roland EGX-350
124 pages
To Next Page IconTo Next Page
To Previous Page IconTo Previous Page
Page #103 background imageLoading...
Page #103 background image
101
Chapter 7 Troubleshooting
7-2 Troubleshooting (Operation)
The power does not come on
Hasn’t the emergency stop button been pressed?
Pressing the emergency stop button automatically turns o the
power. Cancel the emergency stop.
P. 38, “To Cancel an Emergency Stop
Initialization is not performed or initialization fails
Isn’t the cover open?
Keep the cover closed during an initialization. If the cover is open,
this machine stops the initialization on the way.
Isn’t a foreign object caught on the spindle or XYZ-
axes?
Check for foreign objects on the spindle or XYZ axes and remove
it.
Operations are ignored.
Is the cable connected?
Connect the cable securely.
P. 30, “Cable Connections”
Isn’t the cover open?
While the cover is open, some operations are restricted. Close
the cover.
Hasn’t the Emergency Stop button been pressed?
When the Emergency Stop button is pressed, machine operation
is not possible. Release the Emergency Stop button.
P. 38 “To Cancel an Emergency Stop
Isn’t operation paused?
When the machine is paused, cutting stops and some operations
are restricted. Cancel the paused state.
P. 49, “Pausing and Resuming Cutting”
Isn’t a large amount of cutting waste present?
Clean away any cutting waste. Clean especially carefully inside
the spindle cover in particular.
P. 97, “Cleaning Around the Spindle”
Is the handy panel connected correctly?
Before inserting of removing the connector cable for the handy
panel, switch o the power to the machine. The connection is
not detected if made while the power is on.
P. 30, “Cable Connections, p. 40, “ Starting and Quitting”
Is the driver installed correctly?
If the connection to the computer is not made in the sequence
described, the driver may fail to be installed correctly. Check
again to ensure that the connection was made using the cor-
rect procedure.
“Roland Software Package Software Guide”
Are the parameter settings for communication with
the computer correct?
The machine cannot communicate with the computer if the
parameters for communication with the computer are not set
correctly. Switch the power o and back on, revise the settings
such as the communication parameters for the pro gram youre
using to make sure the settings are correct, then redo the opera-
tion from the beginning.
P. 85, “Submenus”
Isn’t an error message displayed in the display
screen?
P. 104, “Responding to an Error Message
Abnormal cutting is performed
Is the location of the origin set correctly?
Check whether the origin has been set correctly. An incorrect ori-
gin location may result in cutting at an unintended position.
P. 56 through 74, “Cutter Installation Method 1” through “Cutter
Installation Method 4, and p. 75, “Setting the XY Origin Point (Home
Position)”
The spindle doesn’t rotate during engraving.
Is [REVOLUTION] set to the “ON” setting?
Go to the [OTHERS] menu and set [REVOLUTION] to “ON.
P. 85 , “Submenus
Descent doesn’t stop (when automatic Z control is on).
Switch o the main power and shut down the machine.
Next, make sure that automatic Z control is set to “ON” and that
the lock lever is at the
or position. If the same problem
persists even when the setting for automatic Z control and the
position of the lock lever are correct, the cause may be a motor
error or the like. Switch o the main power to shut down the
machine, and contact your authorized Roland DG Corp. dealer.
P. 40, “Starting and Quitting, p. 82, “The Position of the Lock Lever,
p. 90, “Others Menu”

Table of Contents

Question and Answer IconNeed help?

Do you have a question about the Roland EGX-350 and is the answer not in the manual?

Roland EGX-350 Specifications

General IconGeneral
Drive SystemStepper motor
InterfaceUSB
Engraving Area350 x 300 mm
Engraving Area (mm)300 x 210 mm
Software Resolution (mm)0.01 mm/step
Spindle Speed7, 000 rpm
Power SupplyAC 100 - 240 V, 50/60 Hz
Acoustic Noise65 dB (A) or less (when not cutting)
Operating Temperature5 - 40 °C
Operating Humidity35 to 80% (no condensation)
External Dimensions (mm)680 x 580 x 430

Summary

Chapter 1 Getting Started

1-1 Machine Highlights

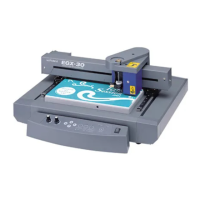
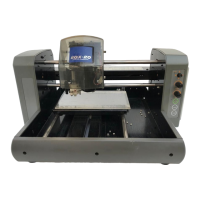
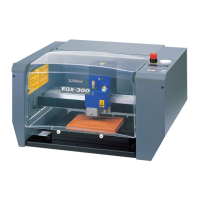
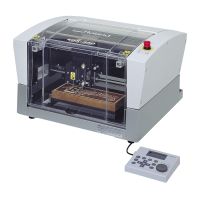
Overview of the machine's key features and capabilities.

1-2 Part Names and Functions

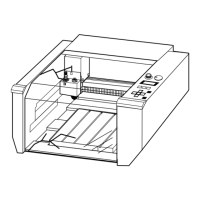
Identifies and explains the different parts of the machine.

Chapter 2 Installation and Setup

2-1 Checking the Included Items

Verifies all components received with the machine are present.

2-2 Installation

Detailed instructions for setting up and installing the machine.

2-3 Cable Connections

Guides on connecting essential cables for machine operation.

2-4 Selecting the Language

Procedure for choosing the display language on the machine.

2-5 Before Starting Operations

Preparation steps before initial machine operation, including spindle run-in.

Chapter 3 Basic Operation

3-1 Types of Emergency Stops to Ensure Safety

Explains different emergency stop methods and their functions.

3-2 Starting and Quitting

Instructions on how to power on and shut down the machine.

3-3 Using the Handy Panel

Details the functions and operation of the machine's handy panel.

3-4 Moving the Cutter

Covers manual and automatic movement of the cutting tool.

3-5 Spindle Operation

Instructions for starting, stopping, and adjusting spindle speed.

3-6 Pausing and Stopping Cutting

Procedures for pausing, resuming, or stopping the cutting process.

Chapter 4 Engraving

4-1 Flow of Engraving Operations

Outlines the sequence of steps for performing engraving tasks.

4-2 Mounting a Workpiece

Guides on how to properly secure materials onto the workpiece table.

4-3 Selection of the Cutter (Usage Examples)

Recommendations for choosing the right cutter for different materials.

4-4 Cutter Installation Method 1 (With Nose Unit)

Step-by-step guide for installing cutters with a nose unit.

4-8 Setting the XY Origin Point

Procedure to define the starting point for engraving operations.

4-9 Performing Engraving

Final steps to commence and manage the engraving process.

Chapter 5 Feature reference

5-1 Attaching the Vacuum Adapter for Chip Cleaning

Instructions for connecting a vacuum adapter for waste removal.

5-2 The Position of the Lock Lever

Explains the function and positioning of the lock lever.

5-3 Surface Leveling of the Workpiece Table

How to adjust the workpiece table for optimal flatness.

5-4 Menu List

Overview of the machine's menu structure and navigation.

5-5 Description of Menu Items

Detailed explanations of various menu options and settings.

Chapter 6 Maintenance

6-1 Daily Care

Routine cleaning and maintenance tasks for daily upkeep.

6-2 Maintenance and Inspection

Procedures for periodic maintenance and inspection of machine parts.

Chapter 7 Troubleshooting

7-1 Troubleshooting (Engraving)

Solutions for common engraving-related issues and problems.

7-2 Troubleshooting (Operation)

Guidance for resolving operational failures and malfunctions.

7-3 Responding to a Message

Explains how to interpret and act on machine display messages.

7-4 Responding to an Error Message

Provides steps to address and resolve machine error messages.

Chapter 8 Appendix

8-1 Examples of Settings for Cutting Parameters

Suggested parameters for various workpiece materials and cutters.

8-3 Interface Specifications

Technical details for serial and expansion connectors.

8-4 Main Unit Specification

Technical specifications and dimensions of the main machine unit.

Related product manuals