(a) Apply a light of engine oil on the threads and under
the nuts of the connecting rod cap.
(b) Install and alternately tighten the nuts of the conne–
cting rod cap in several passes.
Torque: 25 N–m (250 kgf–cm, 18 ft–lbf)
If any one of the connecting rod cap nuts does not
meet the torque specification, replace the cap nut.
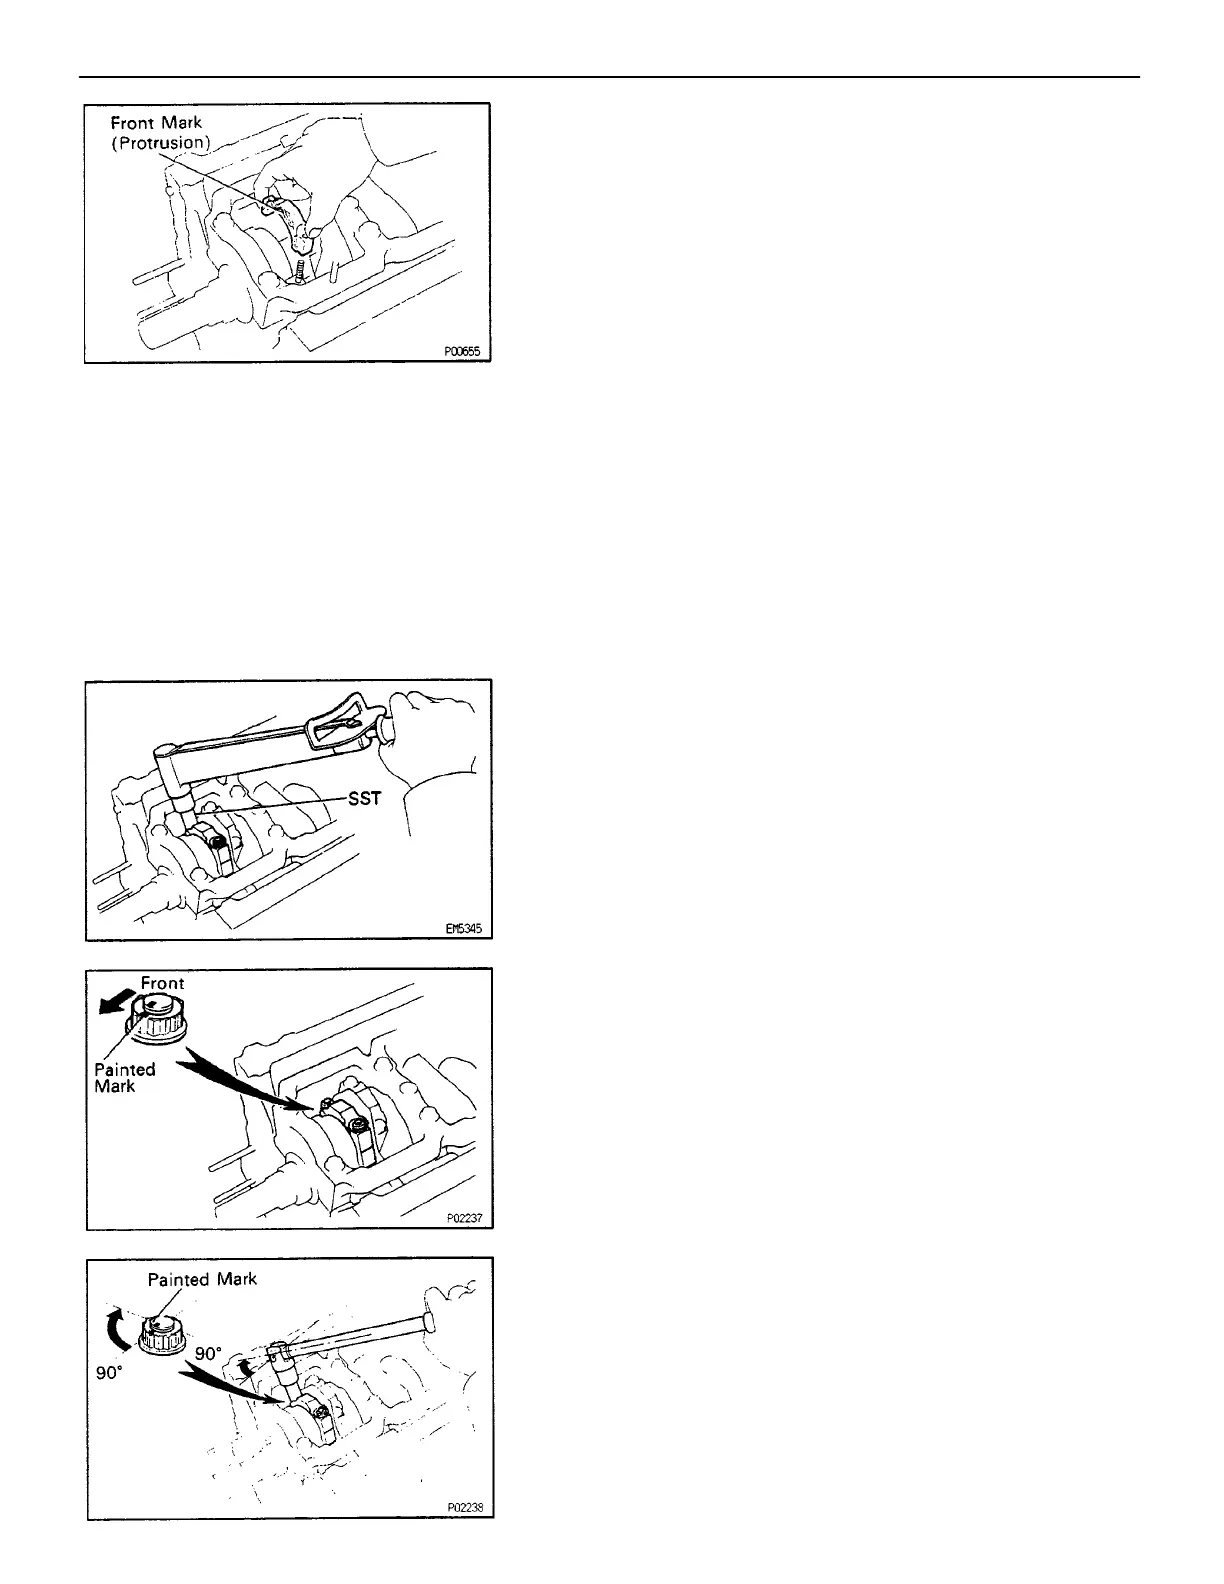
B. Install connecting rod cap nuts
HINT:
• The connecting rod cap nuts are tightened in two
progressive steps (steps
(b) and (d)).
• If any connecting rod bolt is broken or deformed,
replace it.
7. INSTALL CONNECTING ROD CAPS
A. Place connecting rod cap on connecting rod
(a) Match the numbered connecting rod cap with the
connecting rod.
(b) Install the connecting rod cap with the front mark
facing forward.
(d) Retighten the connecting rod cap nuts 90 as shown.
(e) Check that the painted mark is now at a 90 angle to
the front.
(f) Check that the crankshaft turns smoothly.
(c) Mark the front of the connecting rod cap nut and bolt
with paint.
–ENGINE ENGINE MECHANICAL
EG2–120
 Loading...