Draining
1
Before staring work, ensure the motorcycle is
1
stabilised and-adequately supported. This will help
prevent it from falling and causing injury to the
operator or damage to the motorcycle.
1.
Remove the fork (see page 13-4).
2.
Remove the top cap assembly (see page 13-7).
3.
Remove the fork spring (see page 13-7).
4.
Holding the inner and outer tubes together, invert
the fork and pour out the fork oil into a suitable
container. Pump the damper rod to remove all
the oil.
Oil Refilling
The oil level is measured from the upper surface of
the fork outer tube, with the fork fully compressed and
the spring removed.
Fork oil level (fully compressed)
1.
Fill the fork with the grade of oil specified in the
fork oil table, to a level above that which will
finally be required.
2.
Pump the fork assembly and damper several
times to expel any trapped air then fully
compress the fork and support it in an upright
position. Leave the fork for a few minutes to allow
the oil to stabilise.
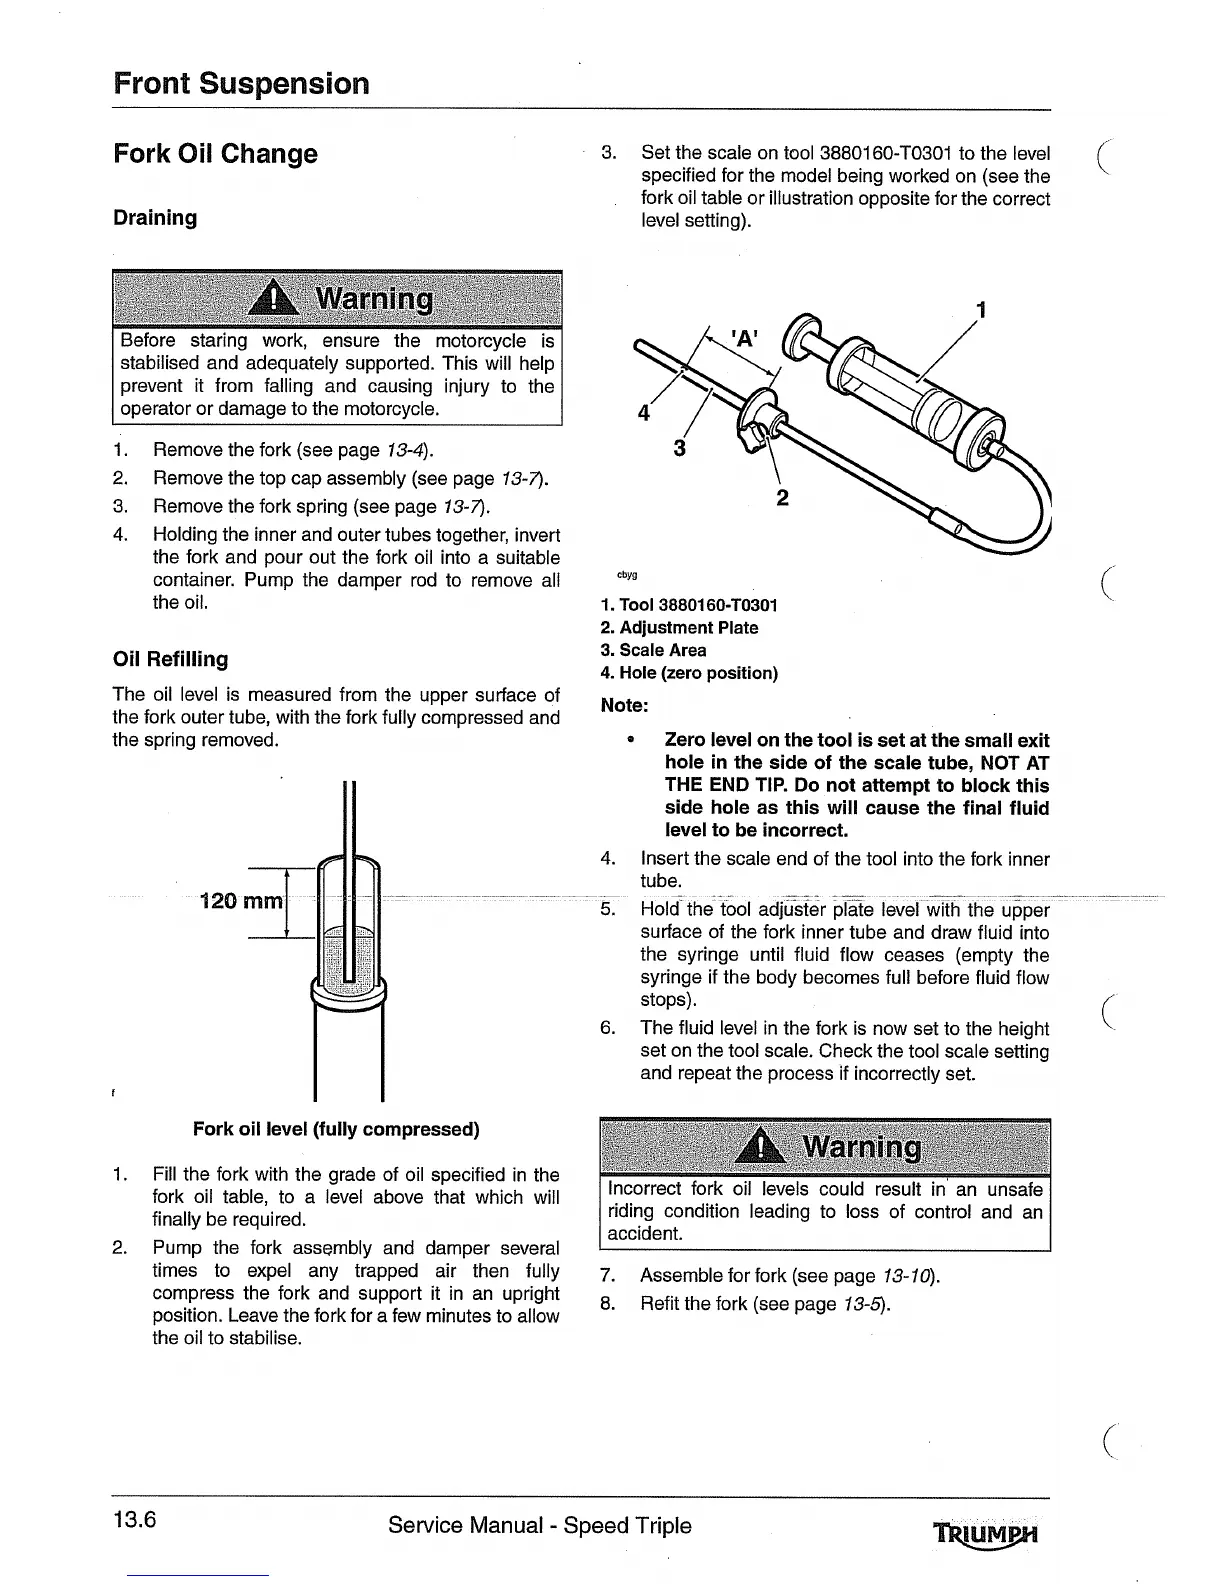
3. Set the scale on tool 3880160-TO301 to the level
specified for the model being worked on (see the
fork oil table or illustration opposite for the correct
level setting).
1. To01 38801 60-TO301
2.
Adjustment Plate
3. Scale Area
4.
Hole (zero position)
Note:
*
Zero level on the tool is set at the small exit
hole in the side of the scale tube, NOT AT
THE END TIP. Do not attempt to block this
side hole as this will cause the final fluid
level to be incorrect.
4.
Insert the scale end of the tool into the fork inner
tube.
surface of the fork inner tube and draw fluid into
the syringe until fluid flow ceases (empty the
syringe if the body becomes full before fluid flow
stops).
6.
The fluid level in the fork is now set to the height
set on the tool scale. Check the tool scale setting
(
and repeat the process if incorrectly set.
Incorrect fork oil levels could result in' an unsafe
riding condition leading to loss of control and an
accident.
7.
Assemble for fork (see page 13-10).
8.
Refit the fork (see page 13-5).
Sewice Manual
-
Speed Triple

 Loading...