Stage 1
-
all screws
1. lnvert the engine.
2. In the correct sequence, tighten all lower
crankcase screws to
12 Nm.
Lower Crankcase Bolt Tightening Sequence
3.
lnvert the engine.
4. In the correct sequence, tighten all upper
crankcase screws to
12 Nm.
7.
Refit the engine covers (see page 7-22).
8.
Refit the sump.
9.
Install the engine in the frame (see page
9-3).
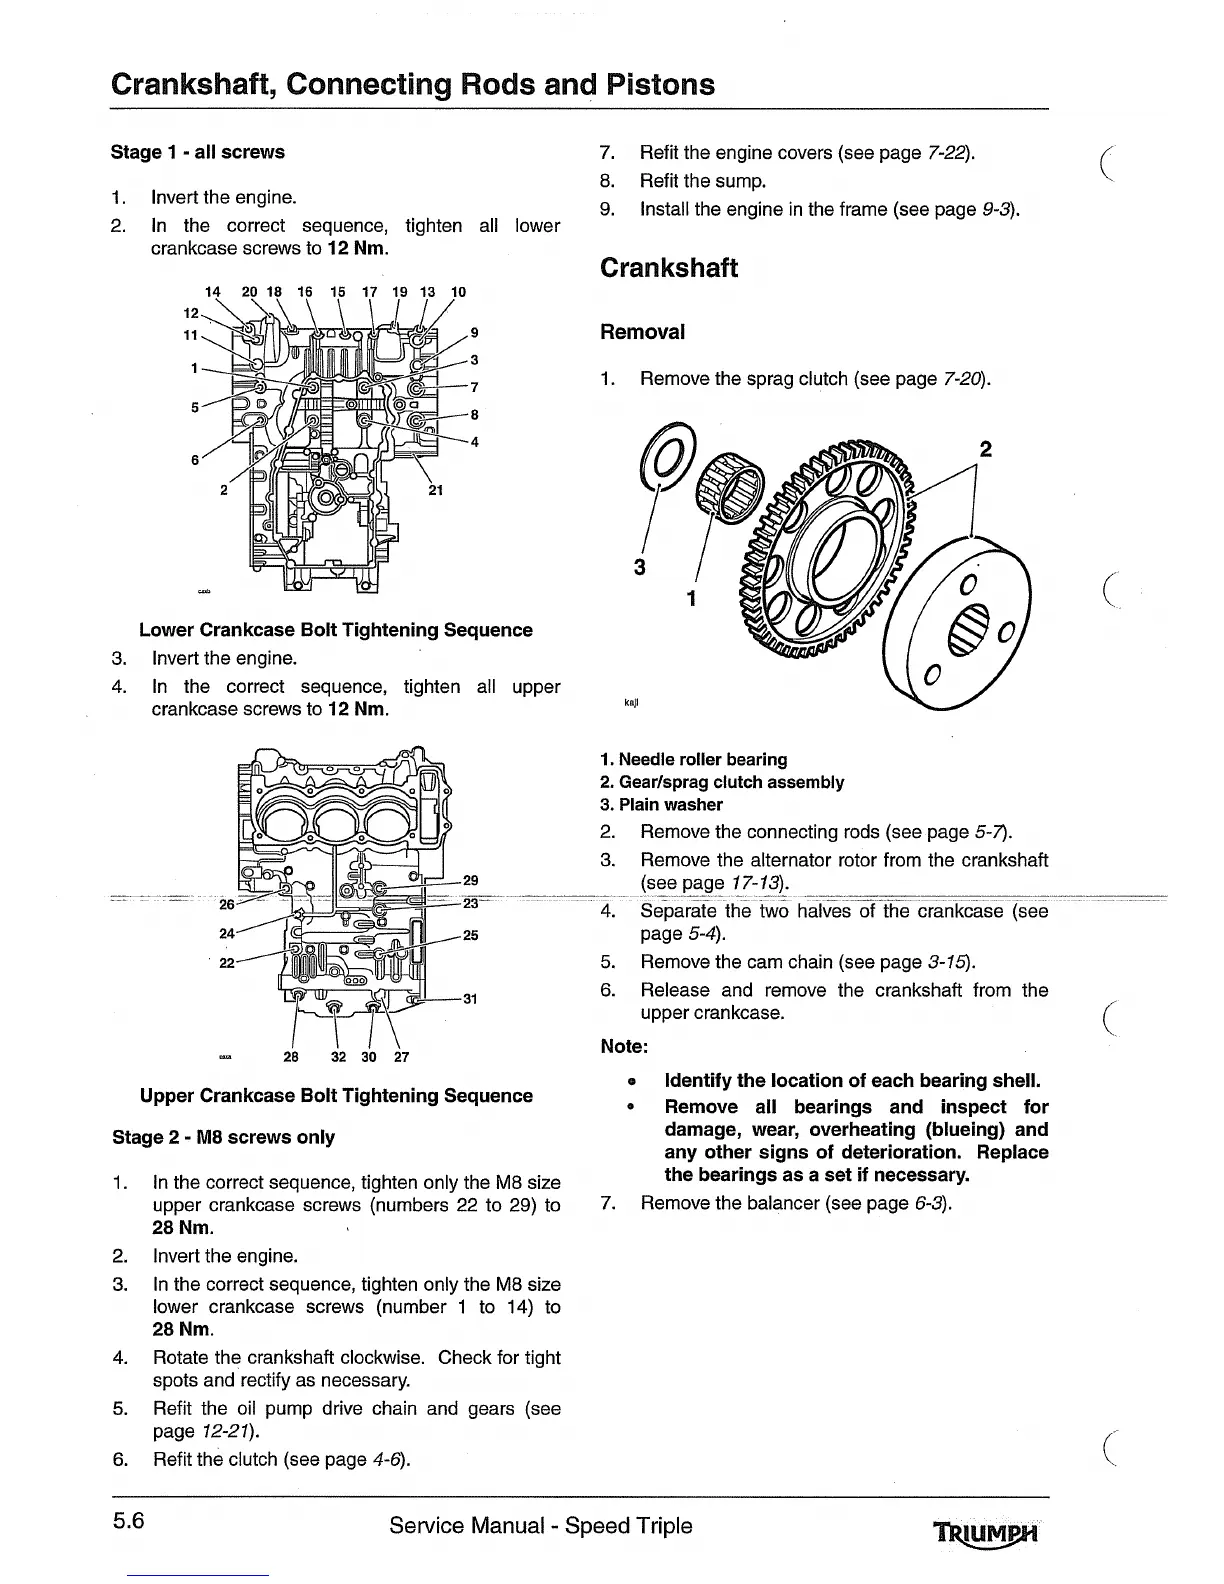
Removal
1.
Remove the sprag clutch (see page 7-20).
-
28 32 30
27
Upper Crankcase Bolt Tightening Sequence
Stage 2
-
M8 screws only
1.
Needle roller bearing
2.
Gearlsprag clutch assembly
3.
Plain washer
2.
Remove the connecting rods (see page 5-7).
3.
Remove the alternator rotor from the crankshaft
(see page 17-13).
4.
Separate the two halves of the crankcase (see
page 5-4).
5.
Remove the cam chain (see page 3-15).
6.
Release and remove the crankshaft from the
upper crankcase.
In the correct sequence, tighten only the
M8
size
upper crankcase screws (numbers 22 to 29) to
28 Nm.
lnvert the engine.
In the correct sequence, tighten only the
M8
size
lower crankcase screws (number 1 to 14) to
28 Nm.
Rotate the crankshaft clockwise. Check for tight
spots and rectify as necessary.
Refit the oil pump drive chain and gears (see
page 12-27).
Refit the clutch (see page 4-6).
Note:
0
Identify the location of each bearing shell.
Remove all bearings and inspect for
damage, wear, overheating (blueing) and
any other signs of deterioration. Replace
the bearings as a set if necessary.
7.
Remove the balancer (see page 6-3).
5.6
Service Manual
-
Speed Triple

 Loading...