6. Lamps and lamp houses
9 Nm
5
7
7
6
4
4
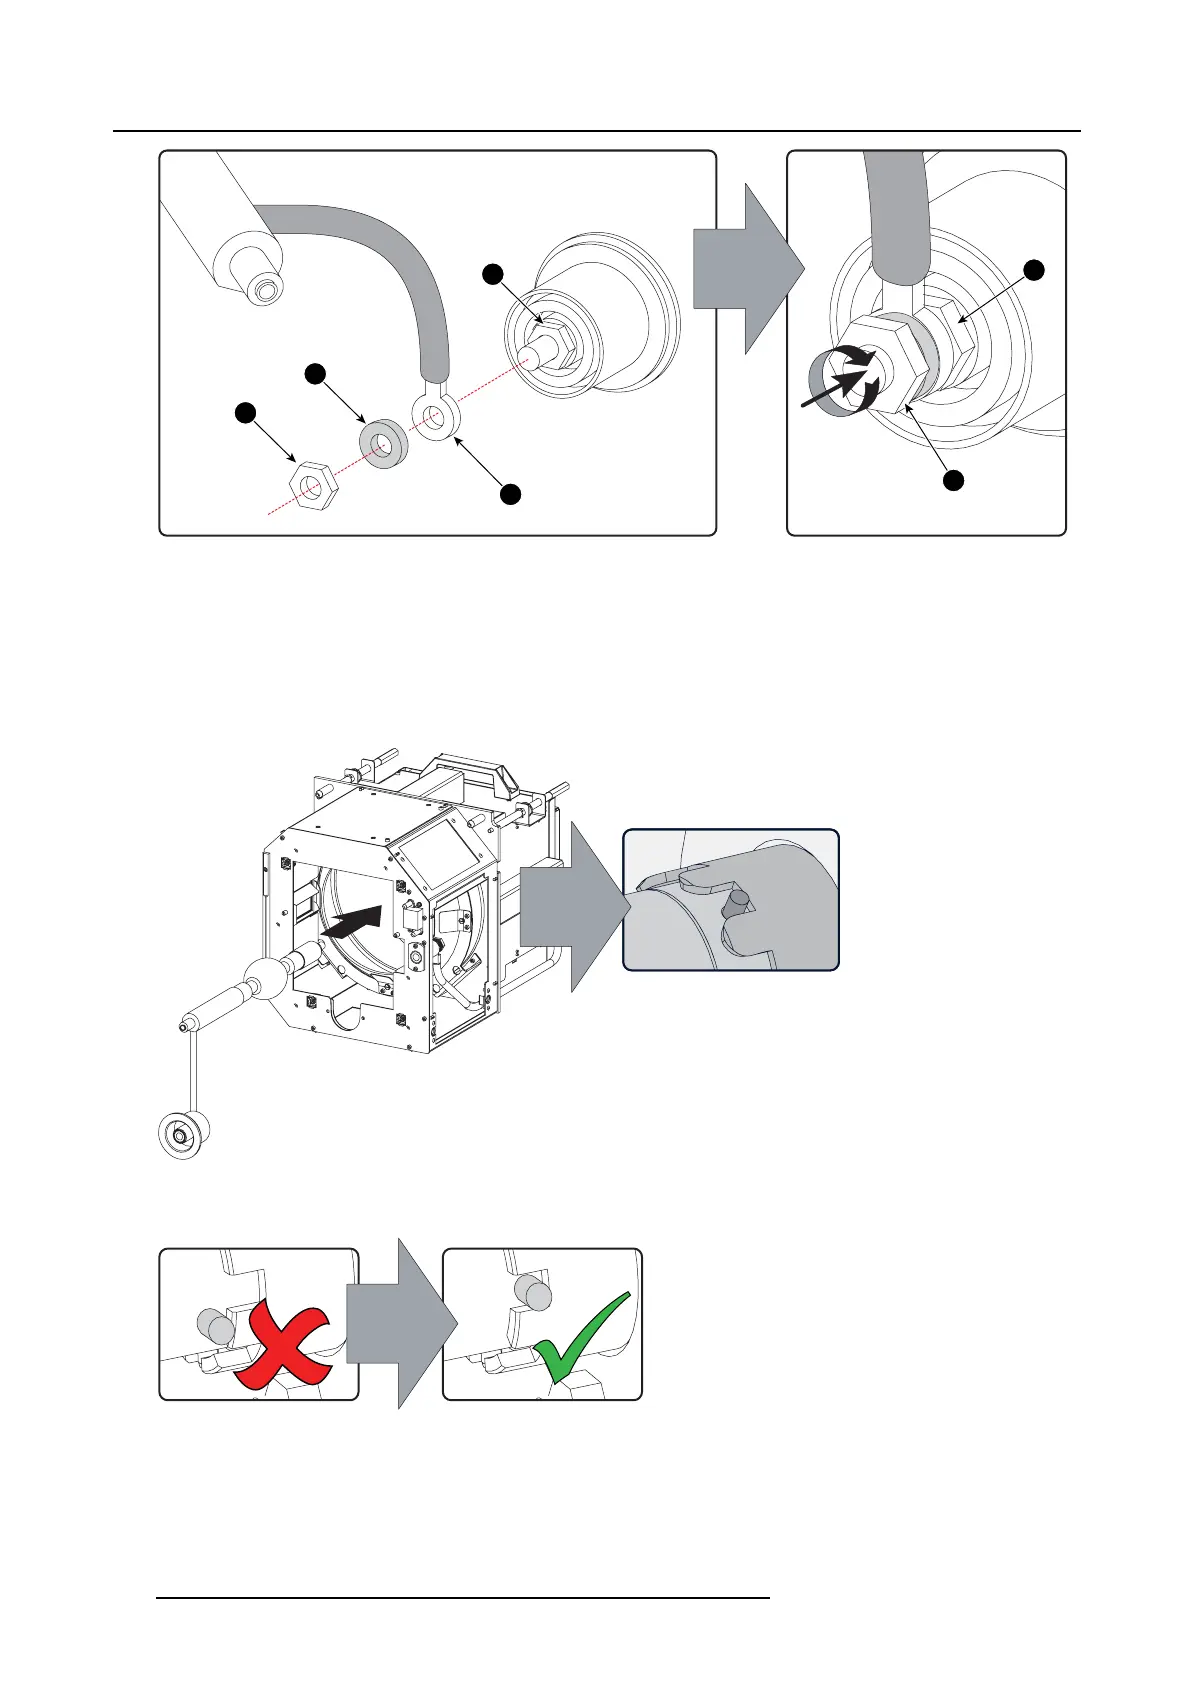
Image 6-15
Anode lug installation
4. Remove the protective container or unwrap the protective cloth from the xenon lamp.
Warning: Ensure that you wear protective clothing, a full face shield and protective gloves.
Tip: Write down the s erial number of the lamp. You will need this while updating the lamp parameters after installation of the
lamp. The serial number of the lamp is engraved in the neck of the xenon lamp.
5. Gently guide the xenon lamp into position inside the Lamp Hous e as illustrated. Anode socket hanging vertical down. While
inserting the lamp, rotate it slightly, engaging the pins of the
cathode a dapter in the foreseen slots. This is to ensure the lam p
cathode is completely inserted.
Image 6-16
Lamp bulb installation
Warning: Make sure that the both pins of the cathode adapter are engaged in the foreseen slots.
Image 6-17
6. Insert the anode socket
into posit ion as illustrated.
Caution: Avoid any tension on the anode wire, ensuring there is no mechan ical stress on the lamp.
104
R5905043 DP2K-12C/11CX 19/02/2018
 Loading...


