Playback
134
5
Playback
Adjusting the Volume
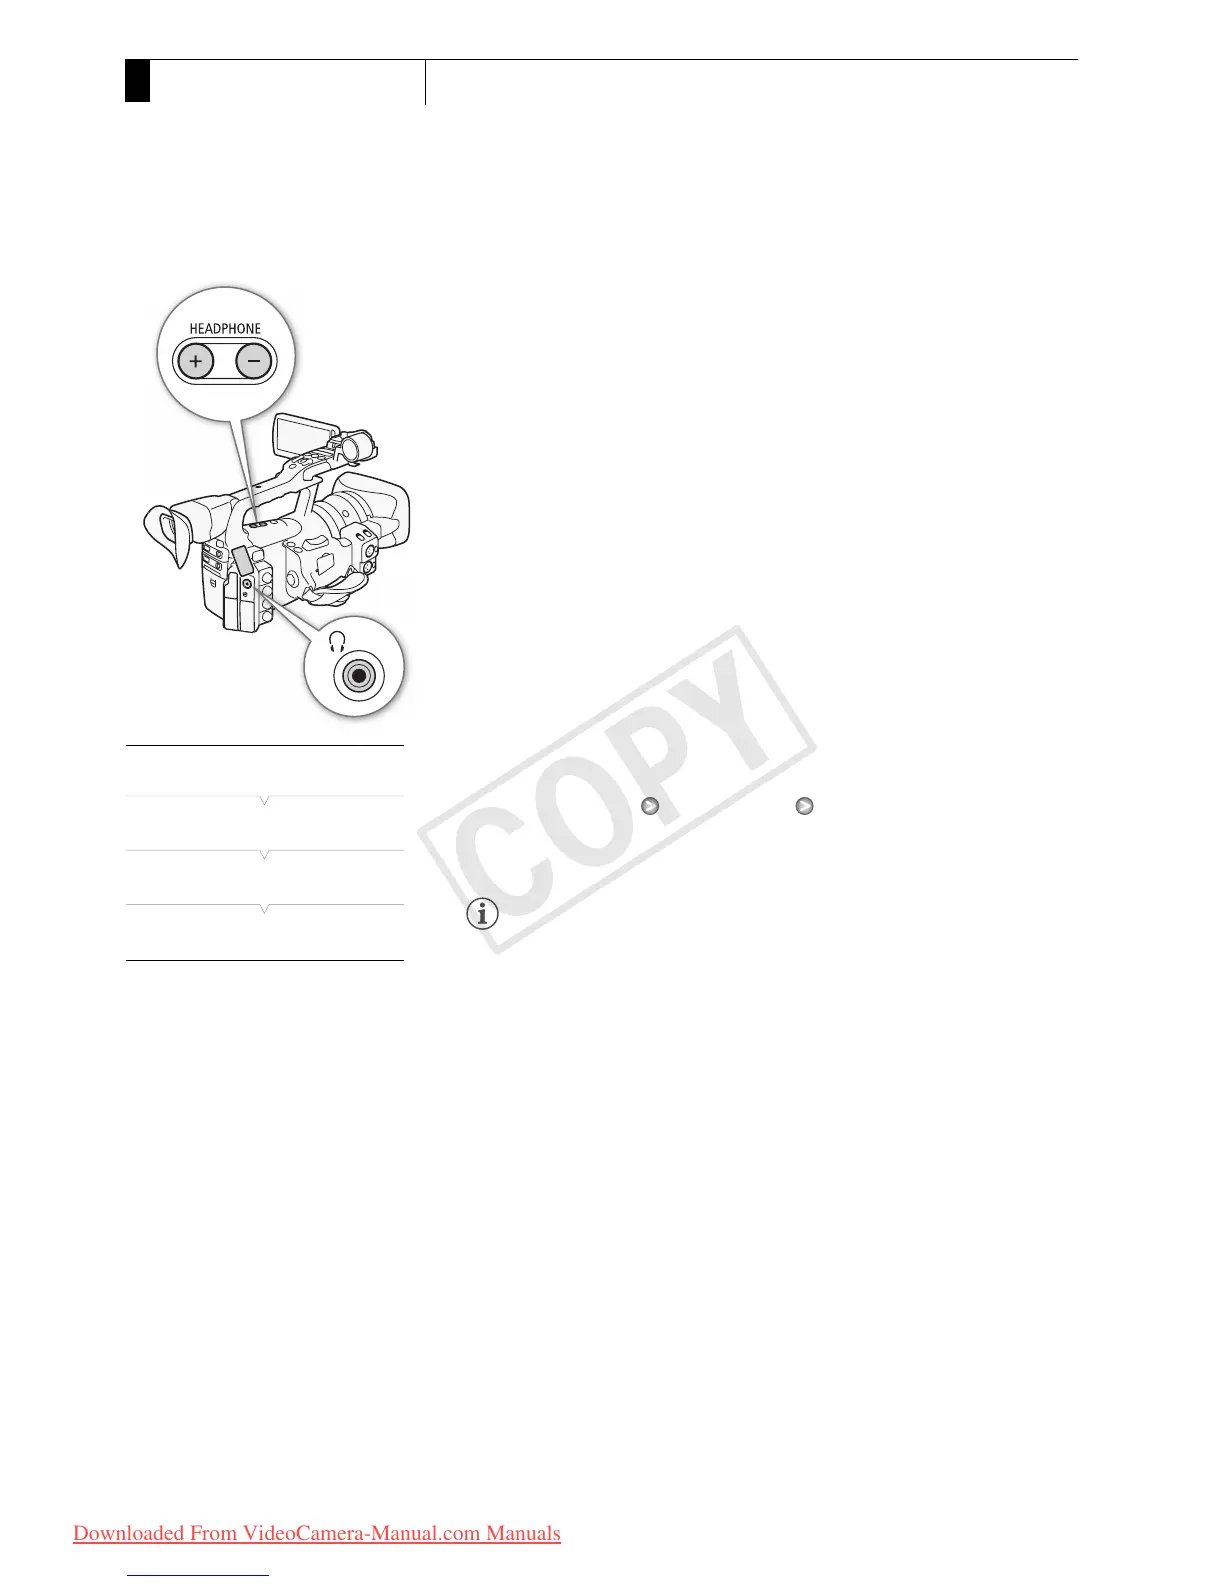
During playback, audio will come from the monaural built-in speaker or
headphones. When you connect headphones to the W (headphone)
terminal, the built-in speaker will be muted.
Adjusting the Headphone Volume
Press the HEADPHONE +/- buttons to adjust the volume.
Adjusting the Built-in Speaker Volume
1 Open the [Speaker Volume] submenu.
[m Audio Setup] [Audio Output] [Speaker Volume]
2 Select the desired level and then press SET.
• Select [Off] to mute the audio.
NOTES
• For details on changing the audio channel, refer to Selecting the Audio
Channel (0 151).
Adding Shot Marks during Playback
You can add an c mark, d mark or both marks to a clip during playback
or playback pause. You can add either mark using assignable buttons or
an c mark using the wireless controller’s SHOT1 button.
1
Set an assignable button to [Add Shot Mark 1] or [Add Shot Mark 2]
(0 113).
2 During playback or playback pause, press the assignable button
at the point in the clip to add the shot mark.
• A message indicating the shot mark appears on the screen and the
shot mark is added to the clip.
• Adding a shot mark to a clip during playback will pause the playback.
• Up to 100 shot marks (c and d marks combined) can be added to
a single clip.
• There may be up to a 0.5 second delay from when you press the
button to when the camcorder adds the shot mark.
[m Audio Setup]
[Audio Output]
[Speaker Volume]
[8]
 Loading...