Chapter 3. Installation
99
8. Ensure that the terminal block's protective covers are in place after installation.
Voltages will be marked on the terminal blocks.
WARNING!
The ringer provides a constantly accessible 95 V AC on the backplane, so use caution whenever
the system is powered.
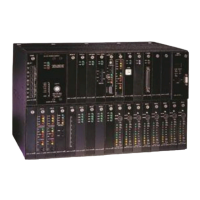
9. Observe that the green indicator is lit. If the red indicator is lit, the supply or the
system has a fault that must be cleared. In the event of a failure, examine the fuses.
Removal of the Smart 110 V AC Power Supply
The following is the procedure for removing the Smart 110 V Power Supply.
1. Remove the line cord plug from the 110 V AC source and unplug the cord from the
back of the system.
2. Remove the nut from the back of the grounding lug at the rear of the system near the
rectangular opening for the line cord.
3. Gently tap or push the grounding stud at the rear of the system with a nut driver
handle, malleable handle, or a piece of wood to remove the supply.
4. After removing the supply from the slot, refasten the nut removed in step 2 onto the
lug. Gently tighten the nut.
5. Replace the power supply in a static-shielded bag.
Transmission Connection
With all the cabling and common equipment installed, the system can now begin to operate in the T1
network. Work closely with the T1 carrier company at this point to make sure compatible line coding and
framing methods are being used by all parties.
Cable
The control cable for the D/I Mux III is a standard RS-232C straight-through cable (pin 1 to pin 1, pin 2 to
pin 2, refer to Figure 3-27 for details). Connect one side of the cable into the COM port of the D/I Mux III,
and the other side into the control terminal. When using a personal computer and terminal emulation
software package to control the D/I Mux III, the RS-232C cable connectors are both female.
 Loading...