02-21
Engine Service, 2.3L
2.3L ENGINE SERVICE (Continued)
4.
5.
6.
7.
8.
9.
IO.
11.
12.
Install timing belt over crankshaft sprocket. Then,
proceeding counterclockwise, install timing belt
over oil pump sprocket and camshaft sprocket.
Loosen tensioner adjusting bolt allowing
tensioner pulley to press against timing belt.
NOTE: When performing the following step, do
not rotate crankshaft counterclockwise as timing
belt may jump a cog, putting camshaft out of
time.
Rotate crankshaft two revolutions clockwise.
Bring crankshaft slowly, without stopping, to
number one cylinder firing position (keyway
directly up).
Recheck timing mark alignment. Repeat the
above Steps if timing marks are not properly
aligned.
Rotate tensioner assembly against belt with
torque wrench up to 40-45 Nom (29-33 lb-ft) and
tighten adjusting bolt.
Tighten adjusting bolt to 35-45 Nom (26-33 lb-ft).
Tighten spring pivot bolt to 40-55 Nom (29-40
lb-ft).
Install outer timing belt cover as outlined in this
section.
Camshaft and Oil Pump Sprocket
NOTE: Removal and installation steps are the same
for both camshaft and oil pump (6600) sprockets.
SPECIAL SERVICE TOOL(S) REQUIRED
Description Tool Number
Cam Sprocket Holding/Removing Tool
T74P-6256-B
I
Removal
1.
Remove outer timing belt cover as outlined in this
section.
2. Remove timing belt as outlined in this section.
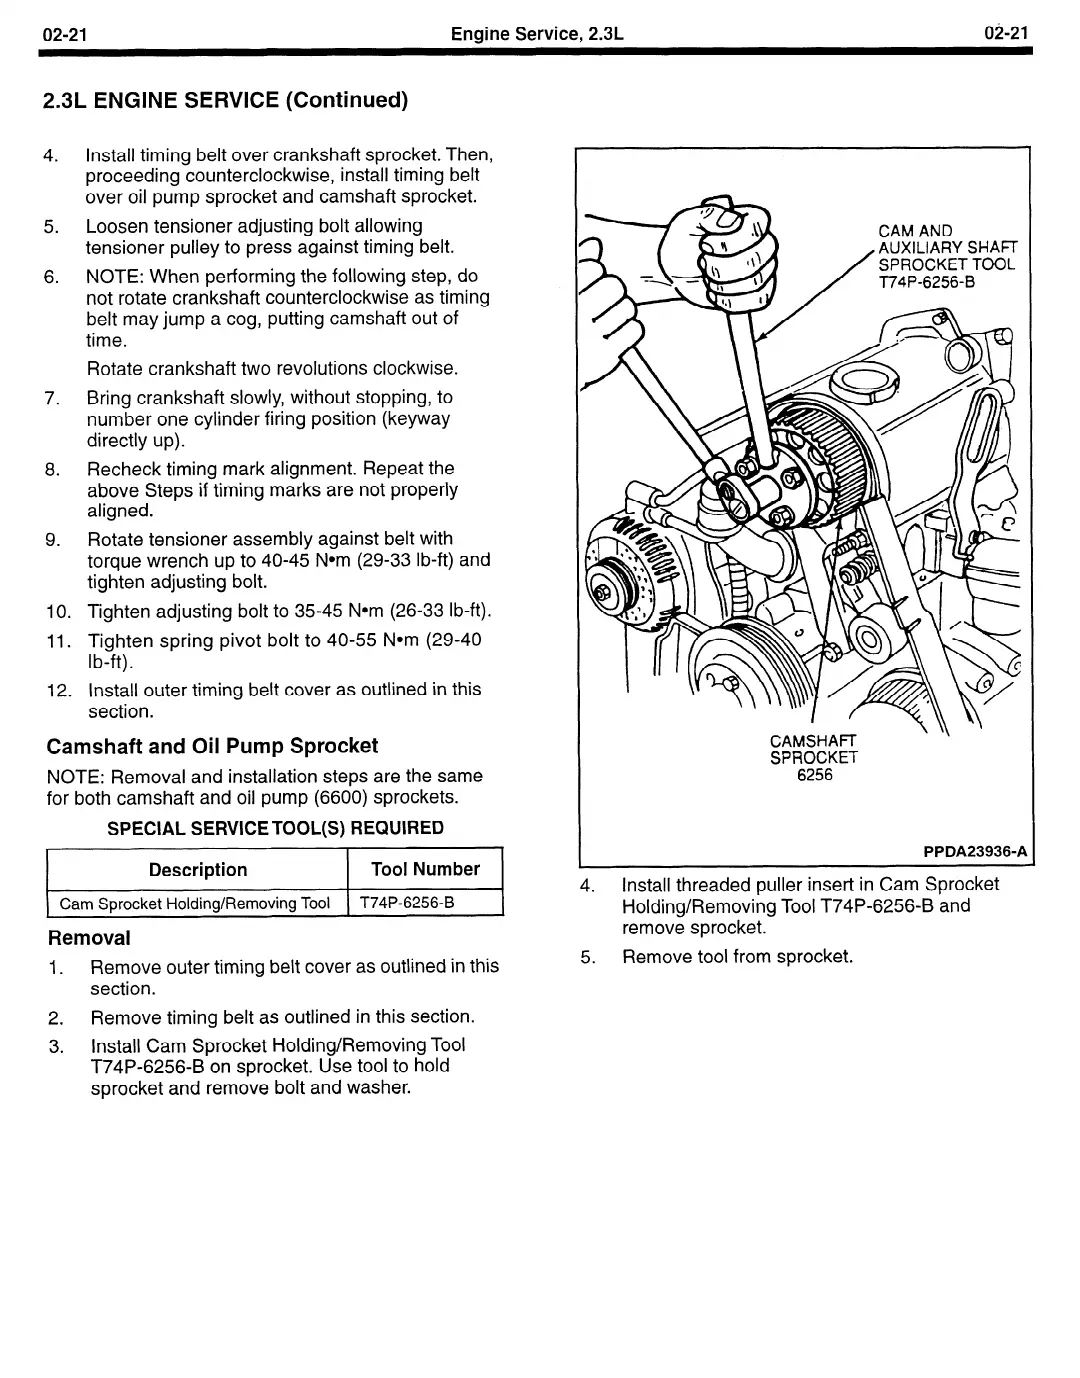
3.
Install Cam Sprocket Holding/Removing Tool
T74P-6256-B on sprocket. Use tool to hold
sprocket and remove bolt and washer.
CAMSHAR-
SPROCKET
6256
PPDA23936-A
4. Install threaded puller insert in Cam Sprocket
Holding/Removing Tool T74P-6256-B and
remove sprocket.
5.
Remove tool from sprocket.
 Loading...


