02-52
Engine Service, 2.3L
02-52
2.3L ENGINE SERVICE (Continued)
12. Check ring gaps using the procedure given in the
engine service section.
13. NOTE: Never install compression rings on
pistons by hand. Always use a ring expander tool.
Install rings using a ring expander tool. Check
ring side clearance.
14. Clean crankshaft journals.
15. If necessary, disassemble piston and rod
assemblies as outlined in this section.
16. Clean gasket surfaces and fasteners.
installation
1. If disassembled, assemble piston and connecting
rod assembly as outlined in this section.
2. Refer to Pistons, Piston Pins, and Piston Rings in
the engine service section for Cleaning,
Inspection, Pistons -
Fitting, and Piston Rings
- Fitting.
3. If necessary, install piston and pin on connecting
rod as outlined in this section.
4.
Using a piston ring expander, install the piston
rings, starting with the oil control rings. Make sure
rings are installed right side up. Refer to
instructions with piston ring set.
5.
Rotate the rings so the end gaps are NOT lined
up but are spaced properly as shown.
FRONT
A281
1 -c
6.
Check the ring side clearance as outlined in the
engine service section. Side clearance for both
compression rings should be 0.041-0.084mm
(0.016-0.0033 inch) and snug fit for the oil control
rrng.
7. Put a piece of hose or other protector over
connecting rod bolt (6214) to protect crankshaft
journal.
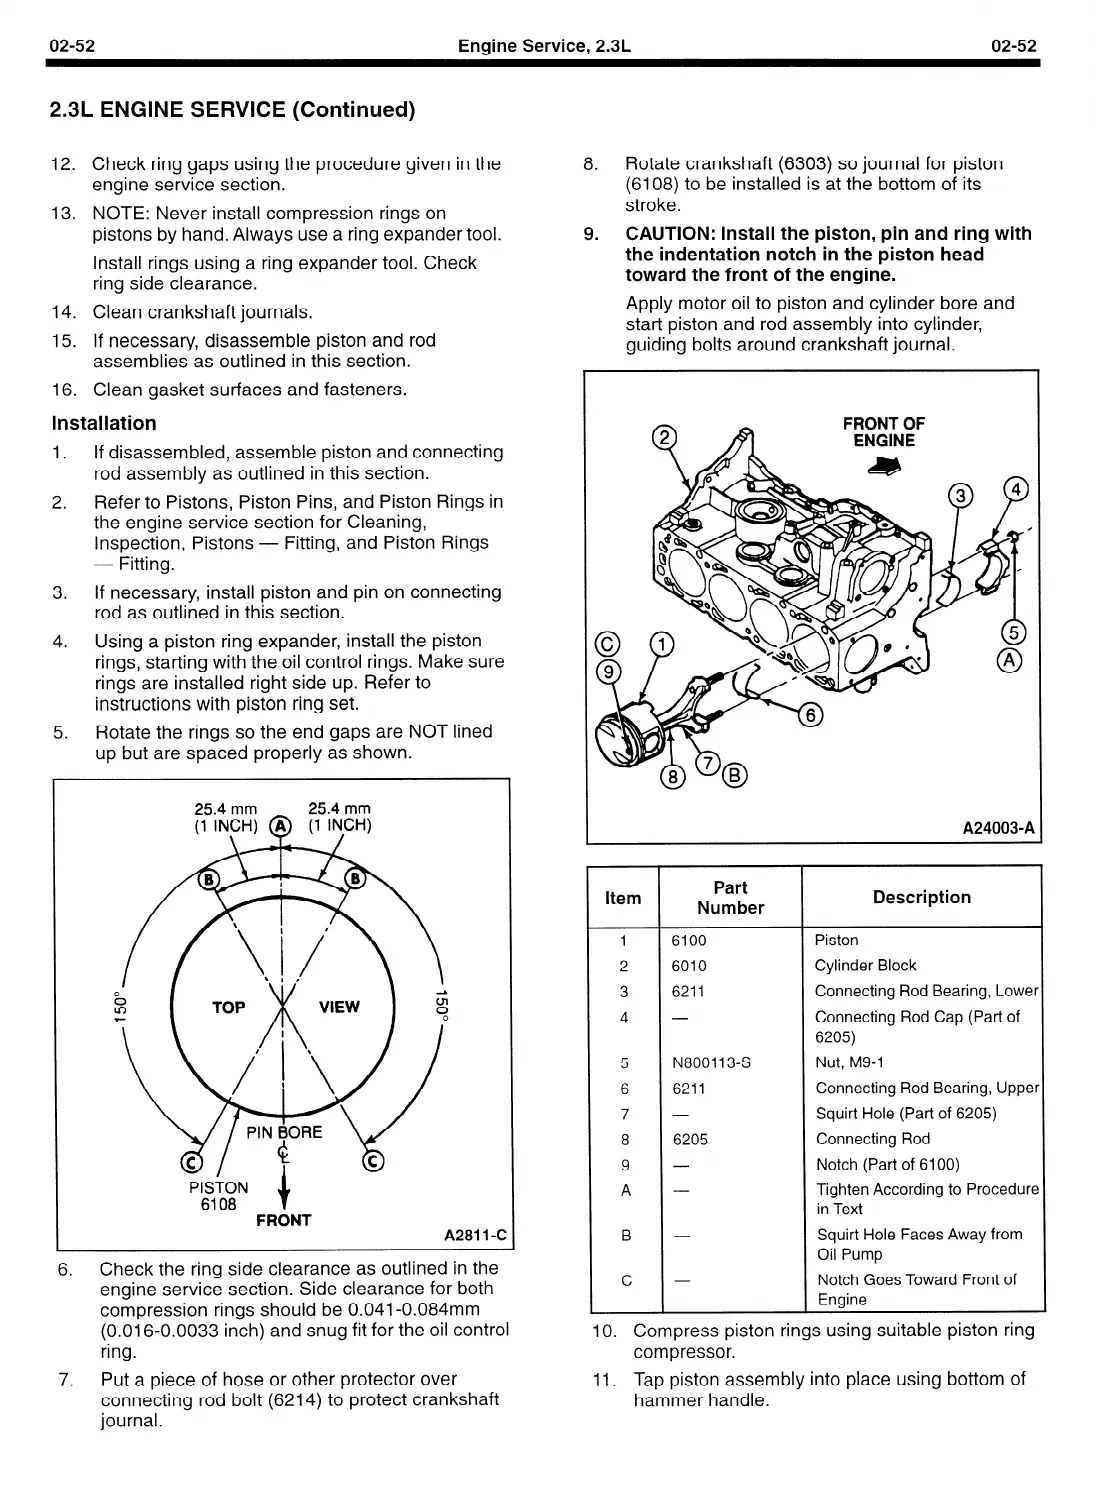
8.
Rotate crankshaft (6303) so journal for piston
(6108) to be installed is at the bottom of its
stroke.
9.
CAUTION: Install the piston, pin and ring with
the indentation notch in the piston head
toward the front of the engine.
Apply motor oil to piston and cylinder bore and
start piston and rod assembly into cylinder,
guiding bolts around crankshaft journal.
FRONT OF
ENGINE
A24003-A
Item
Part
Number
Description
1 6100
Piston
2 6010
Cylinder Block
3
6211
Connecting Rod Bearing, Lower
4 -
Connecting Rod Cap (Part of
6205)
5
N800113-s
Nut, M9-1
6 6211
Connecting Rod Bearing, Upper
7 -
Squirt Hole (Part of 6205)
8
6205
Connecting Rod
9 -
Notch (Part of 6100)
A -
Tighten According to Procedure
in Text
B -
Squirt Hole Faces Away from
Oil Pump
c -
Notch Goes Toward Front of
Engine
10.
Compress piston rings using suitable piston ring
compressor.
11. Tap piston assembly into place using bottom of
hammer handle.
 Loading...


