02-53
Engine Service, 2.3L
02-53
2.3L ENGINE SERVICE (Continued)
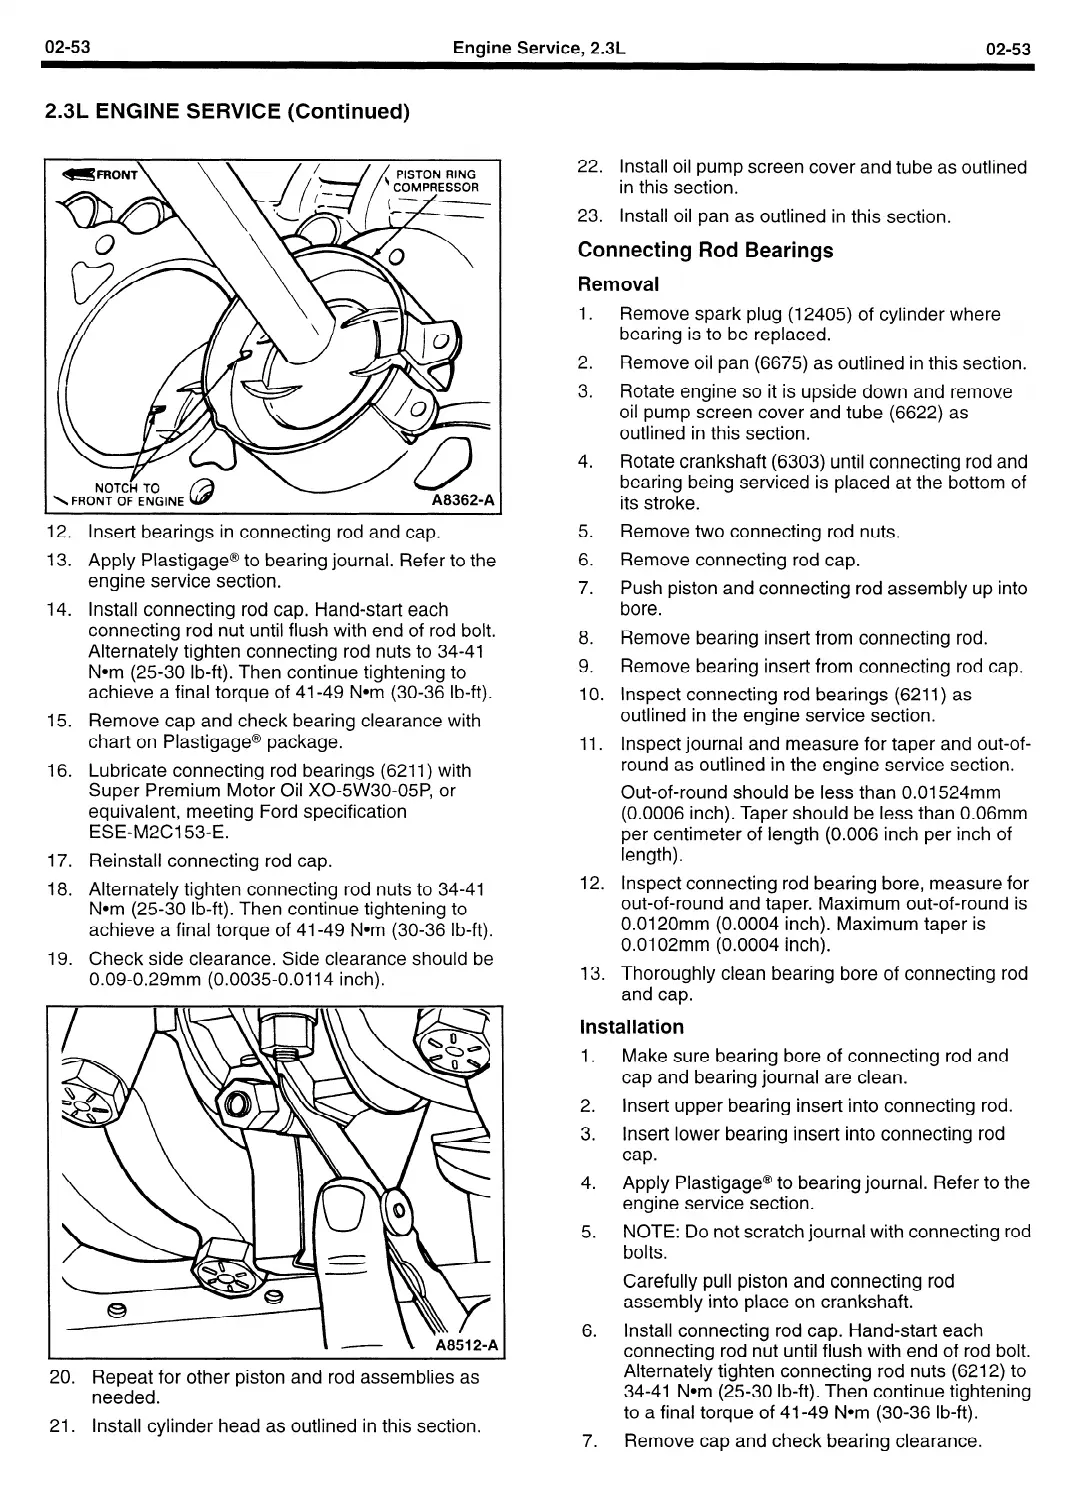
PISTON RING
12.
13.
14.
15.
16.
17.
18.
19.
Insert bearings in connecting rod and cap.
Apply Plastigage@ to bearing journal. Refer to the
engine service section.
Install connecting rod cap. Hand-start each
connecting rod nut until flush with end of rod bolt.
Alternately tighten connecting rod nuts to 34-41
Nom (25-30 lb-ft). Then continue tightening to
achieve a final torque of 41-49 Nom (30-36 lb-ft).
Remove cap and check bearing clearance with
chart on Plastigage@ package.
Lubricate connecting rod bearings (6211) with
Super Premium Motor Oil X0-5W30-05P, or
equivalent, meeting Ford specification
ESE-M2C153-E.
Reinstall connecting rod cap.
Alternately tighten connecting rod nuts to 34-41
Nom (25-30 lb-ft). Then continue tightening to
achieve a final torque of 41-49 Nom (30-36 lb-ft).
Check side clearance. Side clearance should be
0.09-0.29mm (0.0035-0.0114 inch).
20.
21.
Repeat for other piston and rod assemblies as
needed.
Install cylinder head as outlined in this section.
22. Install oil pump screen cover and tube as outlined
in this section.
23.
Install oil pan as outlined in this section.
Connecting Rod Bearings
Removal
1.
2.
3.
4.
5.
6.
7.
8.
9.
10.
11.
12.
13.
Remove spark plug (12405) of cylinder where
bearing is to be replaced.
Remove oil pan (6675) as outlined in this section.
Rotate engine so it is upside down and remove
oil pump screen cover and tube (6622) as
outlined in this section.
Rotate crankshaft (6303) until connecting rod and
bearing being serviced is placed at the bottom of
its stroke.
Remove two connecting rod nuts.
Remove connecting rod cap.
Push piston and connecting rod assembly up into
bore.
Remove bearing insert from connecting rod.
Remove bearing insert from connecting rod cap.
Inspect connecting rod bearings (6211) as
outlined in the engine service section.
Inspect journal and measure for taper and out-of-
round as outlined in the engine service section.
Out-of-round should be less than 0.01524mm
(0.0006 inch). Taper should be less than 0.06mm
per centimeter of length (0.006 inch per inch of
length).
Inspect connecting rod bearing bore, measure for
out-of-round and taper. Maximum out-of-round is
0.0120mm (0.0004 inch). Maximum taper is
0.0102mm (0.0004 inch).
Thoroughly clean bearing bore of connecting rod
and cap.
Installation
1. Make sure bearing bore of connecting rod and
cap and bearing journal are clean.
2.
Insert upper bearing insert into connecting rod.
3.
Insert lower bearing insert into connecting rod
cap.
4.
Apply Plastigage@ to bearing journal. Refer to the
engine service section.
5.
NOTE: Do not scratch journal with connecting rod
bolts.
Carefully pull piston and connecting rod
assembly into place on crankshaft.
6.
Install connecting rod cap. Hand-start each
connecting rod nut until flush with end of rod bolt.
Alternately tighten connecting rod nuts (6212) to
34-41 Nom (25-30 lb-ft). Then continue tightening
to a final torque of 41-49 Nom (30-36 lb-ft).
7. Remove cap and check bearing clearance.
 Loading...


