02-47
Engine Service, 2.3L
02-47
2.3L ENGINE SERVICE (Continued)
Installation
CAUTION: Lubricate parts with Motorcraft Super
Premium Motor Oil XO+W30=QSP, or equivalent,
meeting Ford specification ESE-M2C153-E during
assembly to prevent a dry start and engine
damage.
1.
if removed, install upper crankshaft bearings. If
reusing bearings, reinstall each bearing in the
same place from which it was removed.
2. Install crankshaft.
3. If removed, install bearings in main bearing caps.
If reusing bearings, install bearing in same place
from which it was removed.
4. Apply Plastigage@ to crankshaft bearing journals.
5.
Install main bearing caps and bolts. Alternately
tighten bolts to 68-81 Nom (50-60 lb-ft). Retighten
to 108-122 Nom (79-90 lb-ft).
6.
Remove caps. Check Plastigage@ for bearing
clearance using chart on package. If OK, go on to
next step. If not, correct clearance.
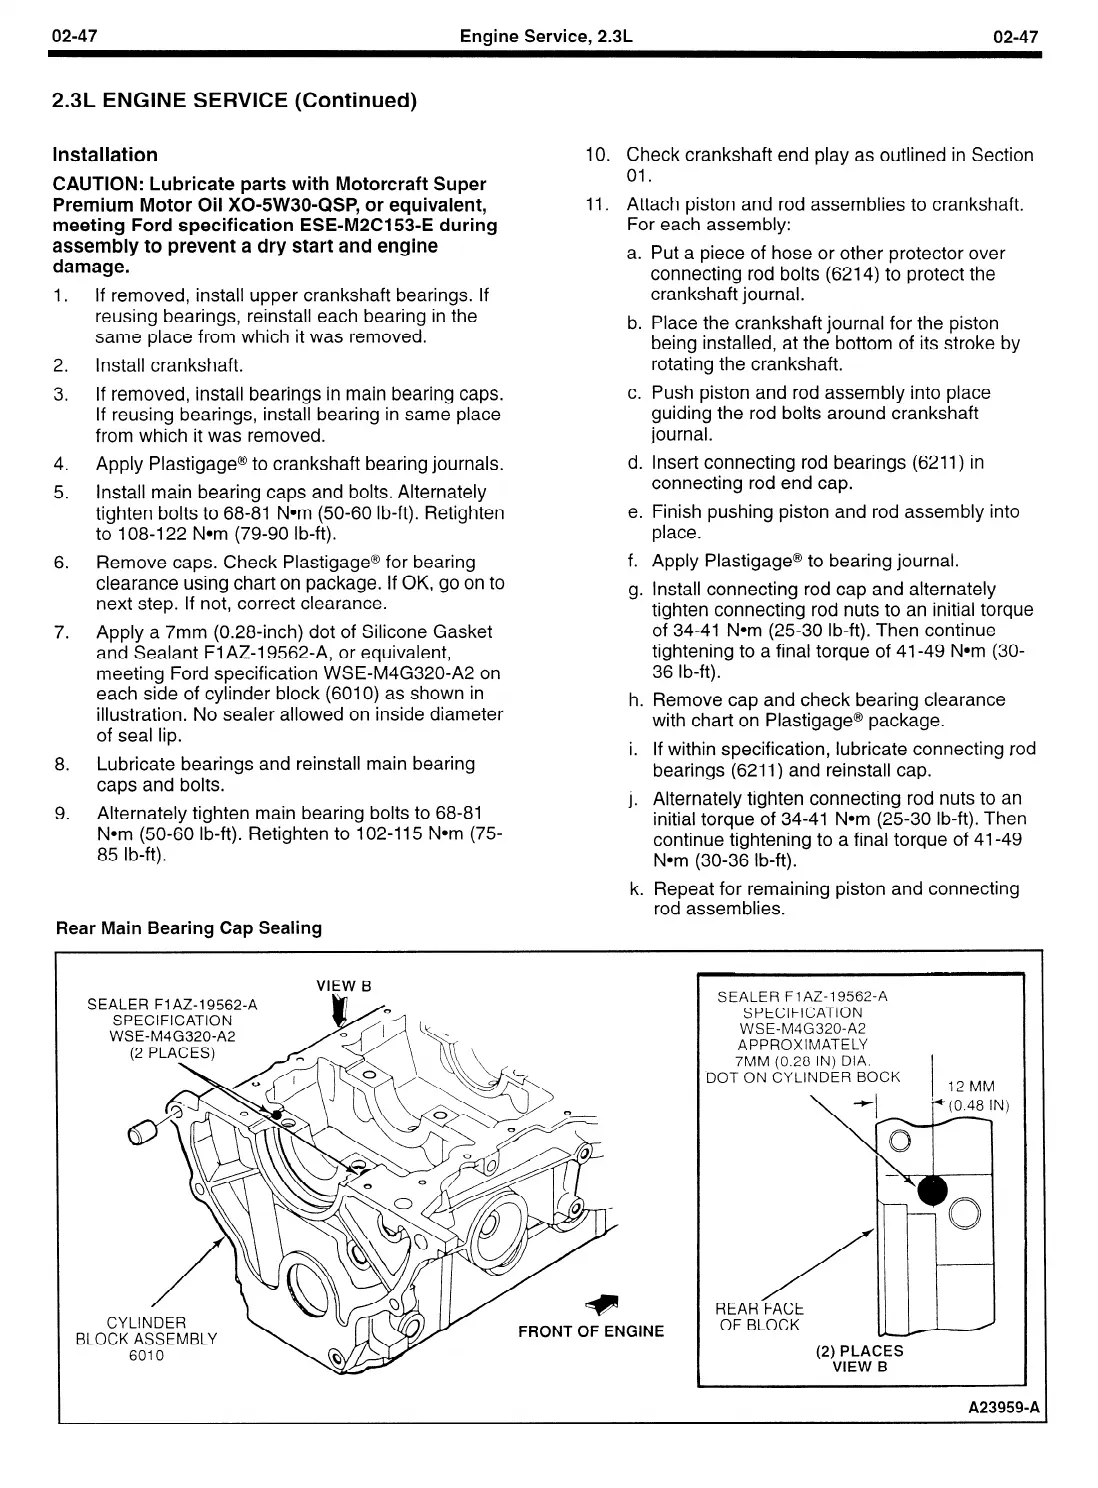
7. Apply a 7mm (0.28-inch) dot of Silicone Gasket
and Sealant Fl AZ-l 9562-A, or equivalent,
meeting Ford specification WSE-M4G320-A2 on
each side of cylinder block (6010) as shown in
illustration. No sealer allowed on inside diameter
of seal lip.
8. Lubricate bearings and reinstall main bearing
caps and bolts.
9. Alternately tighten main bearing bolts to 68-81
Nom (50-60 lb-ft). Retighten to 102-115 Nom (75-
85 lb-ft).
Rear Main Bearing Cap Sealing
10. Check crankshaft end play as outlined in Section
01.
11.
Attach piston and rod assemblies to crankshaft.
For each assembly:
a. Put a piece of hose or other protector over
connecting rod bolts (6214) to protect the
crankshaft journal.
b. Place the crankshaft journal for the piston
being installed, at the bottom of its stroke by
rotating the crankshaft.
c. Push piston and rod assembly into place
guiding the rod bolts around crankshaft
journal.
d. Insert connecting rod bearings (6211) in
connecting rod end cap.
e. Finish pushing piston and rod assembly into
place.
f. Apply Plastigage@ to bearing journal.
g. Install connecting rod cap and alternately
tighten connecting rod nuts to an initial torque
of 34-41 Nom (25-30 lb-ft). Then continue
tightening to a final torque of 41-49 Nom (30-
36 lb-ft).
h. Remove cap and check bearing clearance
with chart on Plastigage@ package.
i. If within specification, lubricate connecting rod
bearings (6211) and reinstall cap.
j. Alternately tighten connecting rod nuts to an
initial torque of 34-41 Nom (25-30 lb-ft). Then
continue tightening to a final torque of 41-49
Nom (30-36 lb-ft).
k. Repeat for remaining piston and connecting
rod assemblies.
VIEW B
SE
CYLINDER
ILOCK ASSEMBLY
FRONT OF ENGI
NE
SEALER FlAZ-19562-A
SPECIFICATION
WSE-M4G320-A2
APPROXIMATELY
7MM (0.28 IN) DIA.
DOT ON CYLINDER
BOCK
12
MM
REAR FACE
OF BLOCK
(2) PLACES
VIEW B
A23959-A
 Loading...


