3.3.4 Acquire a scout
Use this procedure to acquire a scout from which you can prescribe the scan locations.
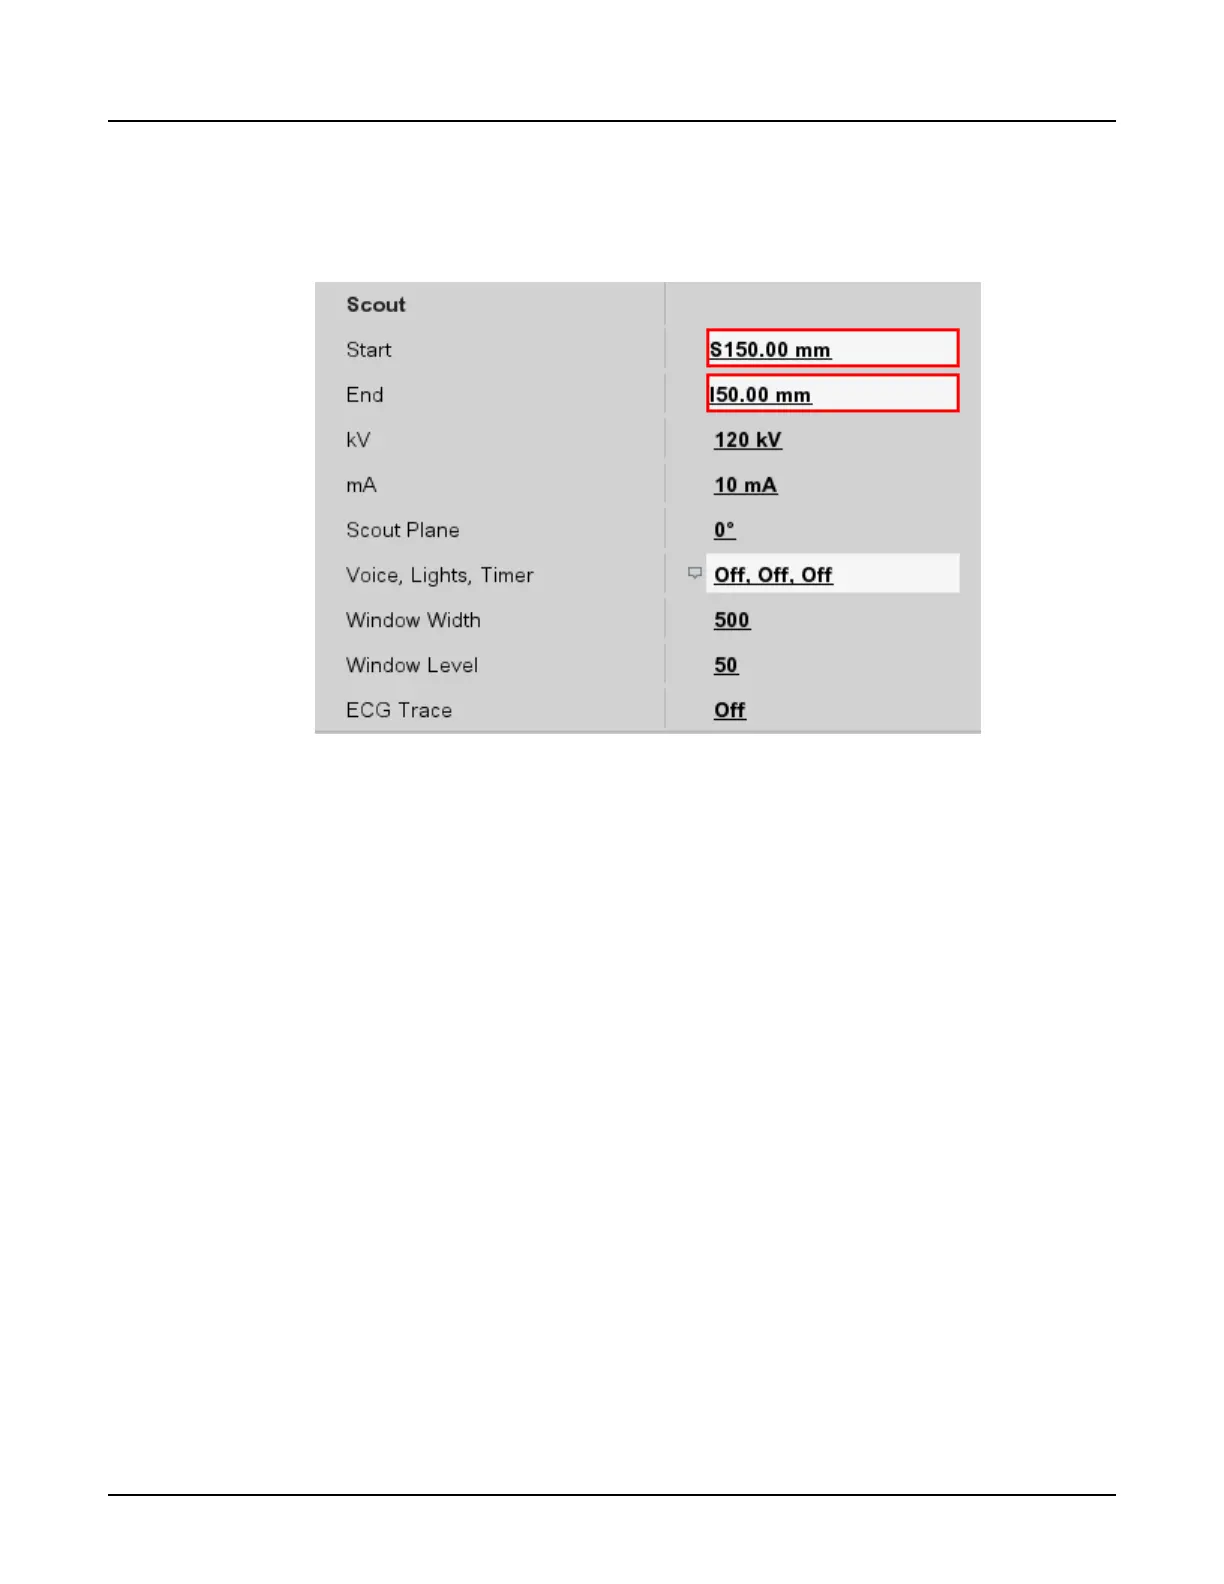
Illustration 9: Scout collection
1. Confirm that the patient orientation matches the patient orientation in the
Patient Position
area of the
Scan Settings
window.
○
Click on the patient image to change to a head-first or feet-first orientation.
○
Click on the table or above the patient body to rotate the body in 90° increments.
2. From the
Scout
collection on the
Scan Settings
window, confirm the
Start
and
End
locations,
kV
,
mA
, and
Auto Voice
settings (if applicable).
○
To change a parameter, open the desired settings collection and click in the field to enter
a new value. Plus (+) can be used for S values and Minus (-) for I values when using the
ten-digit key pad.
○
Technique factors are set low (120 kV and a low mA are common), since these scans
are normally used only for planning purposes.
3. Set the
Scout Plane
to designate the type of scout to acquire.
○
0° = 12 o'clock
○
90° = 3 o'clock
○
180° = 6 o'clock
○
270° = 9 o'clock
4. In the
Window Width
and
Window Length
fields, type the desired values.
Revolution CT User Manual
Direction 5480385-1EN, Revision 1
256 3 Exam Workflow

 Loading...