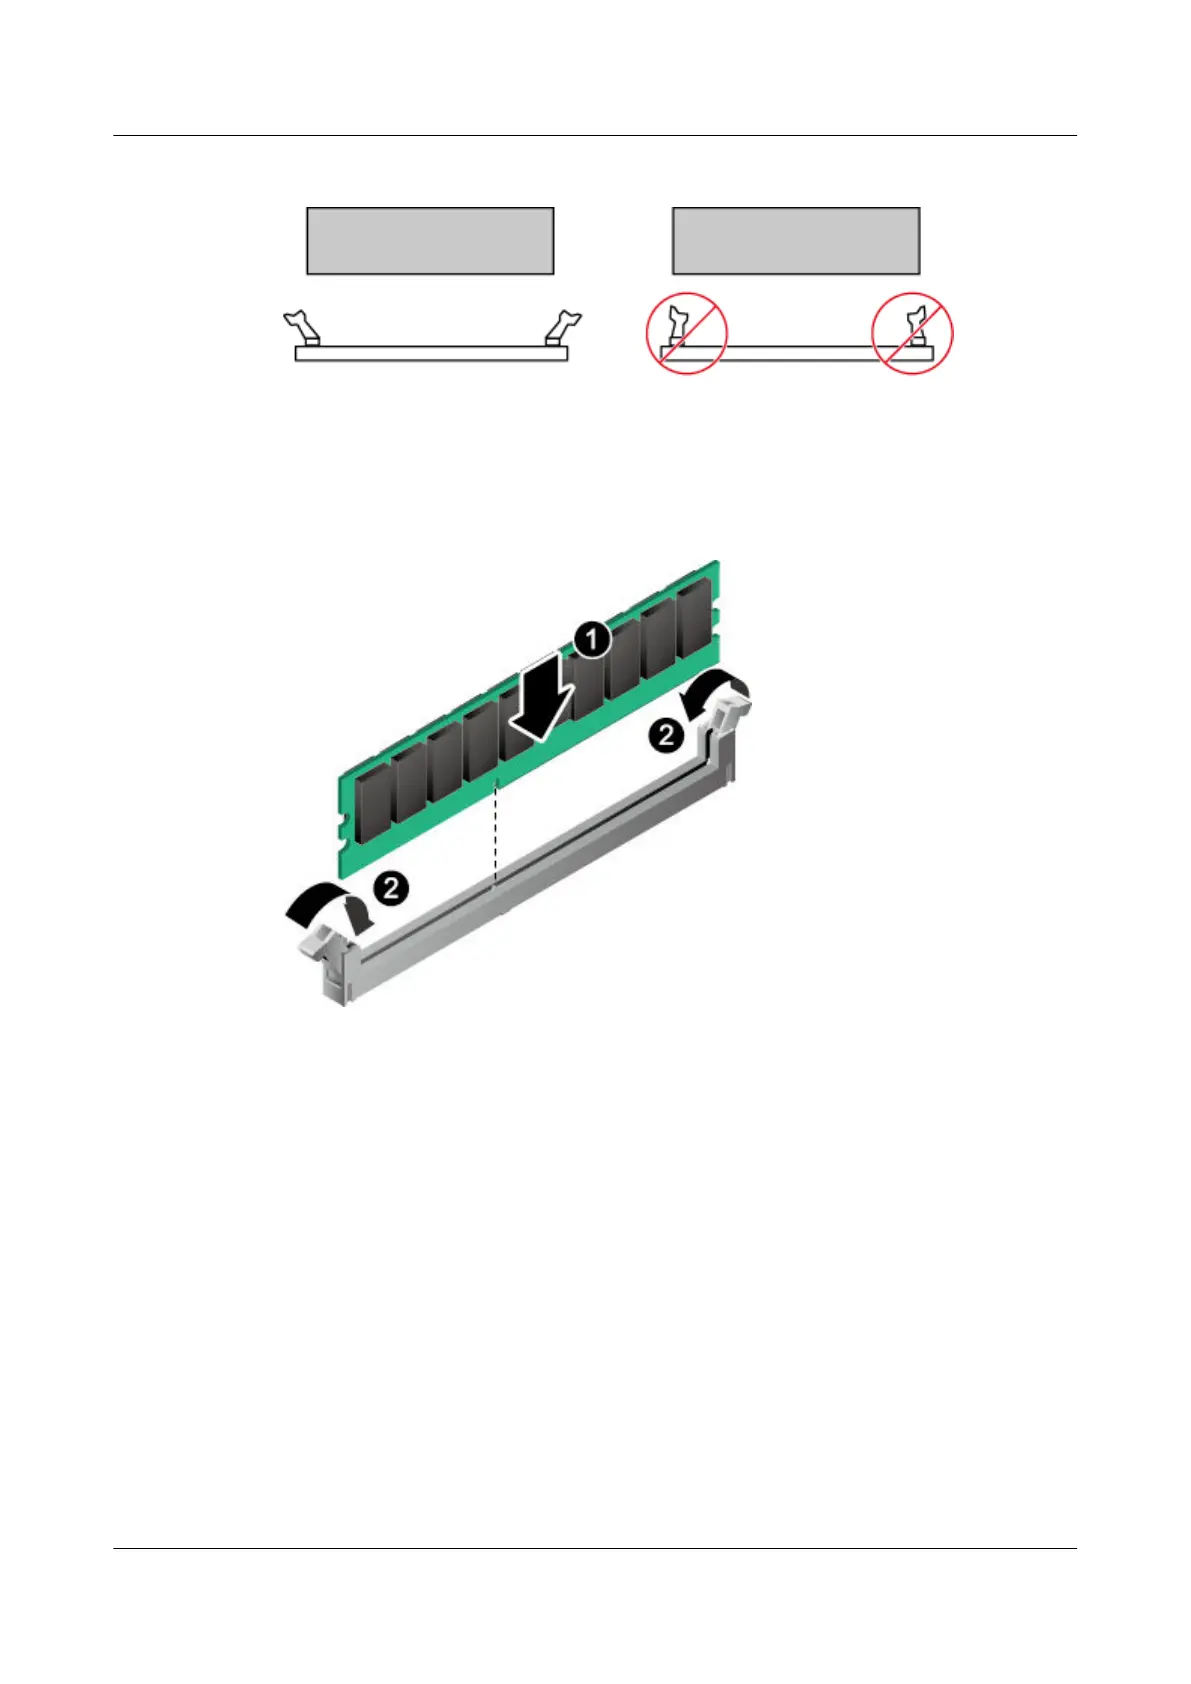
Figure 6-4 Opening the fixing clips on the DIMM slot
Step 7 Align the DIMM with the DIMM slot, and insert the DIMM into the slot by gently pressing it
down until it sits flush with the slot. See Figure 6-5.
The two fixing clips pop up into place automatically.
Figure 6-5 Installing a DIMM
----End
6.2.3.8 Air Duct
Installing an Air Duct
Step 1 Power off the G560. For details, see 3.1 Powering Off the Compute Node.
Step 2 Remove the G560. For details, see 3.3 Removing the G560.
Step 3 Place the G560 on the ESD floor.
Step 4 Remove the cover. For details, see 3.7 Cover.
Step 5 Installing a DIMM. For details, see Installing a DIMM.
Step 6 Vertically place the air duct downwards. See Figure 6-6.
FusionServer G5500 Server
User Guide
6 Optional Part Installation
Issue 02 (2017-12-15) Huawei Proprietary and Confidential
Copyright © Huawei Technologies Co., Ltd.
130
 Loading...