CLUTCH
B1220, B1620, B1820, WSM
2-S4
(EU)
4. CHECKING, DISASSEMBLING AND SERVICING
[1] CHECKING AND ADJUSTING
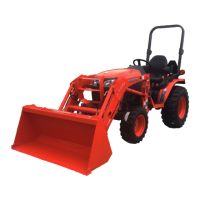
Checking Clutch Pedal Free Travel
• When checking, park the tractor on flat ground, apply the
parking brake, stop the engine and remove the key.
1. Slightly depress the clutch pedal (1) and measure free travel at
top of pedal stroke "L".
2. If adjustment is needed, loosen the lock nut (2) and turn buckle
(3) to adjust the rod length within acceptable limits.
3. Retighten the lock nut (2).
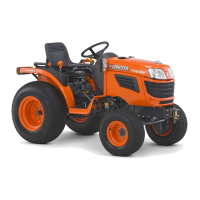
4. After adjusting it, move the clutch pedal (1) by just the stroke "L"
(Free Travel).
While keeping the condition, measure distance "A" between the
step (4) and the clutch pedal (1).
5. If the measurement not within the factory specifications, adjust
it with the clutch pedal stopper bolt (5).
• After adjustment, fix the stopper bolt with the lock nut (6).
9Y1210272CLS0004US0
[2] PREPARATION
(1) Separating Engine from Clutch Housing
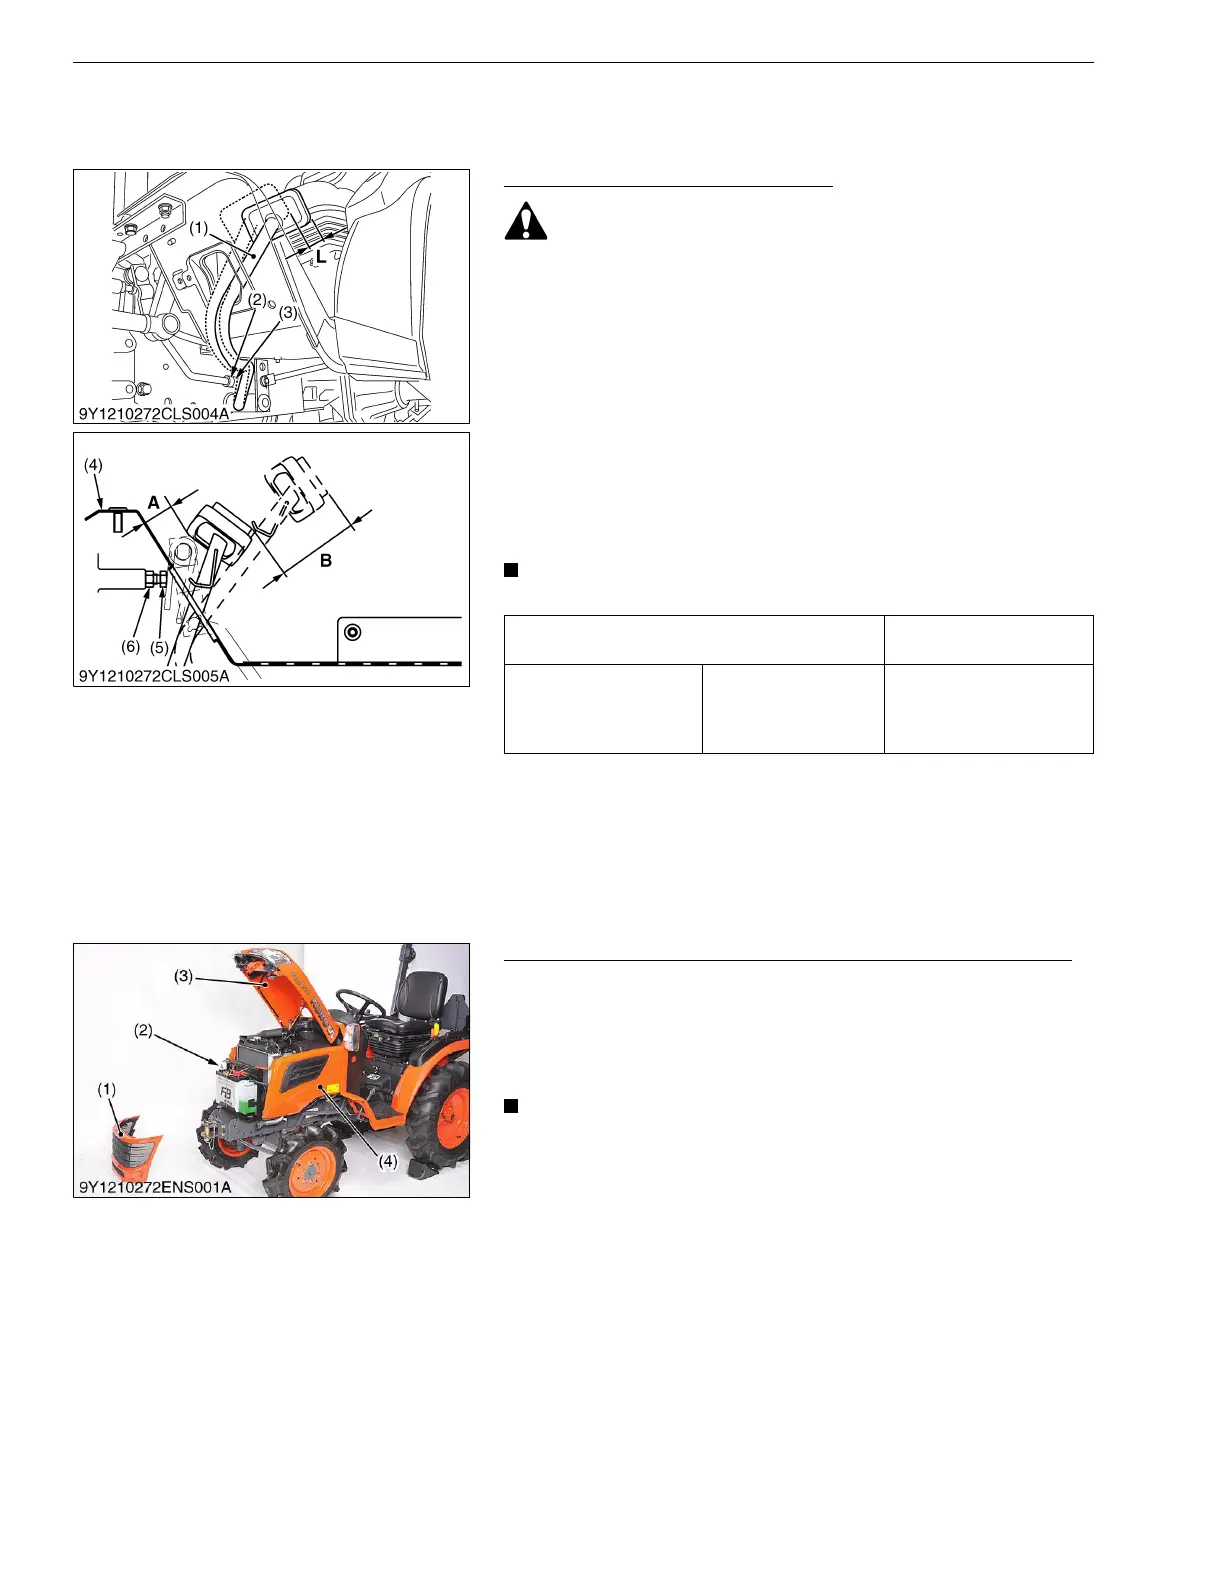
Bonnet, Front Grille, Side Cover and Battery Negative Cable
1. Open the bonnet (3) and remove the front grille (1).
2. Disconnect the negative cable (2).
3. Disconnect the head light connectors, horn connectors and
remove the bonnet (3).
4. Remove the side covers (4).
• When disconnecting the battery cables, disconnect the
negative cable first. When connecting, positive cable first.
9Y1210272ENS0001US0
Clutch pedal free travel "L" on top of clutch pedal
(Reference)
15 to 25 mm
0.59 to 0.98 in.
Distance "A"
Distance "A" on clutch
pedal stroke "B" above
80 mm (3.1 in.)
Factory specification
10 to 15 mm
0.40 to 0.59 in.
(1) Clutch Pedal
(2) Lock Nut
(3) Turn Buckle
(4) Step
(5) Stopper Bolt
(6) Lock Nut
(1) Front Grille
(2) Battery Negative Cable
(3) Bonnet
(4) Side Cover
 Loading...