5B-44 - MID-SECTION 90-826148R2 MARCH 1997
Shock Rod Installation
1. Place trim cylinder in soft jawed vice.
2. Install lubricated o-ring to memory piston and
place into cylinder. Push memory piston all the
way to bottom.
b
a
a - Memory Piston
b - O-ring
3. Fill cylinder three inches (76.2mm) from top of
cylinder using Dexron III, (ATF) automatic trans-
mission fluid. If not available, use Quicksilver
Power Trim and Steering Fluid.
4. Install shock rod into cylinder until power trim fluid
flows through oil blow off ball passage. Fill re-
maining cylinder to just below the cylinder
threads.
a
a - Oil Blow Off Ball Passage
CAUTION
End cap must not make contact with shock rod
piston when tightening. Shock rod piston must
be positioned in cylinder deep enough to avoid
contact.
5. Tighten end cap securely using spanner wrench
[3/16 in. x 5/16 in. (4.8mm x 8mm) long pegs].. If
a torquing type spanner tool is used to tighten end
cap, then torque to 45 lb. ft. (61.0 N·m).
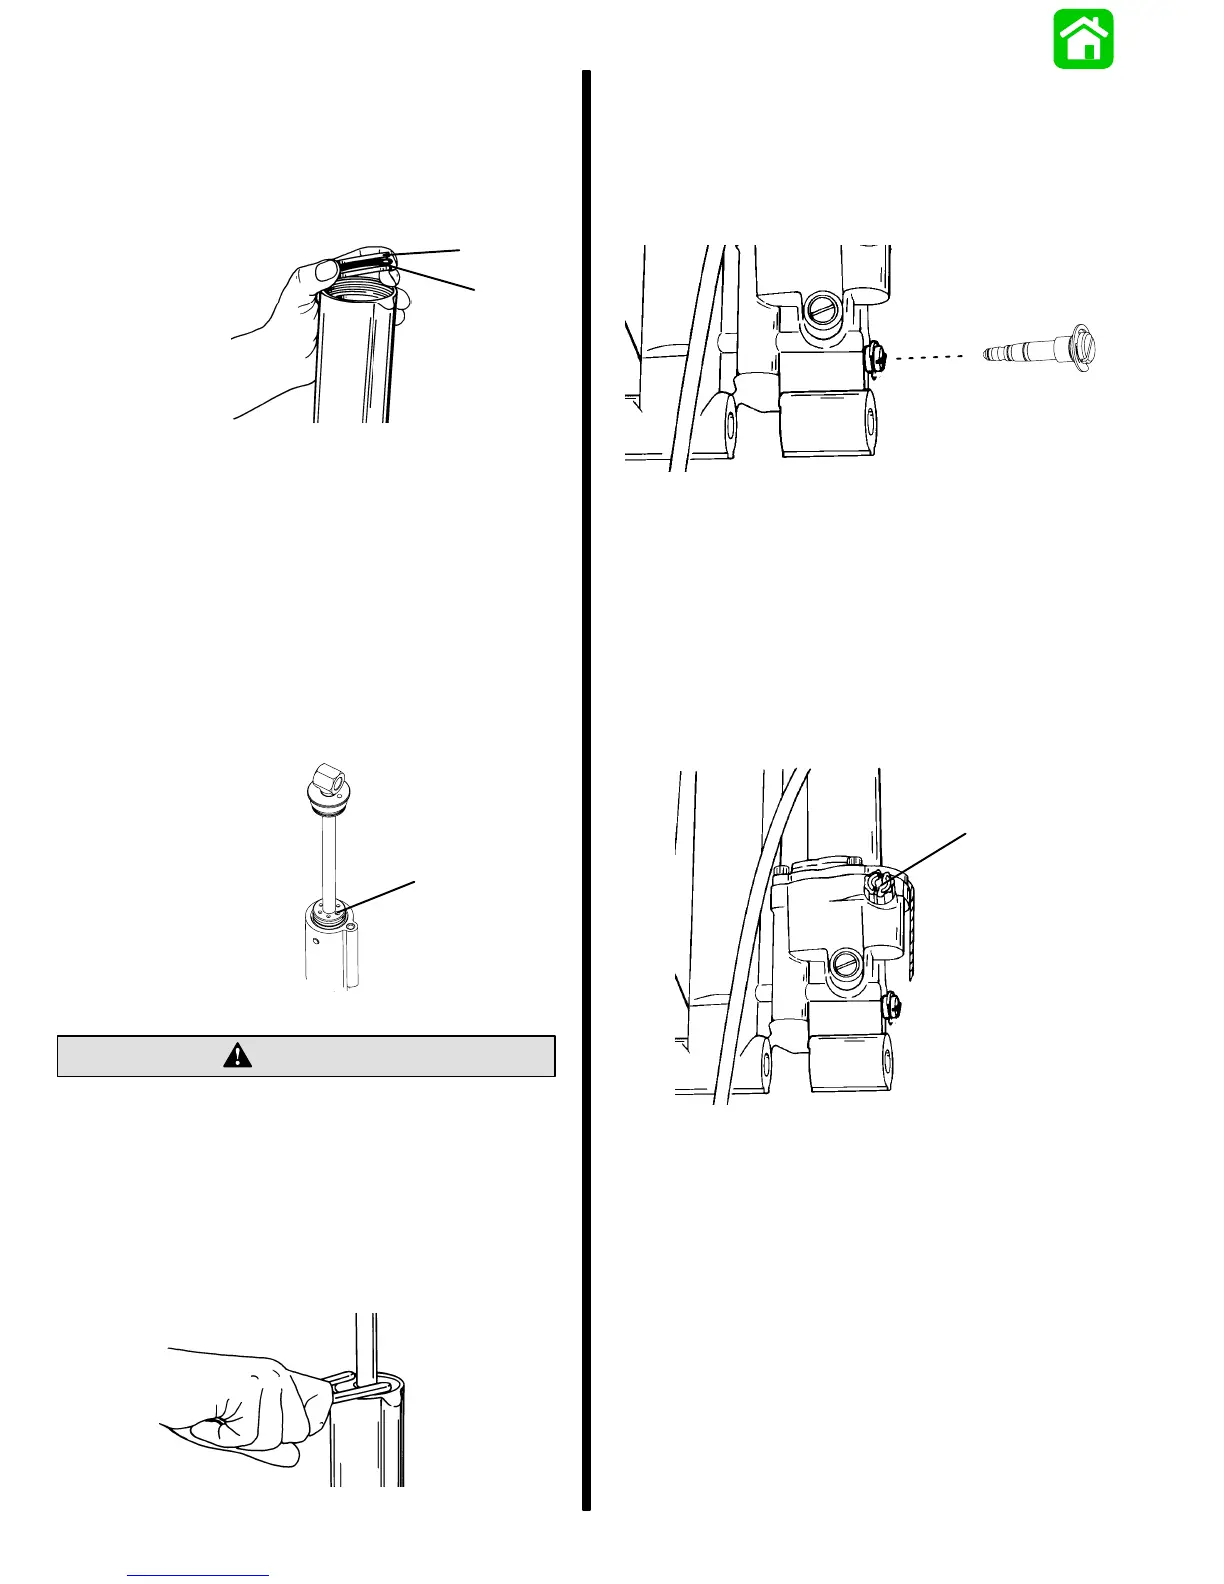
Manual Release Valve Installation
1. Install “E” clip (if removed) and lubricate O-Rings
with power trim fluid.
2. Insert manual release valve into manifold and
tighten securely.
Bleeding Power Trim Unit
1. Secure power trim unit in soft jawed vise.
2. Remove reservoir plug. Add power trim fluid until
its even with the bottom of the fill hole. Reinstall
plug.
3. Close the manual release valve. (Turn full clock-
wise).
a
a - Reservoir Plug
4. Connect the positive lead to (blue) trim motor
wire and negative lead to (green) trim motor wire
and drive shock rod to the up position.
5. Using a 12 volt power supply, connect the posi-
tive lead to the (green) trim motor wire, and the
negative lead to the (blue) trim motor wire and
drive the shock rod to the down position.
6. Recheck fluid level with rod fully extended, add
fluid if required and repeat cycle until fluid level
stays even with the bottom of the fill hole.
 Loading...