Comments (Annotations)
14-7
14.7.2 User-defined Comments
You can customize user-defined comments for an exam mode according to your preferences.
The customized comments will display in the corresponding exam mode. The operational
steps are as follows:
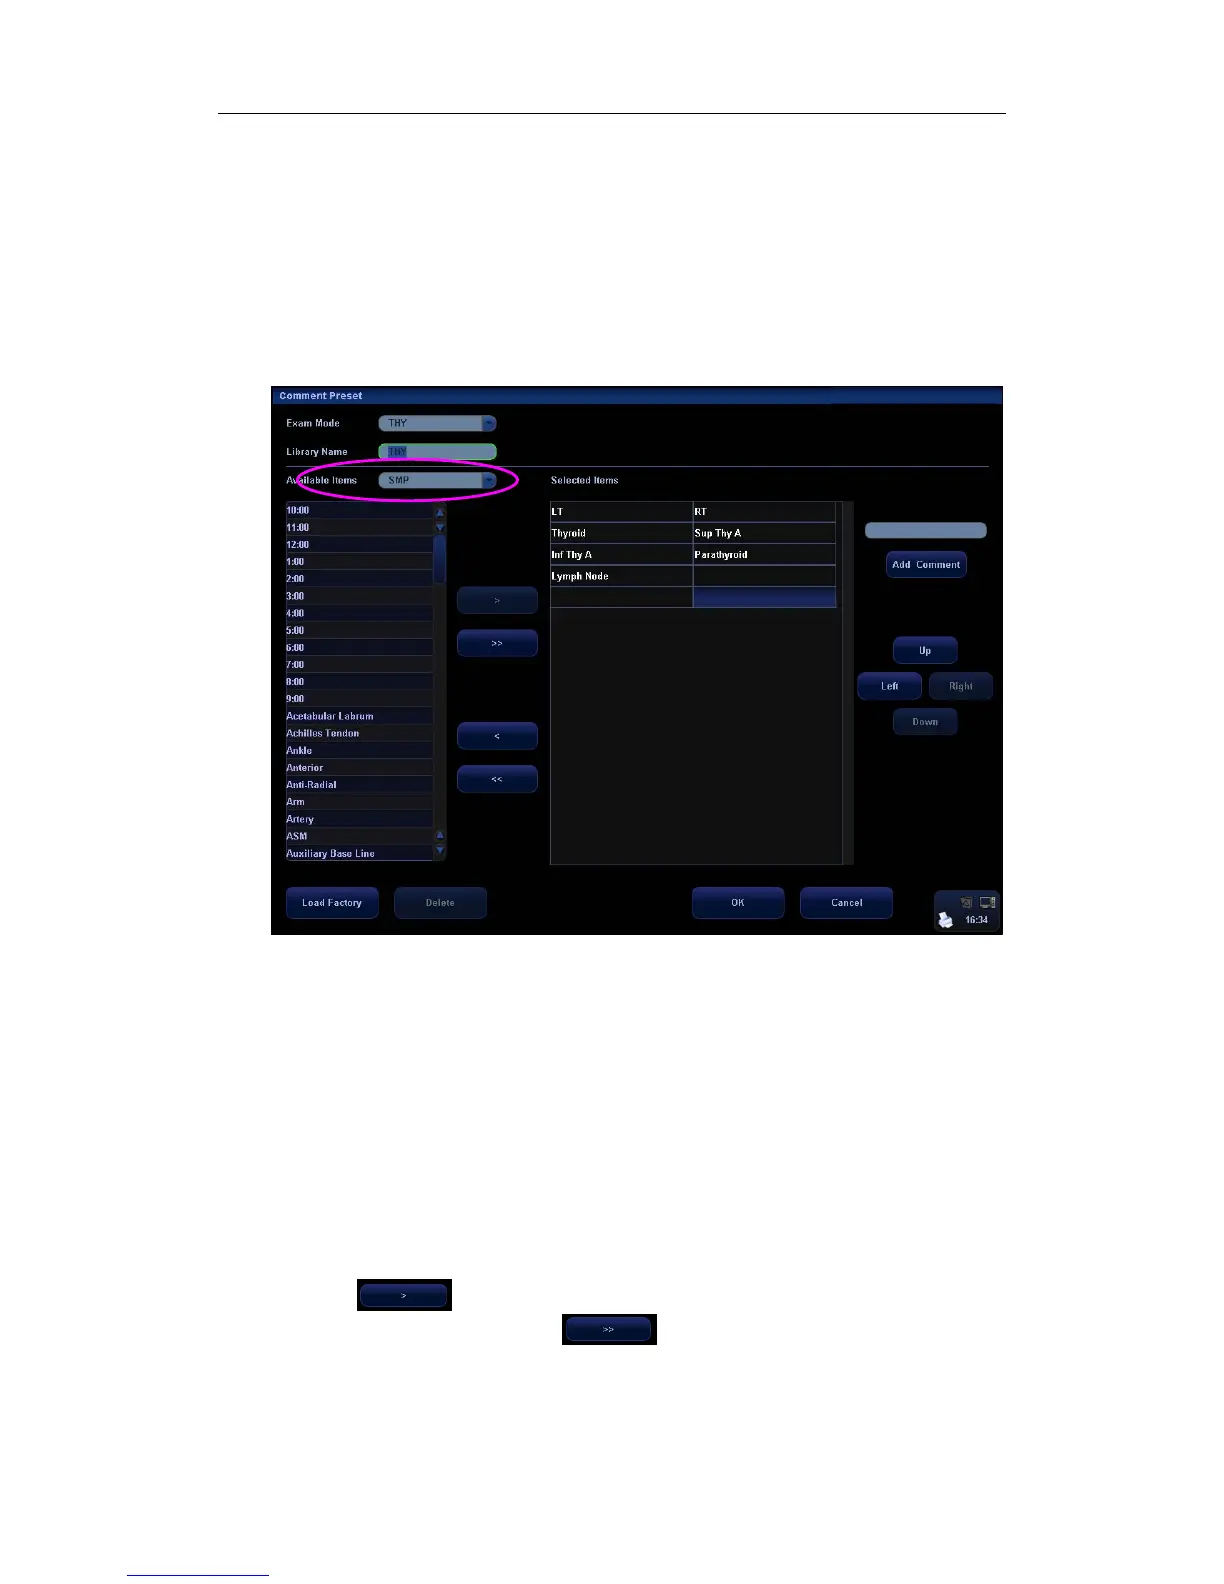
1 To open the [Comment Preset] screen, select Comment Preset in the Setup menu.
The following example is comment preset in A-Abdomen mode. See the figure below.
2 Select the desired exam mode.
3 Enter Library Name: you can enter characters for the library name, or accept the default
name (the same as that for the exam mode).
4 Add user-defined comments: directly enter comment texts, or select comment texts for
the comment library.
z Directly enter comment texts: Enter the user-defined comment in the box above
[Add Comment], and then click [Add Comment], the added comment will be updated
to both “Available Items” as well as “Selected Items”. In addition, you can double
click a selected item and edit the selected item.
Note: the directly-entered or edited comments will be added to the library
z Select Available Items: First select a comment library in the drop-down list beside
“Available Items”, and then click [Set] on one item displayed below “Available Items”.
Click
to add one item to the box on the right side. To add all items on the
left side to the right side, click
.
5 Change the selected items on the right side: select an item on the right side box and click
[Up], [Down], [Left] or [Right] button to move the position of the item.
 Loading...