Uninstalling the Printer Drivers
- 7 -
● Uninstalling the Printer Drivers
Uninstalling Printer Drivers
For Windows
• To perform uninstallation, you must log onto Windows with
the “Administrator” account. However, even if you have
logged on with a user account other than “Administrator”,
entering an administrator password upon display of the
[User Account Control] dialog box enables you to perform
the uninstallation by temporarily changing the user account.
• Even when you have logged on Windows with the
“Administrator” account, the [User Account Control] dialog
box may appear. In this case, click a button for allowing the
operation, such as [Continue], and then continue.
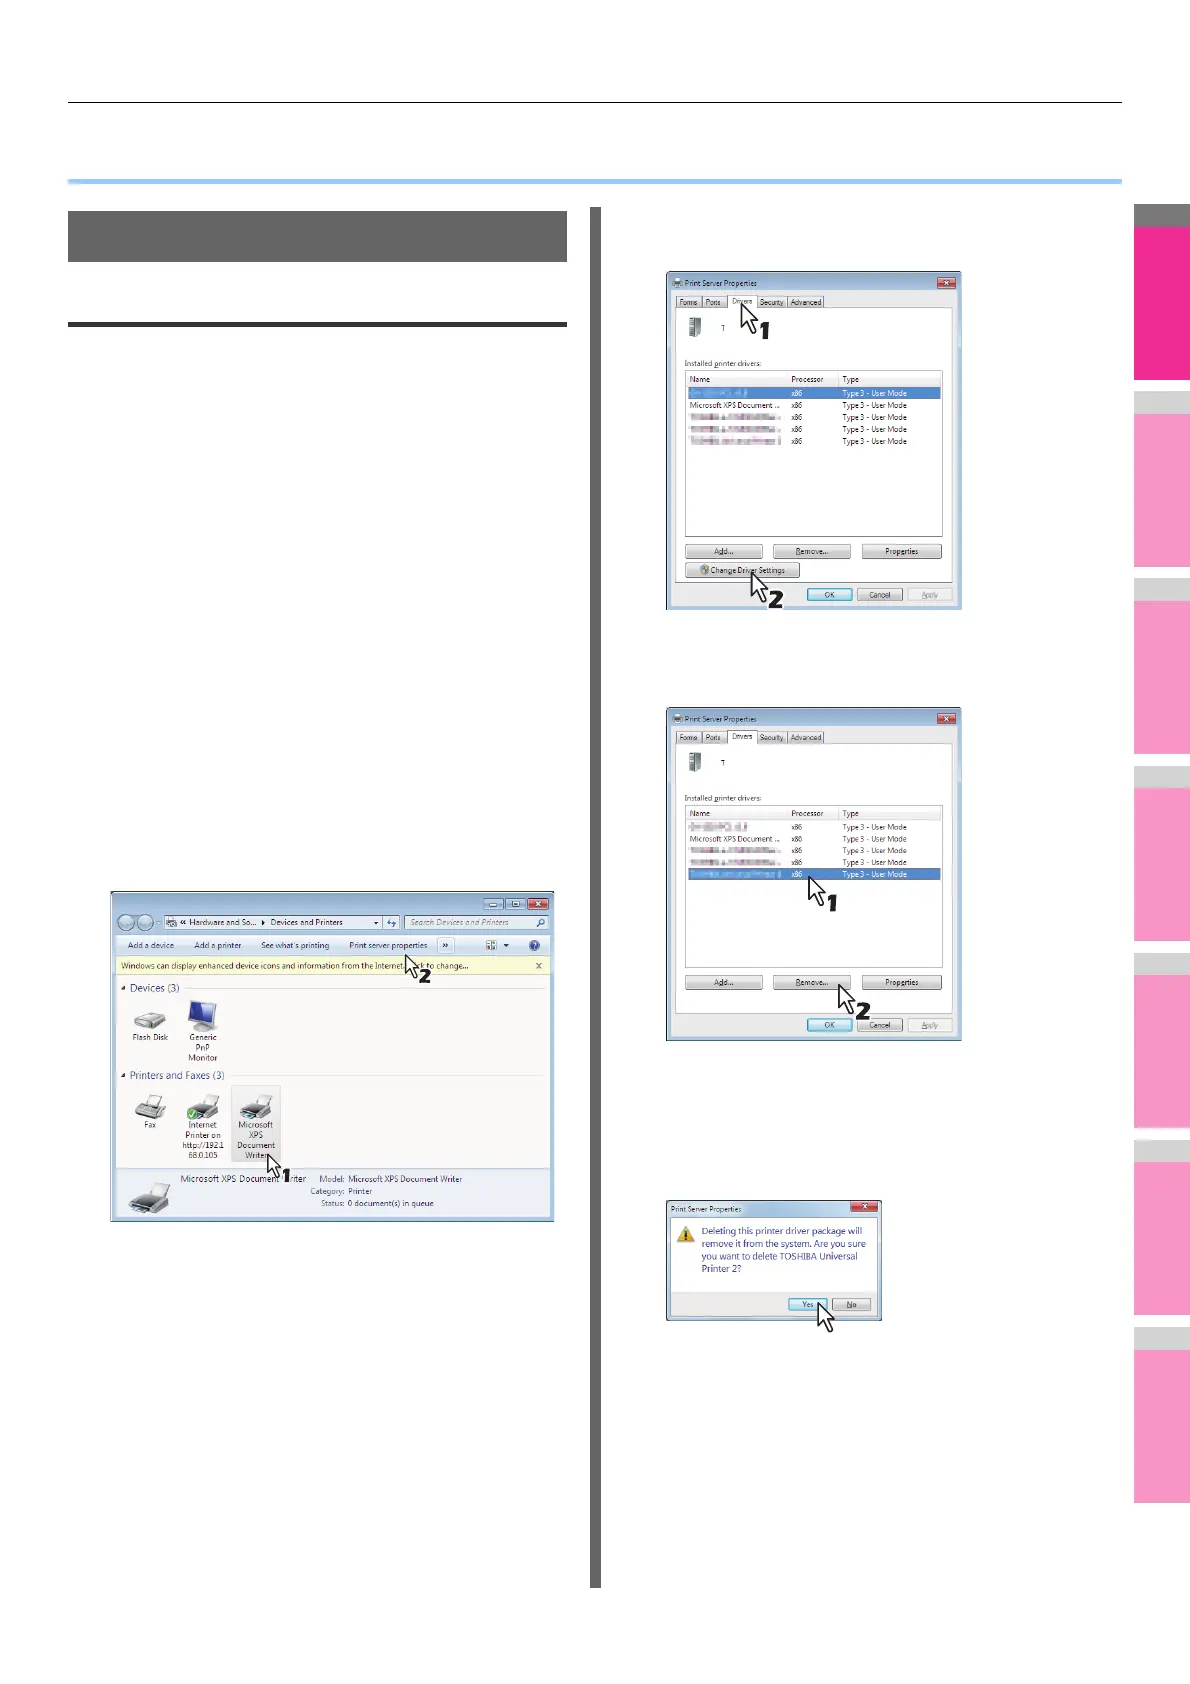
1
Click [Start] and click [Devices and
Printers] to open the [Devices and Printers]
folder.
2
Right click on the machine to be deleted
and select [Remove device] from the menu
displayed.
When the confirmation dialog box for deletion is
displayed, click [Yes].
3
Select one of the remaining printer icons
and click [Print server properties].
The [Print Server Properties] dialog box appears.
4
Display the [Drivers] tab and click [Change
Driver Settings].
5
Select the printer driver to be deleted and
click [Remove].
The [Remove Driver And Package] dialog box appears.
6
Select [Remove driver and driver package]
and click [OK].
The [Remove Driver And Package] dialog box appears.
 Loading...