FE0254601-00 A 5-1
5 Installation in a VMware
Environment
Overview
This section describes how to install a QLogic 8100 Series Adapter in VMware
®
ESX/ESXi environments
including, hardware installation, driver installation, and
software installation.
Installing Hardware
To install the adapter:
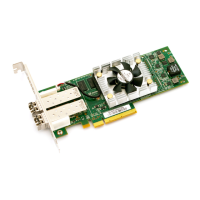
1. Record the adapter model number, which can be found on the bar code
label on the adapter.
2. Determine whether the server requires a full-height or a half-height adapter
bracket. The QLogic 8100 Series Adapter ships with a full-height bracket
installed and a spare half-height (low profile) bracket.
To install the half-height bracket:
a. Using the bail handle of the SFP+ transceivers, pull out the SFP+
modules.
b. Remove the two screws that hold the full-height bracket using a
Phillips #1 screw driver.
CAUTION!
To minimize the risk of ESD damage, use a workstation anti-static mat
and an ESD wrist strap.
Leave the adapter in its anti-static bag until you are ready to install it in
the server.
Hold the adapter by the edge of the PCB or mounting bracket, not the
connectors.
Place the adapter on a properly grounded antistatic work surface pad
when it is out of its protective anti-static bag.
 Loading...